This article will detail how to create, configure, and publish courses on your website. It covers setting up multiple course locations and restricting access with private, client-specific booking options.
A course is scheduled into the calendar on a day/time determined by you as the admin, and clients are then able to book into these.
If you want to set up a class that is run online, please refer to the Setting up an online class/webinar article (noting this is different to setting up a self-paced Online Course which is covered in Learning Management System (LMS)).
Adding a course
Steps
Navigate to Setup > Bookings > Services
Click Add New Service
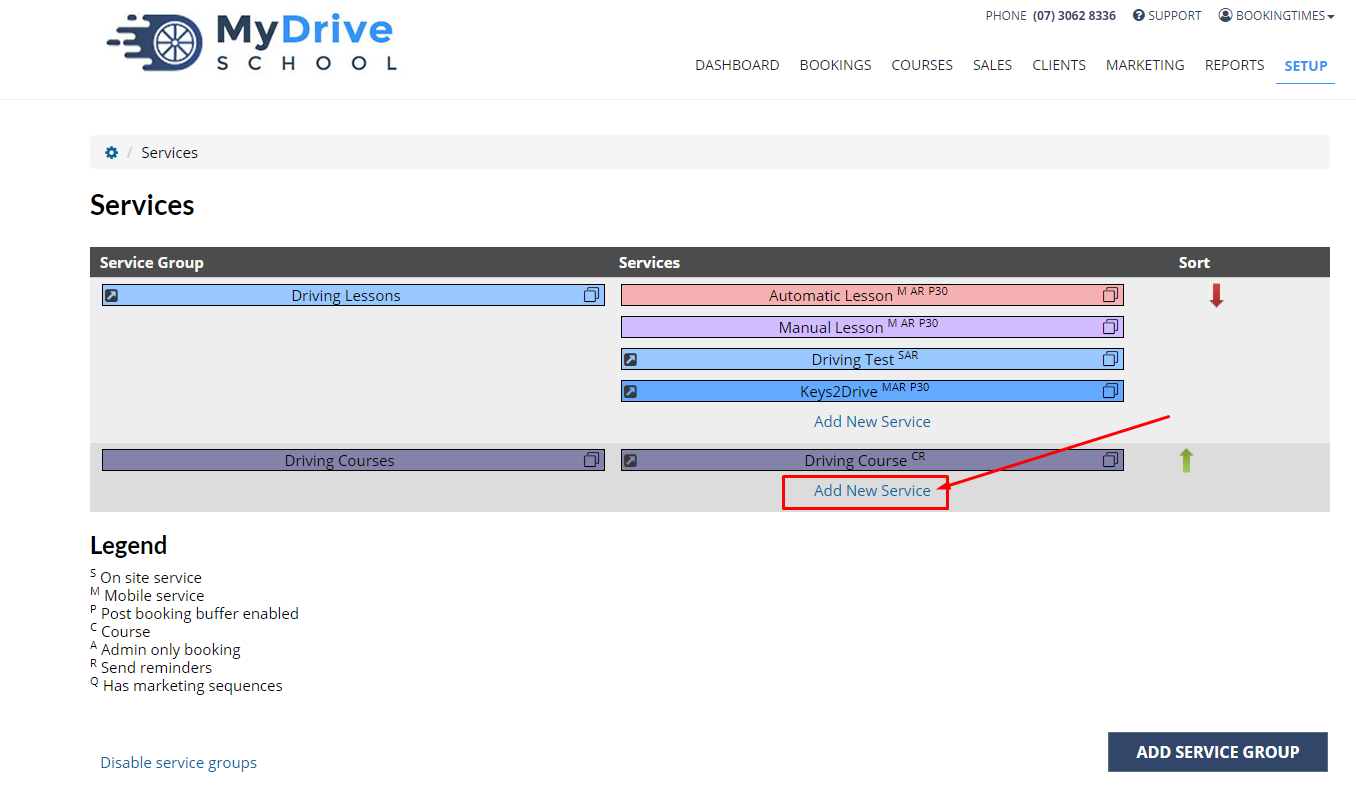
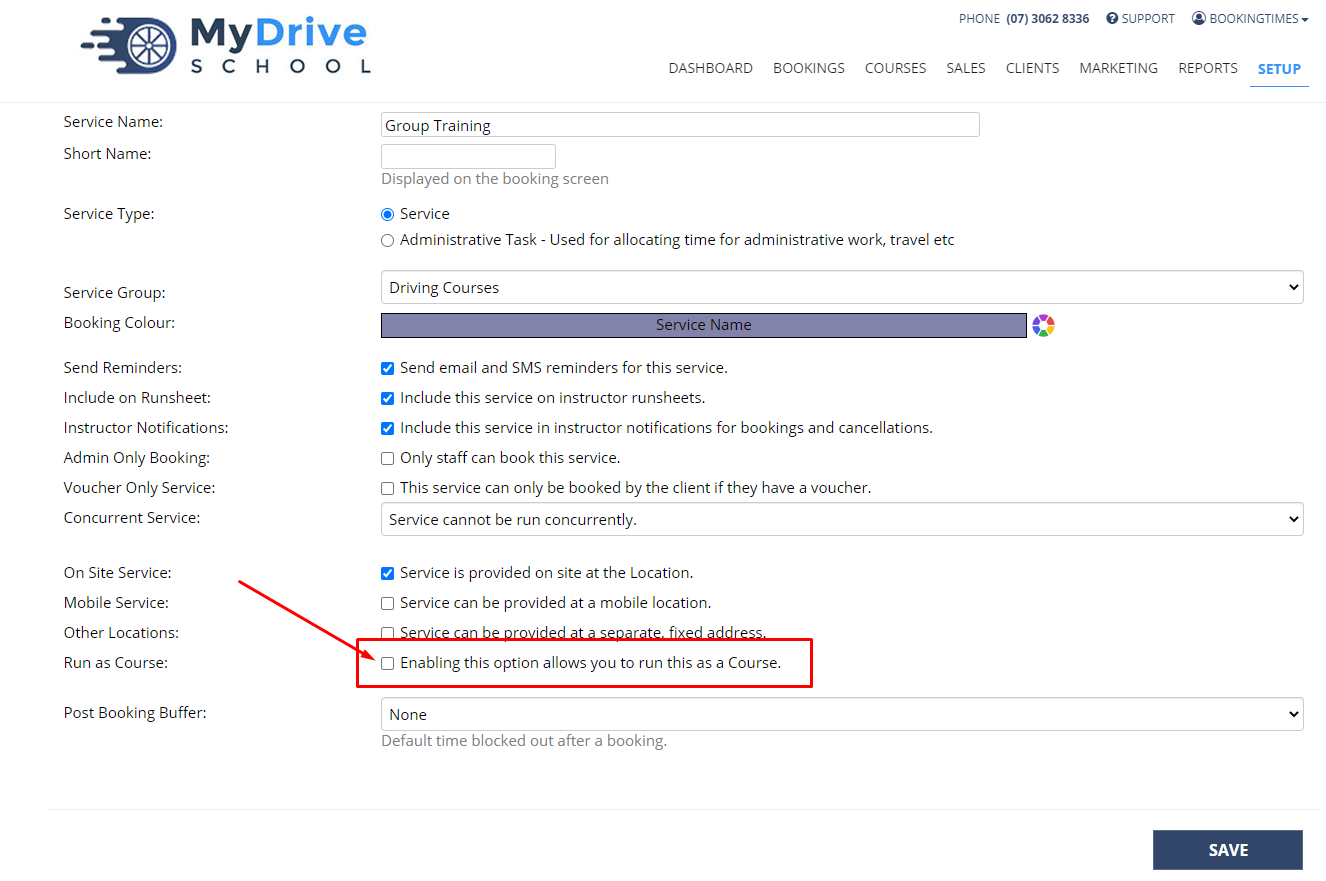
Enter service name
Under Run as Course, check " Enabling this option allows you to run this as a course"
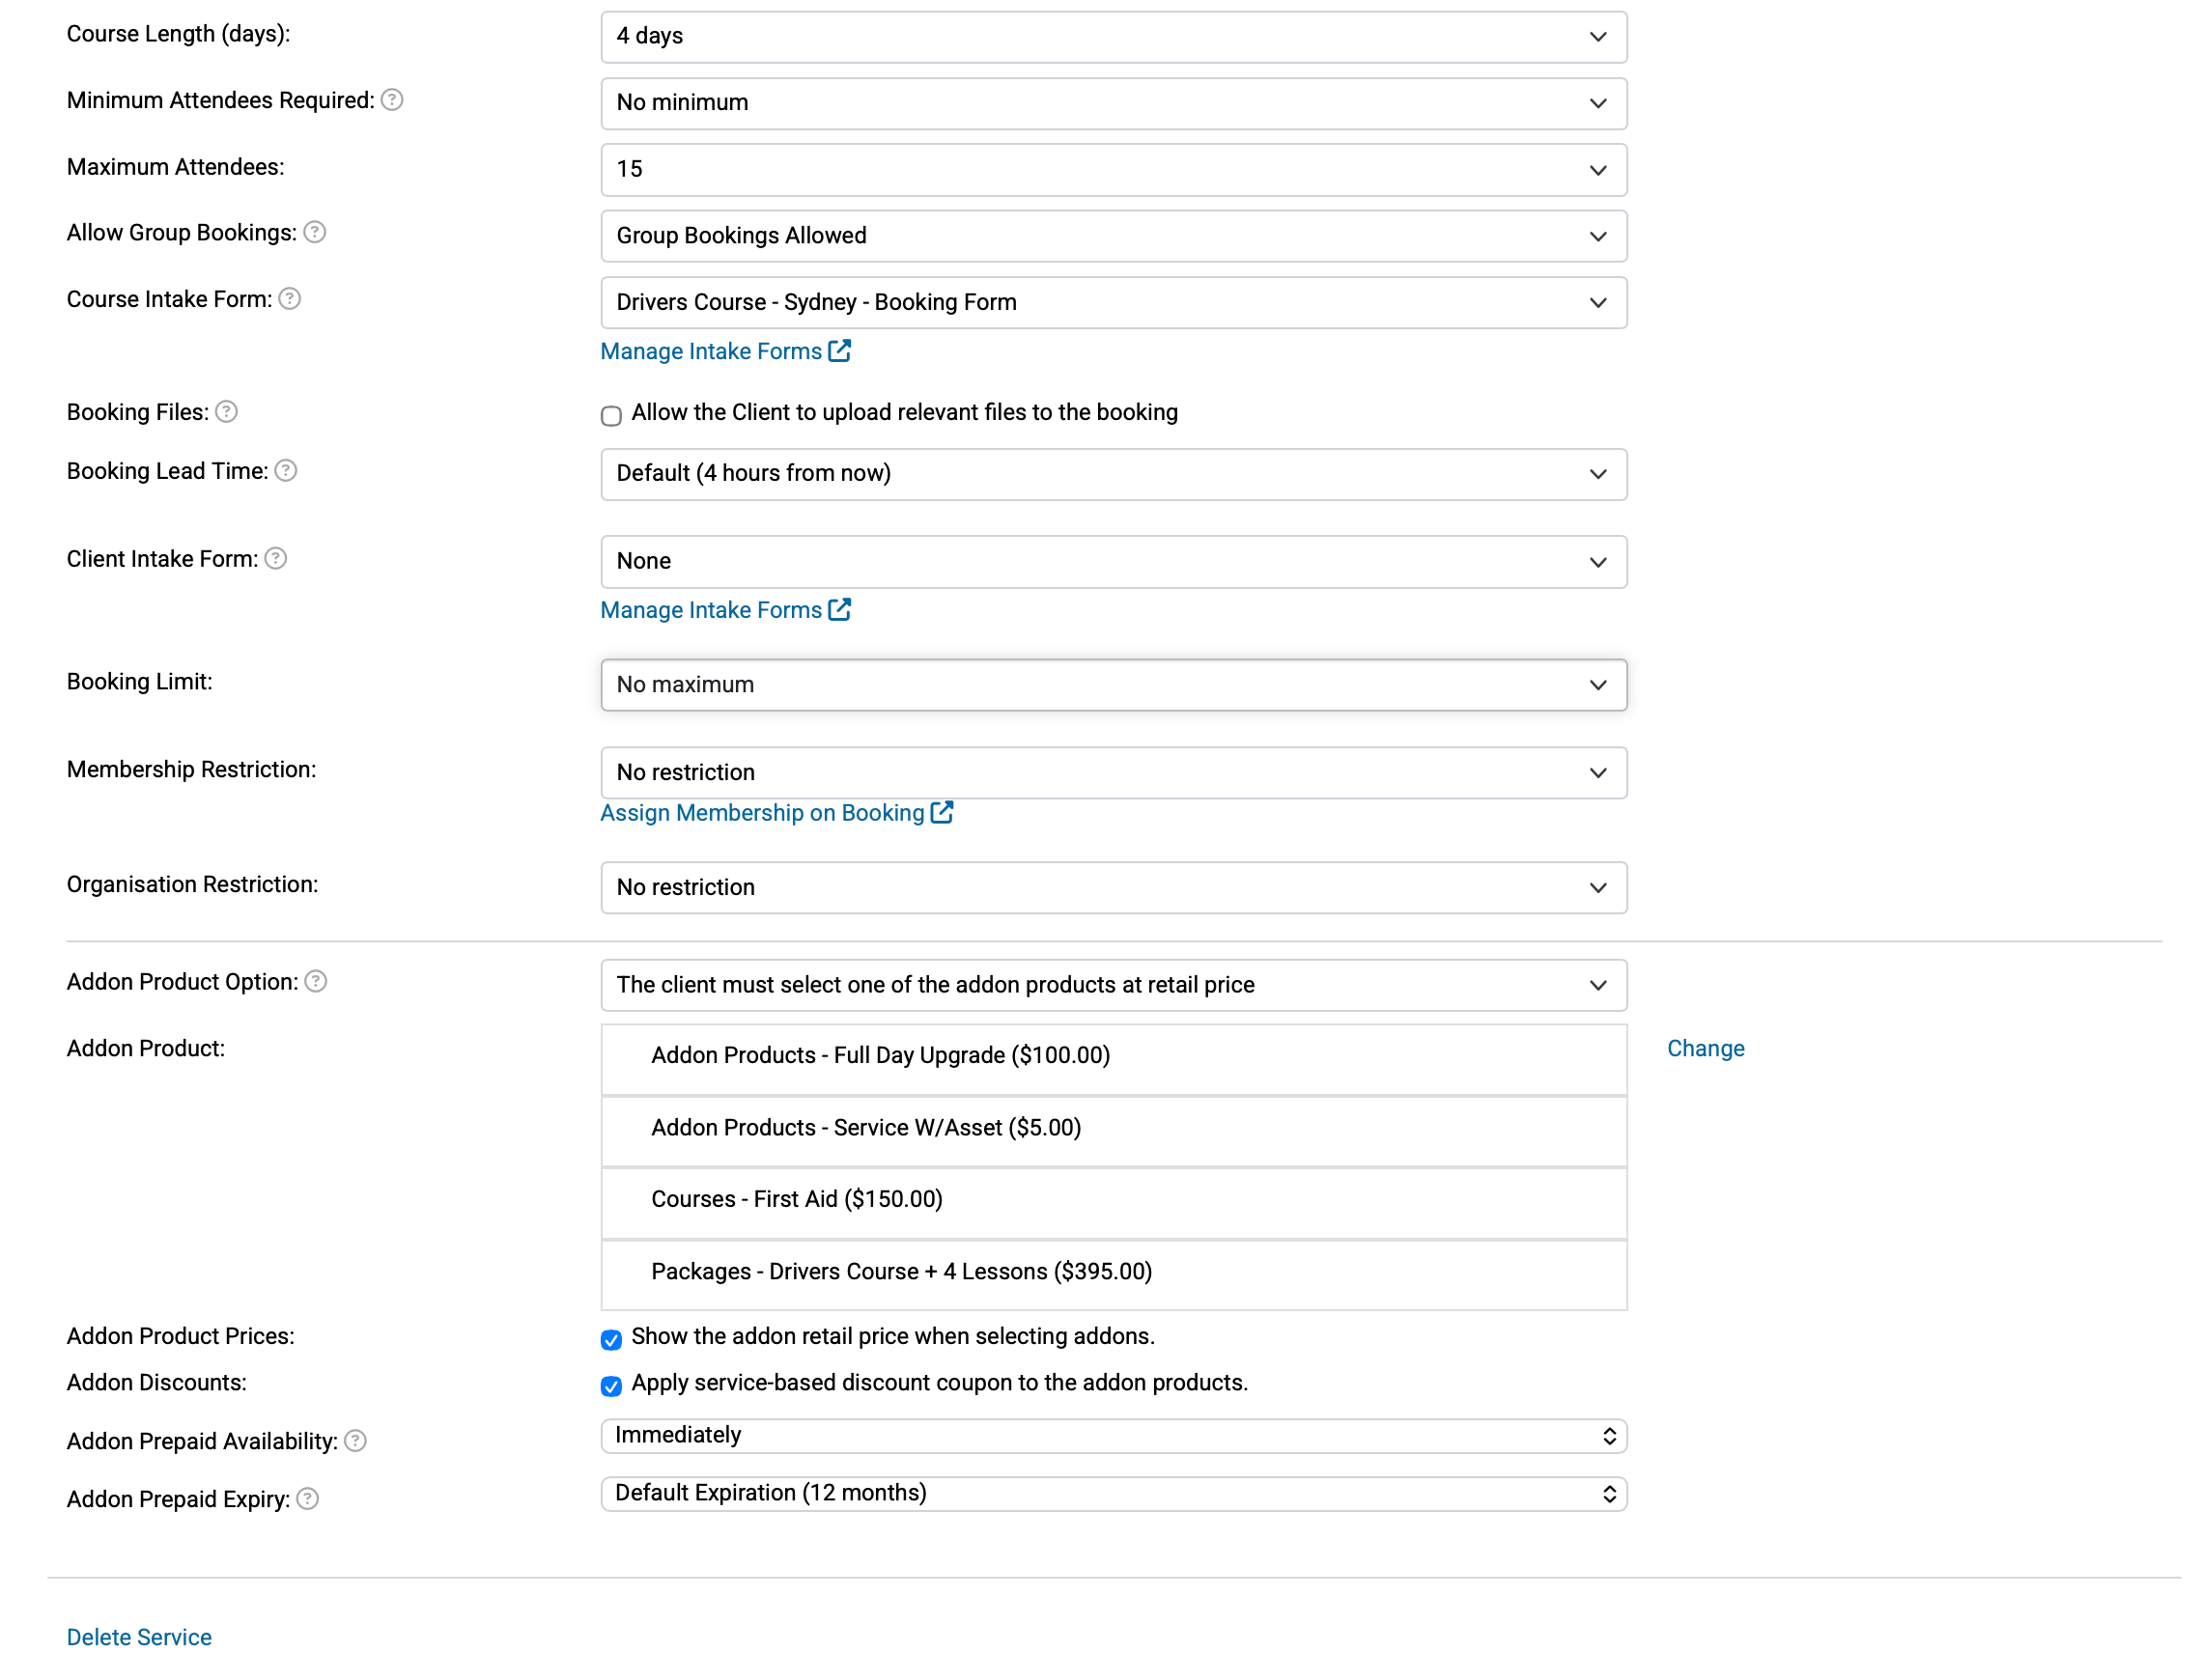
A range of configuration options will appear on this tab including:
Course Length (days) if the course spans multiple days (note multi-day courses are only available on Nail & Scale plan)
Minimum and Maximum Attendees limit
Allow Group Bookings or restrict the course to Individual Bookings Only
Course Intake Form which must be filled out at the very start of the bookings process (for more details see the Course signup forms article. If a course signup form already exists, then you can select it here)
Client Intake Form which are optional one-time forms that can be filled out at the end of the booking process, emailed, or in-person using a tablet device (for more details see the Creating an intake form article)
Booking Limit which adds a restriction to how many times a client can book this course.
Membership restriction adds a restriction to only allow client that are part of a certain membership group to book this course.
Organisation Restriction adds a restriction to only allow organisation to book into this course
Addon Product Options allow you to determine if any product addons are added or offered to the client at the time of purchasing the course. There are a number of options available on those including if discounts should be added, when the prepaid vouchers are available and if they have an expiry. For the setup of addon products please refer to the Addon products for client to select article.
On the Pricing tab set course price options, including the length and pricing for single or multi-day courses.
Select options to match your needs including: if price includes GST, if the online processing fee (if set up) should be applied, capturing an upfront deposit, auto charge balance (the client’s credit card must be on file).
Single day courses
Enter the price under the relevant length. You can enter multiple prices at different lengths if the course has variable lengths.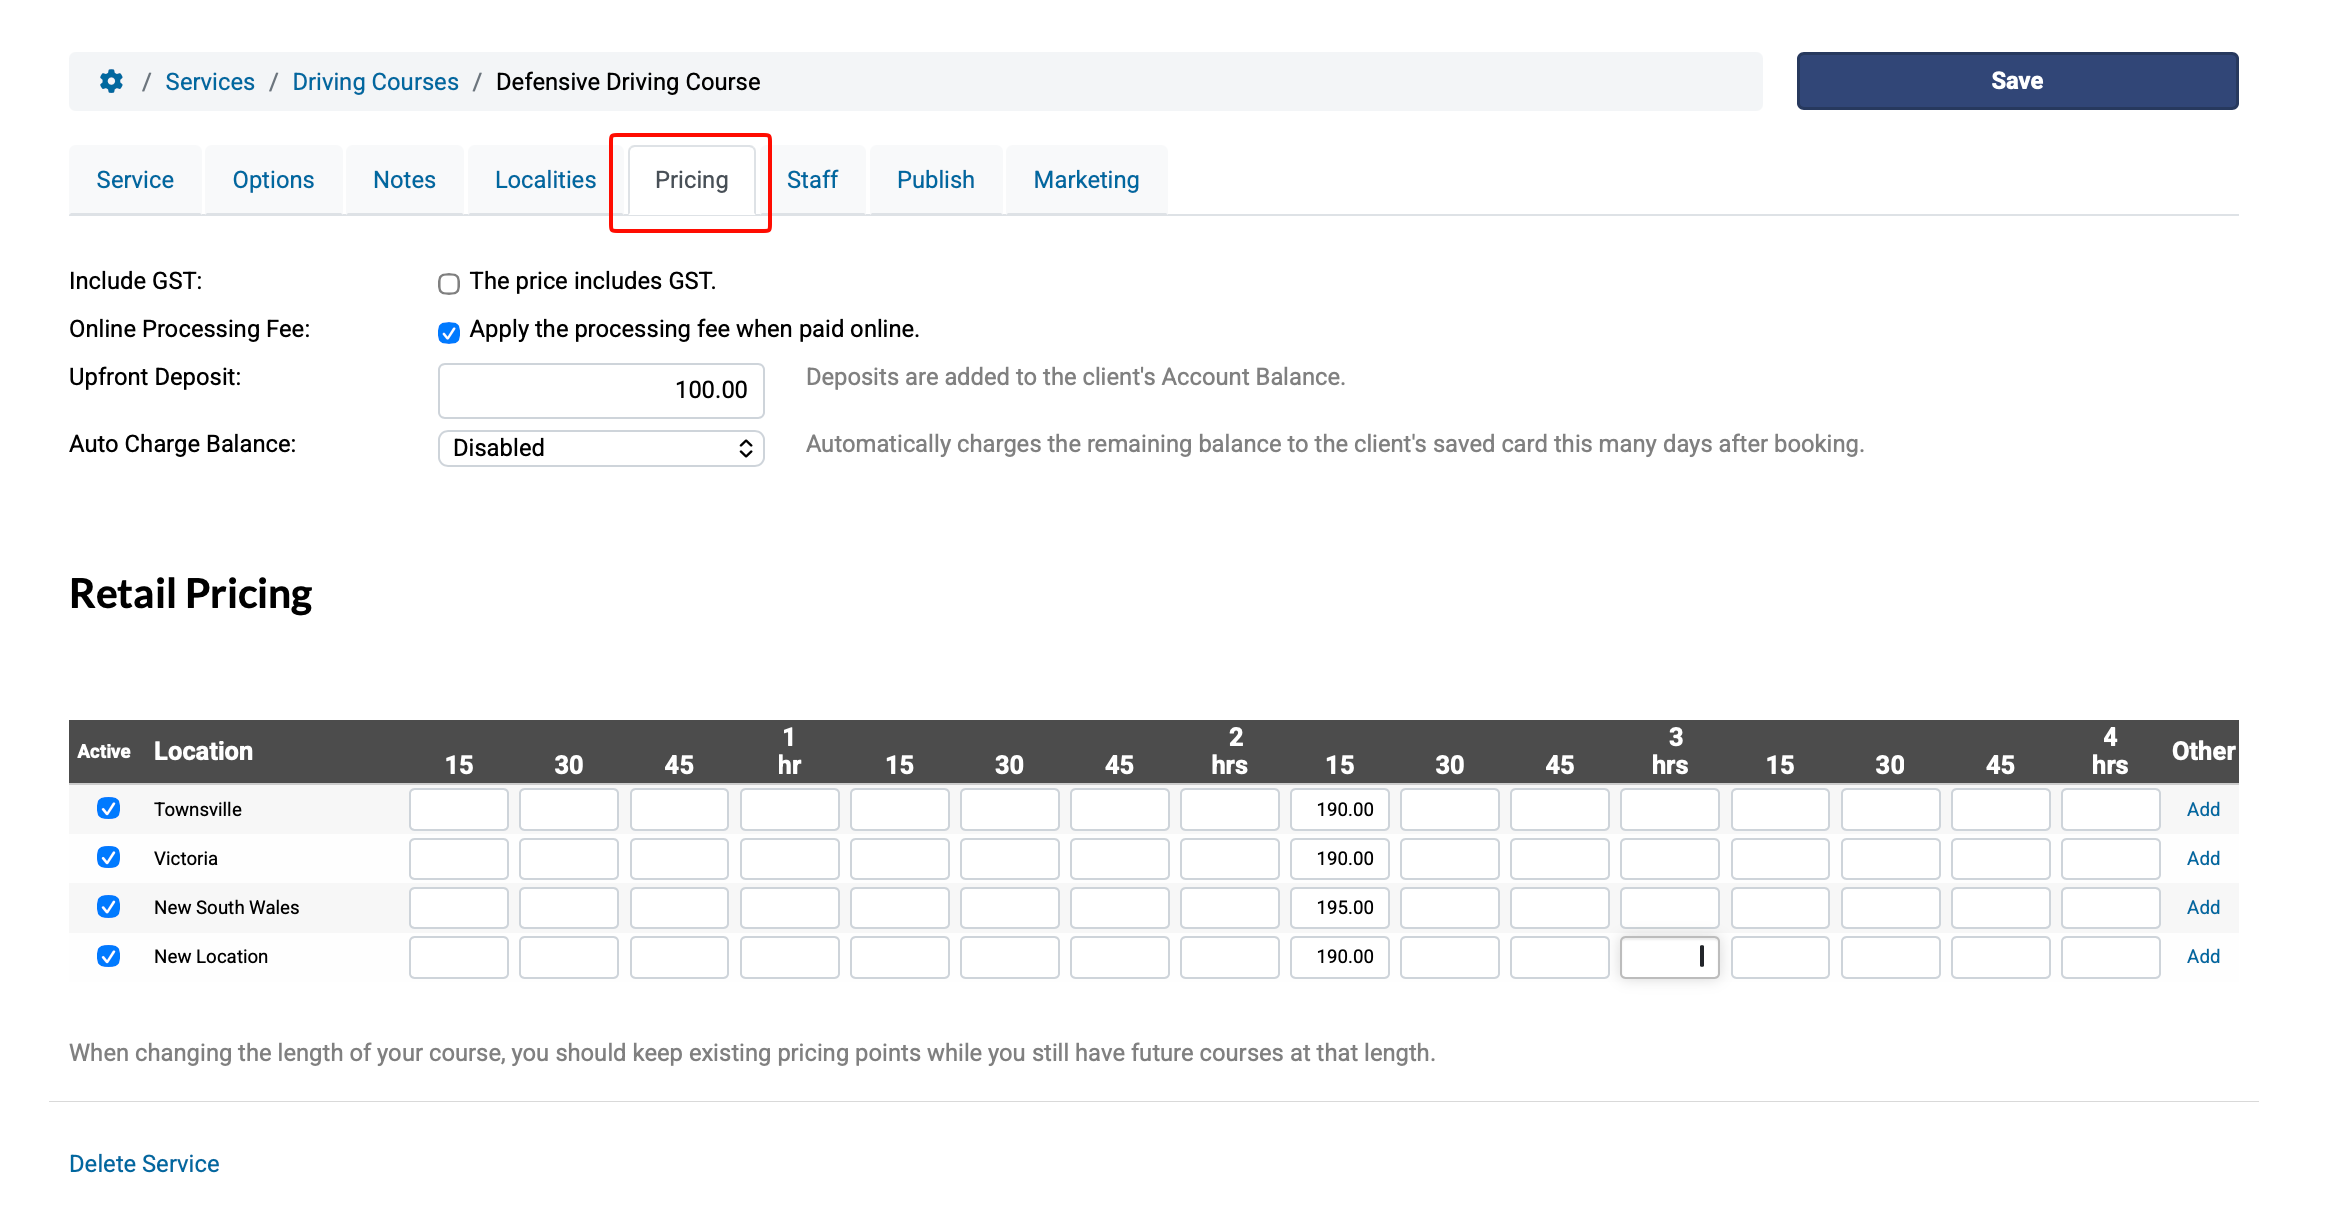
If a longer length is needed, select the Add (or Manage if a previous price has been added in already) link in the Other column and set the price and length accordingly in the popup.
b. Multi-day courses
Enter the TOTAL price of the course, under the length for each SESSION. The system will only charge this amount once, and allow you to schedule multiple sessions of the specified length.
Reminders for multi-day courses
You can turn off the reminders for subsequent days by going to the Options tab and uncheck the option Send reminders for subsequent days of this service.

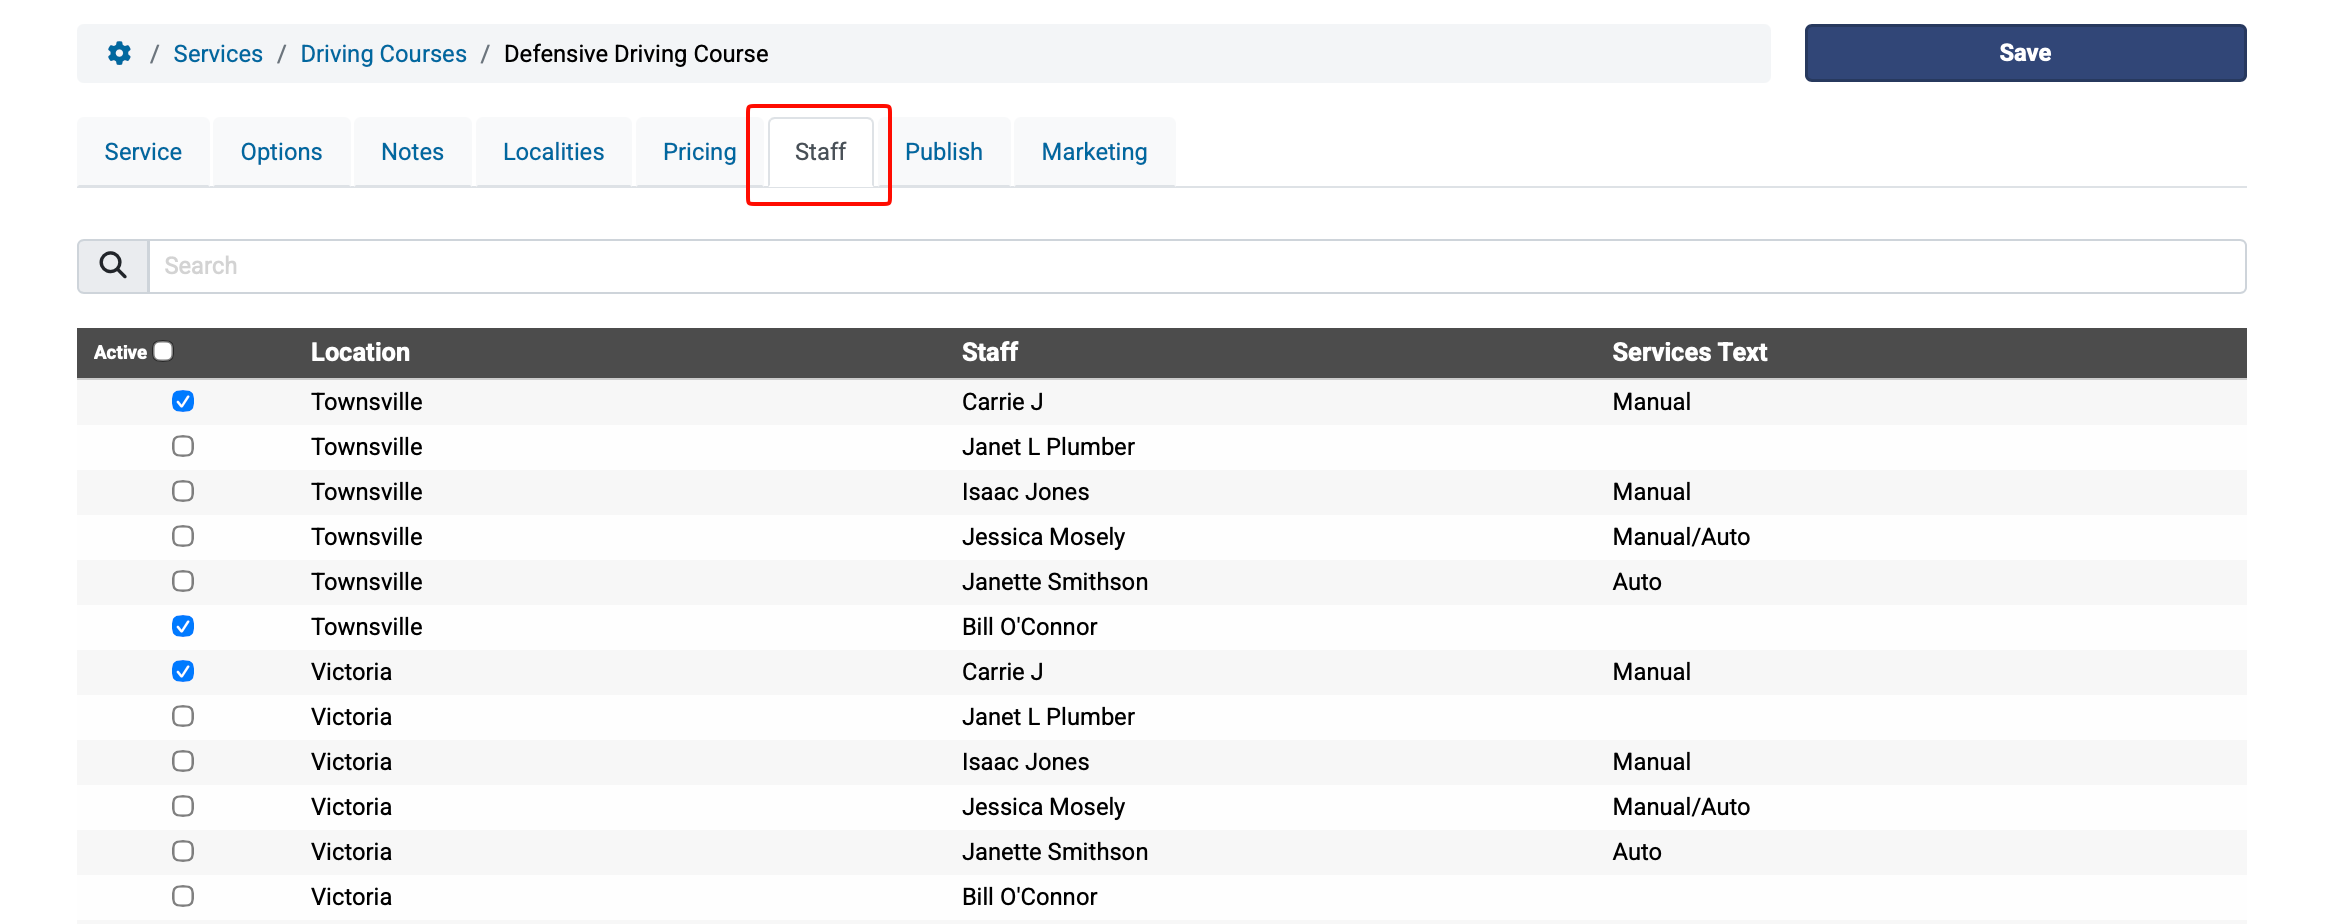
On the Staff tab assign staff to the course so it is able to be scheduled in the calendar. Refer to Scheduling a course article for more details.
Click Save
Course completion certificates
If you'd like to set up certificates for attendees after successful course completion please see the Course completion certificates article.
Adding different locality addresses for a course
If there are several locations that you run your course from, then you can set these up as Localities under each course. e.g. meeting at a particular Department of Transport, or 3rd party training facility for First Aid training.
Steps
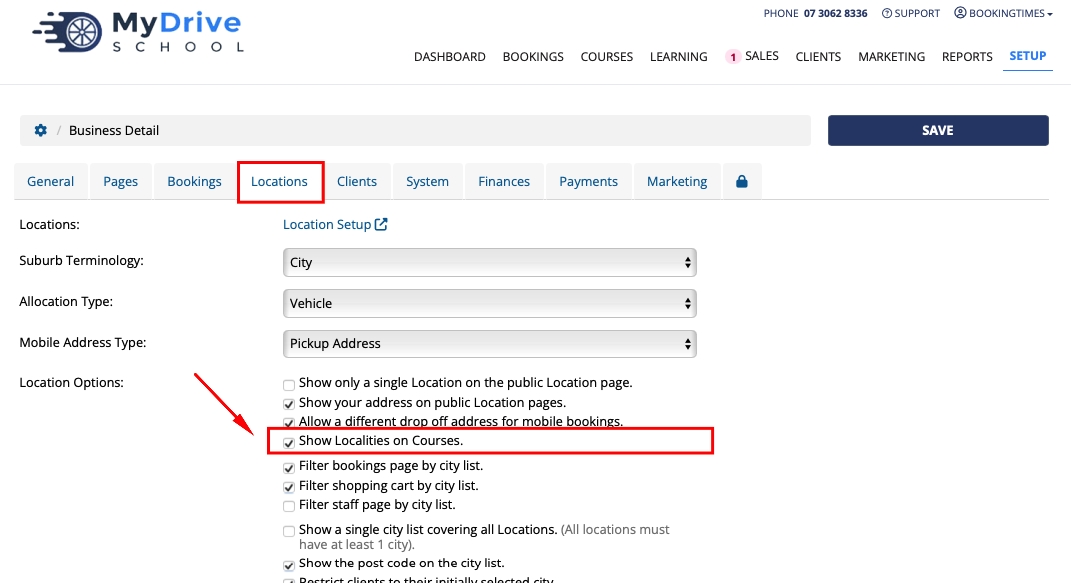
First you need to ensure that Localities are enabled. Go to Setup > System Settings > Business Detail > Locations tab
Select Show Localities on Courses, click Save
Now go into your existing course. Setup > Bookings > Services > select your Course > Localities tab
Click the Add Locality Address button, complete the details on the popup, and Save
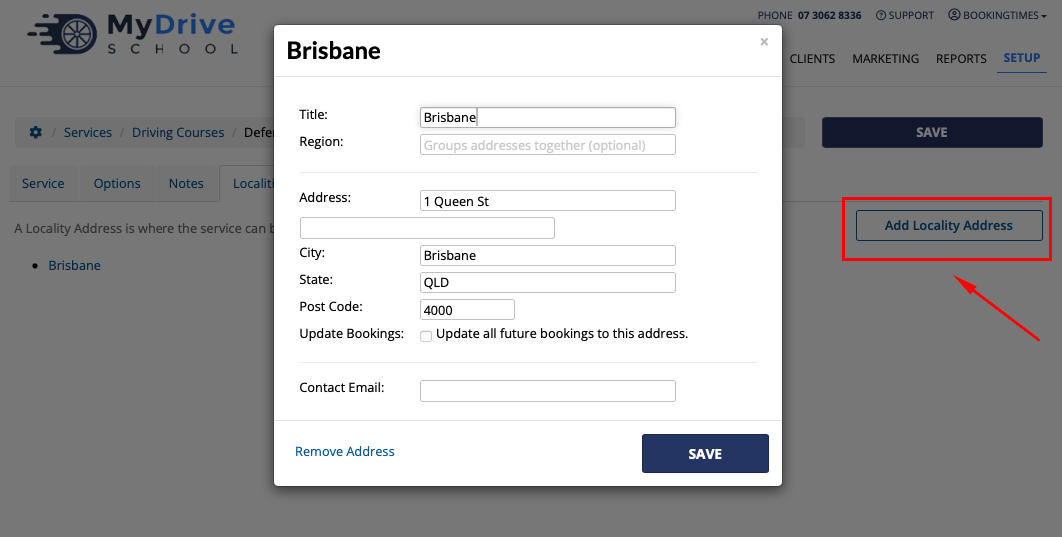
When you schedule a course, you’ll now be able to select your desired locality, and this will set the address for the course.

Publishing a course page
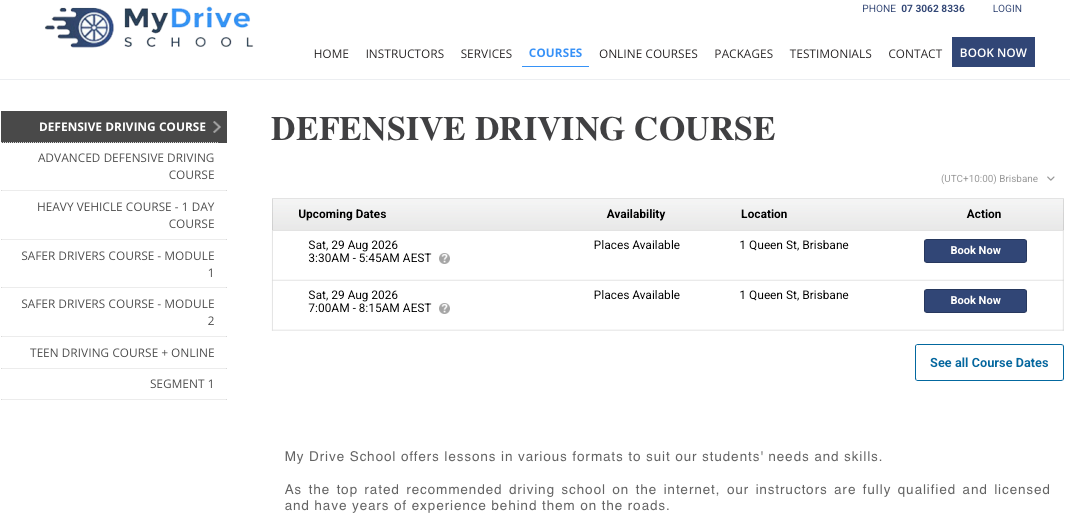
The public can book a course both from the calendar/schedule (once it's been scheduled), and from a dedicated Courses page accessible from the main menu. A specific course page will allow you to publish information about the course, as well as automatically show all upcoming course dates.
The following section outlines the 2 step process to publish your Courses.
Steps
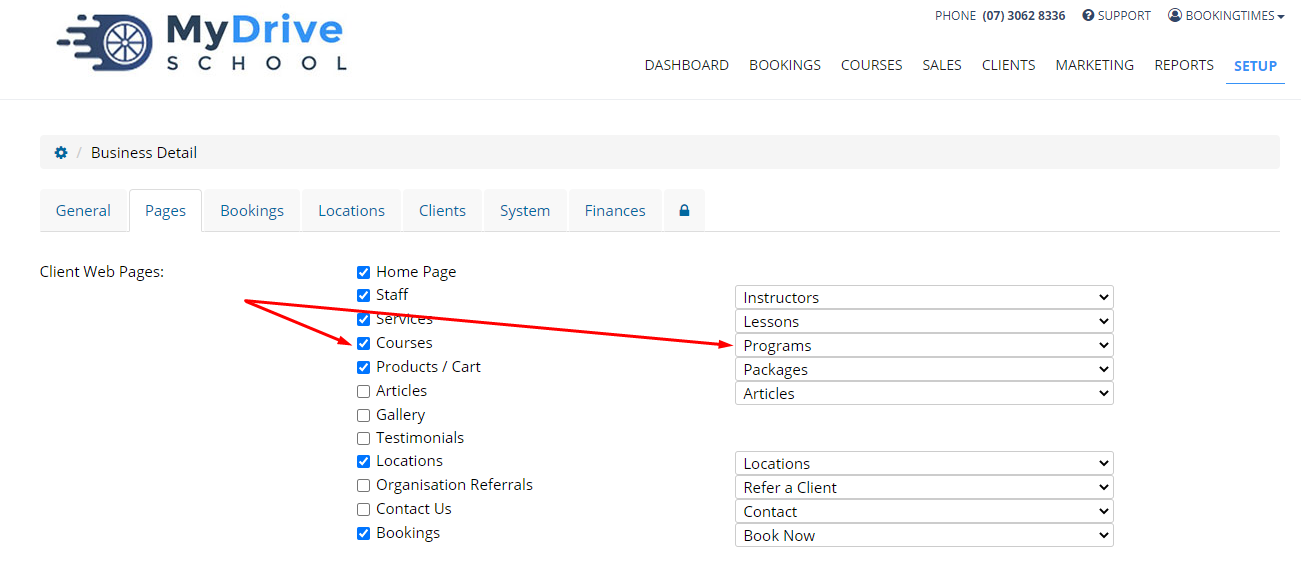
Navigate to Setup > System Settings > Business Detail
Click the Pages tab
Under Client Web Pages, check the Courses checkbox. You can adjust the terminology from the dropdown on the left to suit the type of Course you offer.
Click Save
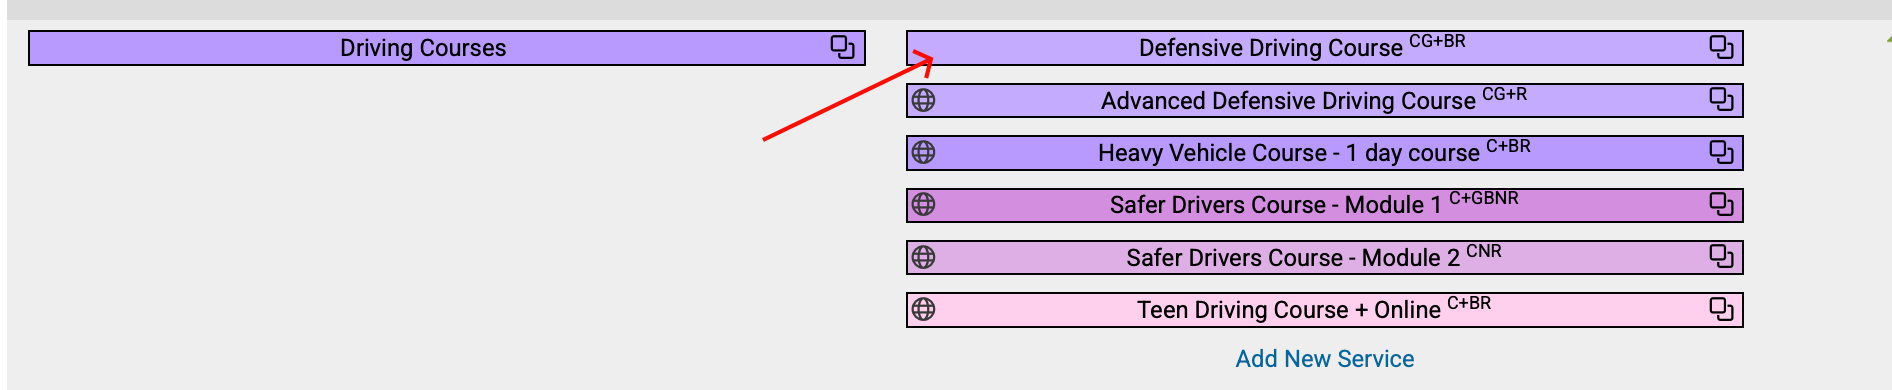
For the Courses menu item to show up from the above steps, we need to ensure that the Course has information to display. Navigate to Setup > Bookings > Services
Select the course you wish to publish a page for
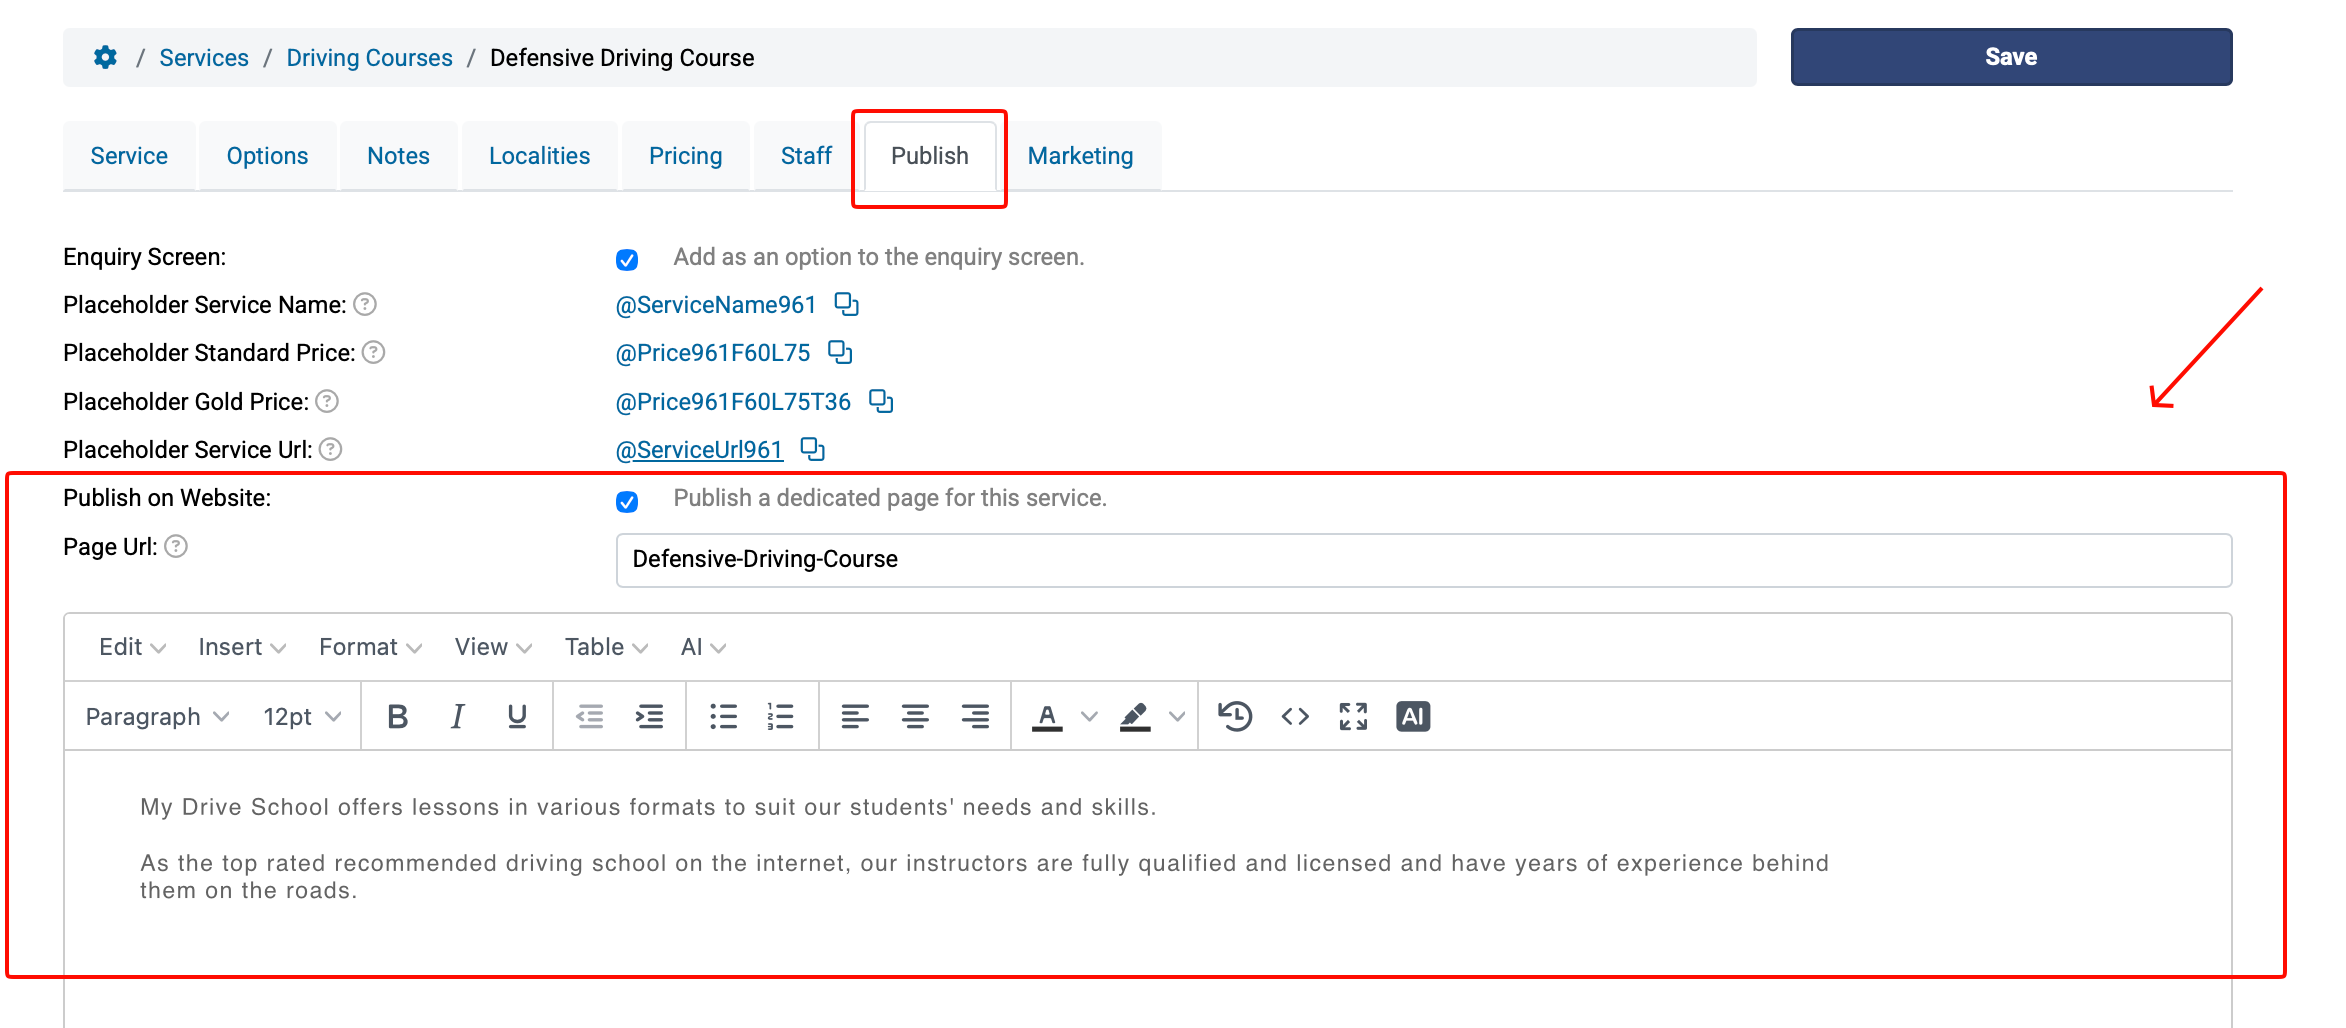
Click on the Publish tab
Select the Publish on Service Page checkbox
Enter the content you want displayed for the course in the text box
Click Save
Adding a private course
You can configure a course to be a “private” course which essentially allows only certain clients to book in. This is achieved by using the Membership Groups feature, and then applying that to the course you wish you restrict.
Steps
Ensure you have a Membership Group set up that will capture the clients that you will allow to book into the course. This is set up via Setup > Client CRM > Memberships.
Please refer to the Creating membership groups article on how to set this up.
Navigate to the course you wish to apply this membership restriction to, via Setup > Bookings > Services > select the service/course
Scroll down to the Membership Restriction field and select Clients with one of the following Memberships. Then select the appropriate Membership Group that you created earlier.
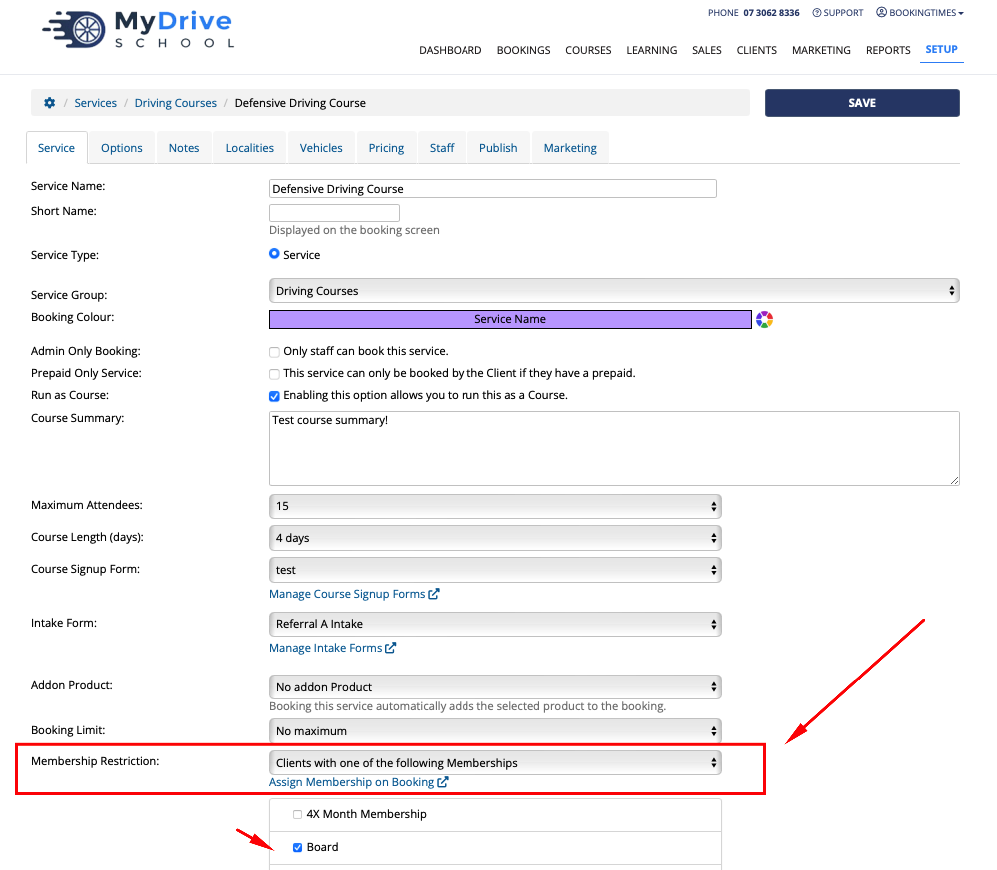
Click Save
You can now schedule this course on your calendar as usual. Now only clients who are part of the Membership Group will be able to book in the course.
Please refer to the Scheduling a course article for more details.
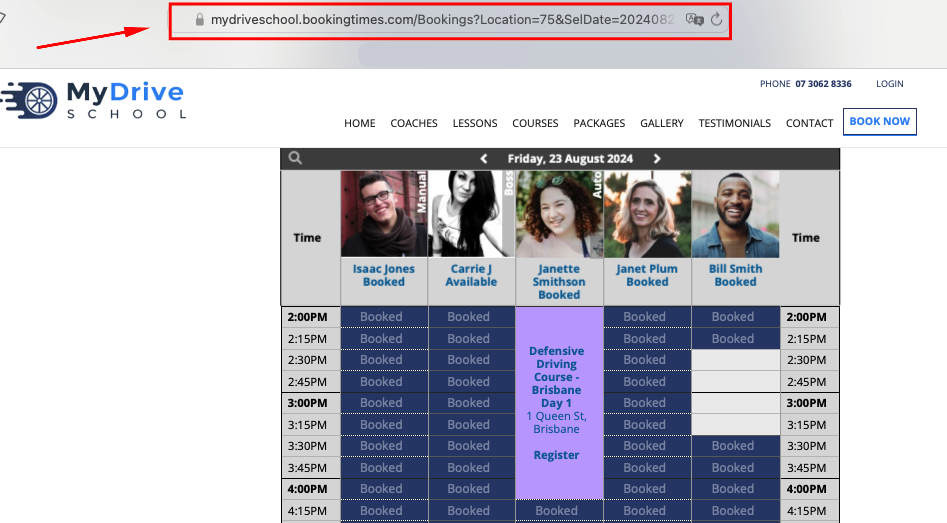
Because only certain clients can book in, you can send your clients a link to the specific day on the calendar so they can book directly from there without having to search through all the listed courses. In the example below, you can send them a link that points to the Defensive Driving Course that’s held on Friday 23 August.
Tip - duplicating a course
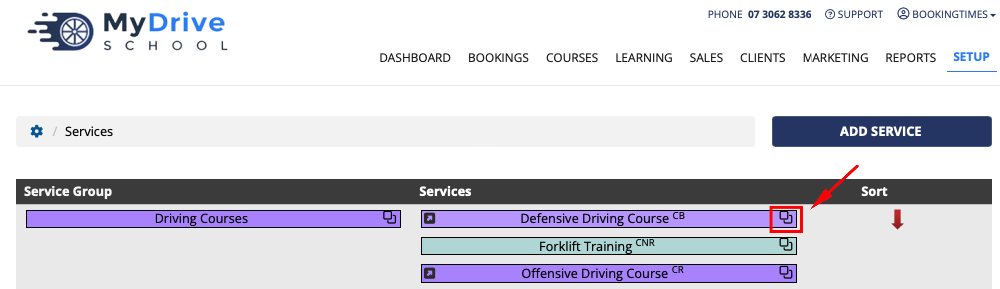
if you wish to duplicate an existing course but have one restricted, you can use the copy feature that’s available on the services page to quickly duplicate a course. This is done via Setup > Bookings > Services, and clicking on the copy icon.