Membership groups can be used to group clients for management or marketing purposes, as well as restricting certain time slots in the calendar. For example:
Offering a special discounted membership price for products or services
Grouping certain clients to send newsletters to
^ Restricting services to a particular membership group
^ Restricting booking schedule/calendar to membership group/s
Please note: This feature is only available on the Nail & Scale plan.
This article will detail how to create membership groups and add clients to membership groups, including how they can be automatically added based on a trigger for a service, product or online course. e.g. passing a service/course, purchasing a product.
^ These 2 options are covered within the Restricting services or calendar to membership groups article.
Creating a membership group
Steps
Navigate to Setup > Client CRM > Memberships
Click Add Membership Group

Enter details on the Membership tab and click Save. The following tabs can be optionally completed also.
Enter Membership Name
Select if a Discount applies. Please see the Creating discount coupons article for details.
Pick a Membership Color
Select if a Membership Certificate applies
Select if you’d like an Action State alert created when a new member is added
When someone becomes a member, it'll automatically add that action to the client actions record, and thus also show on the dashboard.

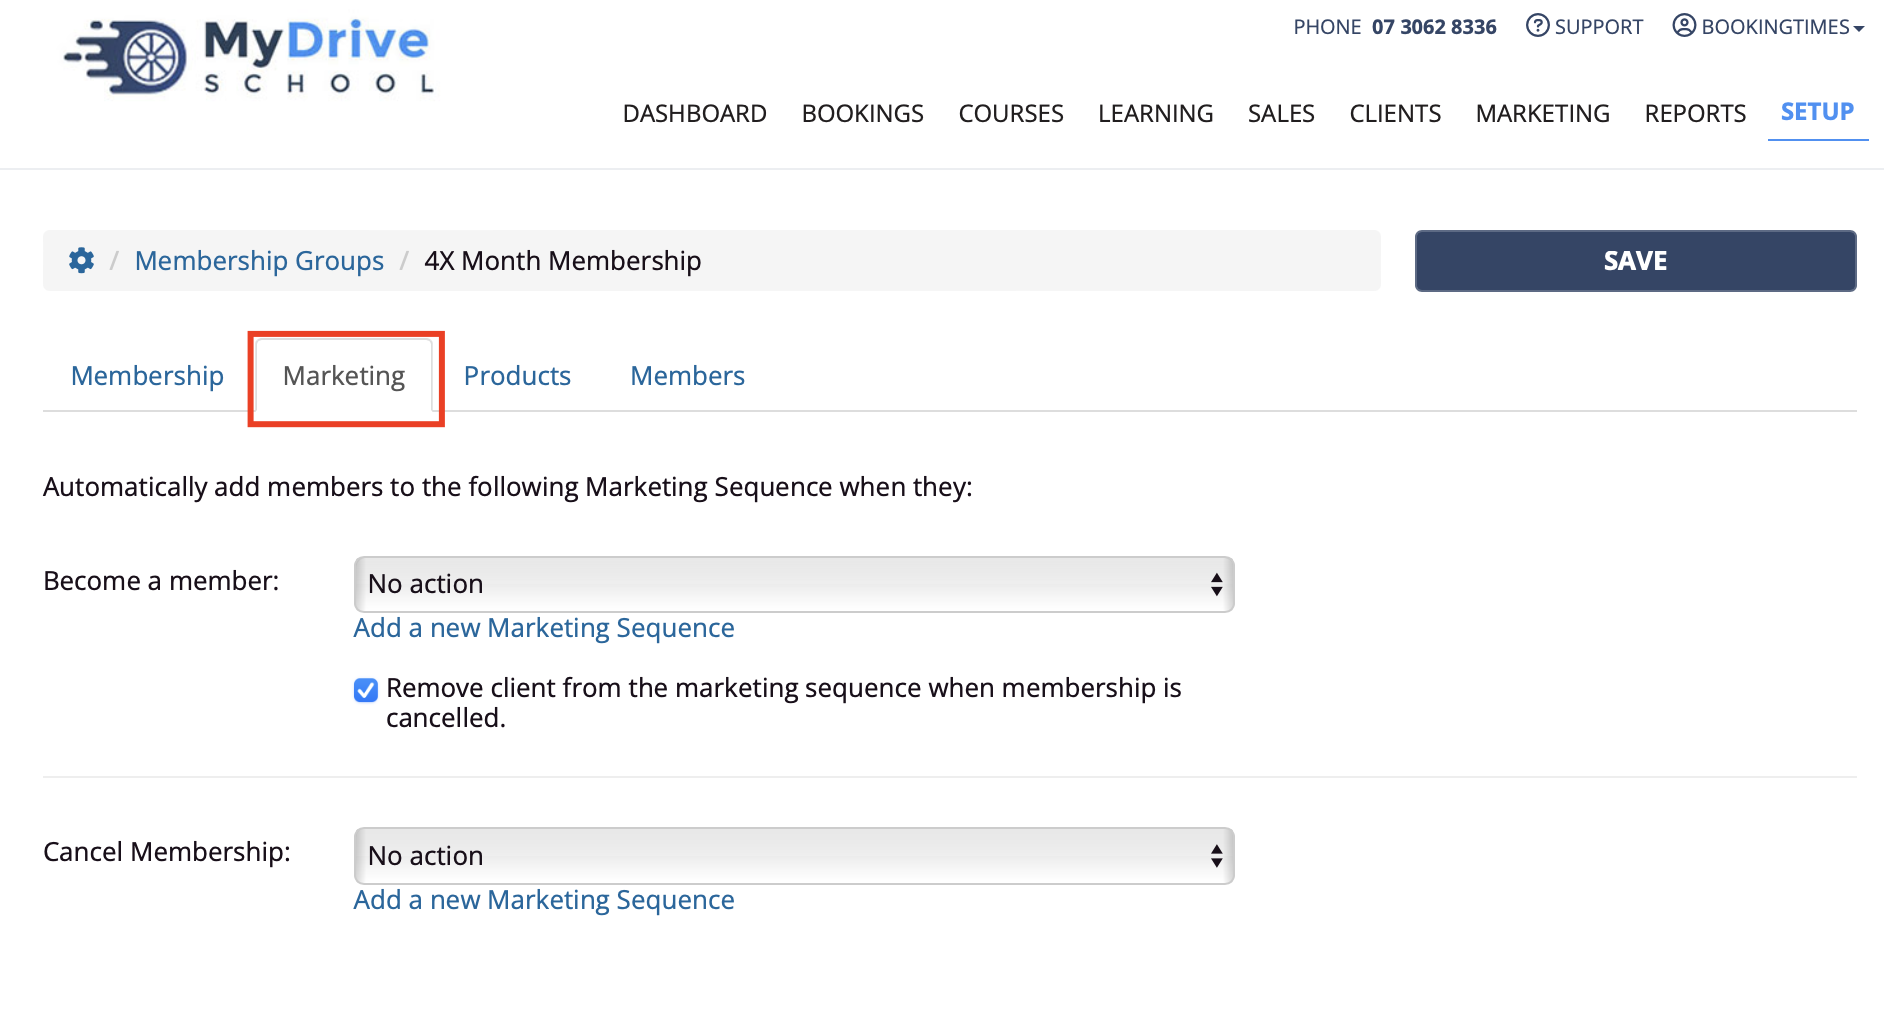
Enter details on the Marketing tab (optional)
Select any products that apply to this membership group on the Products tab (optional). Please see the Creating a membership product article for more details.
Note: if a membership product is added here, and a client purchases this product they will automatically be granted membership to this group
.png)
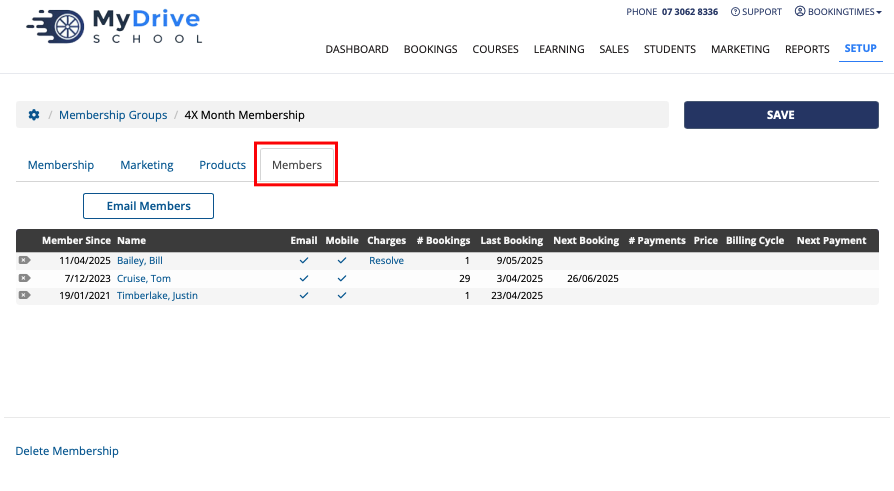
View any members (once membership group exists) on the Members tab
Adding clients to membership groups
Clients can be manually added into membership groups. Once assigned to a group, you can also see the client’s membership history.
Steps
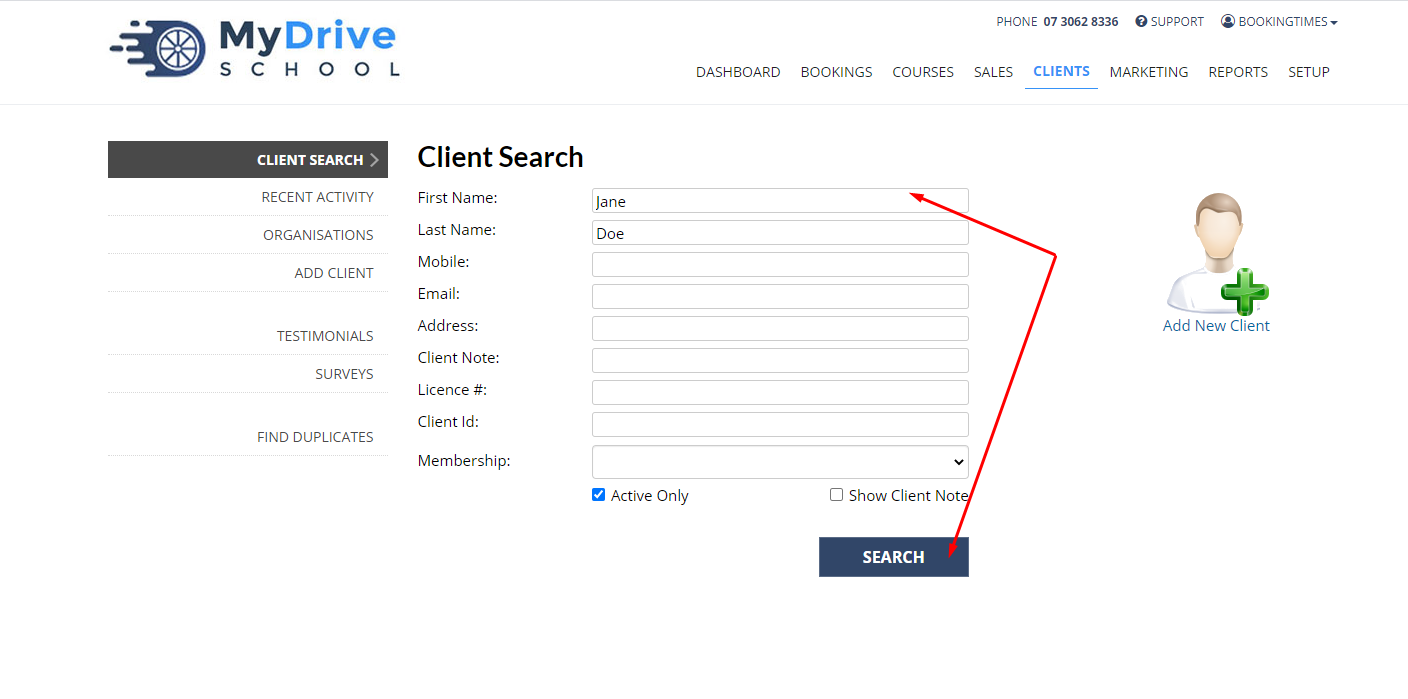
Search for a client under the Clients menu
On the client profile, scroll down to Memberships
Click Add Membership
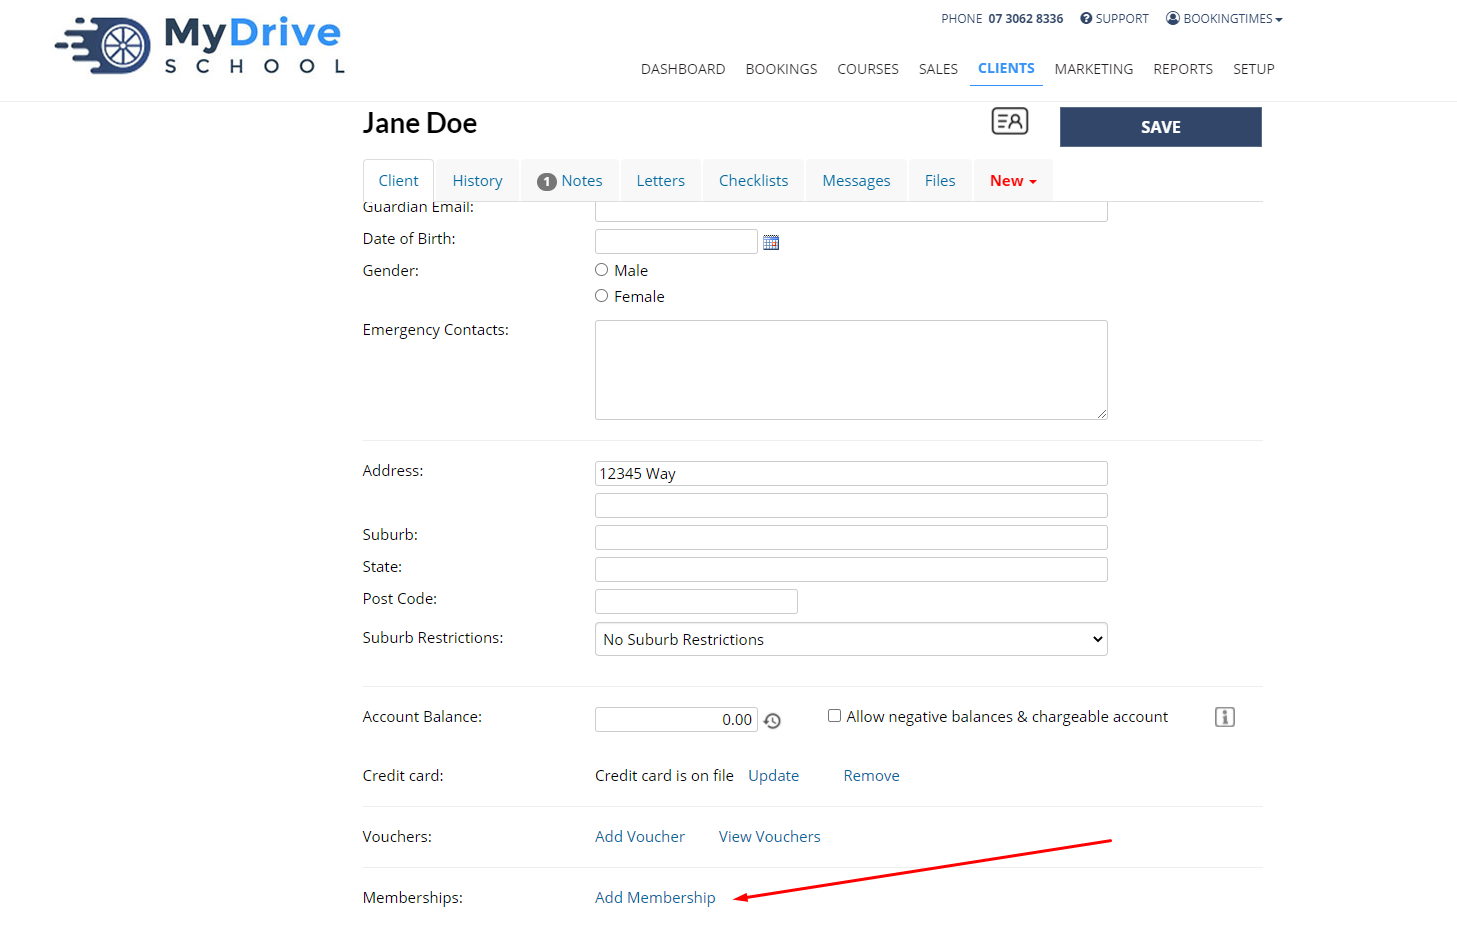
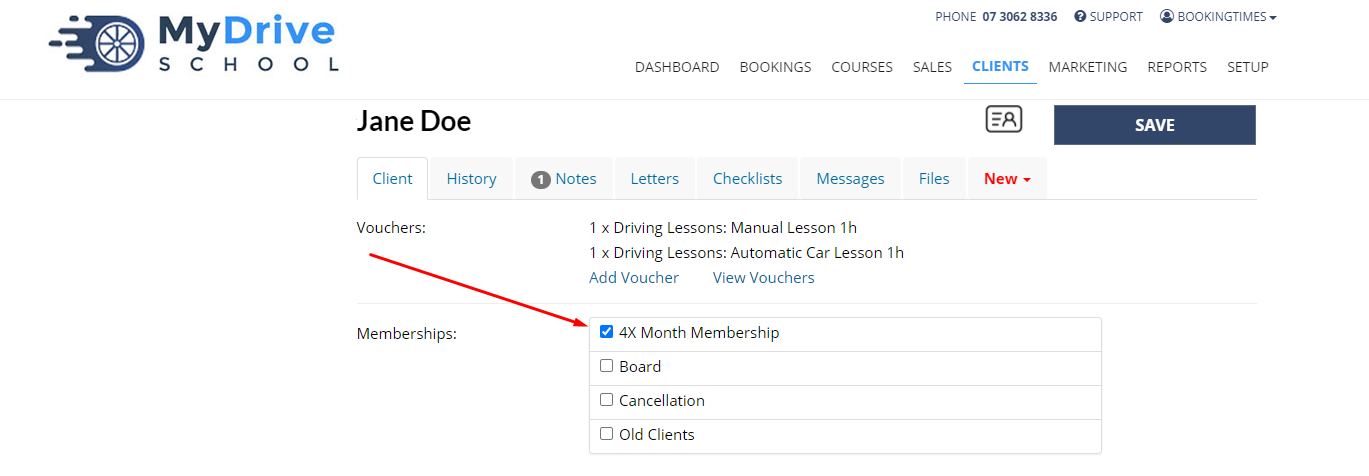
Check the relevant membership(s) and click Save on the client profile
Updating a client’s membership group and viewing history
Once a client has been assigned to a membership group, you can also update the groups that they’re a part of, and see their membership history.
Steps
Search for a client under the Clients menu
On the client profile, scroll down to Memberships
To update a client’s membership group, click on the Change link

Select or unselect the membership groups, and click Save

To check a client’s membership history, click on the history icon on the client record

The client’s membership history appears

Automatically adding clients to membership groups
Clients can be automatically added into membership groups based on certain triggers from a service, product or online course.
Service triggered membership
Steps
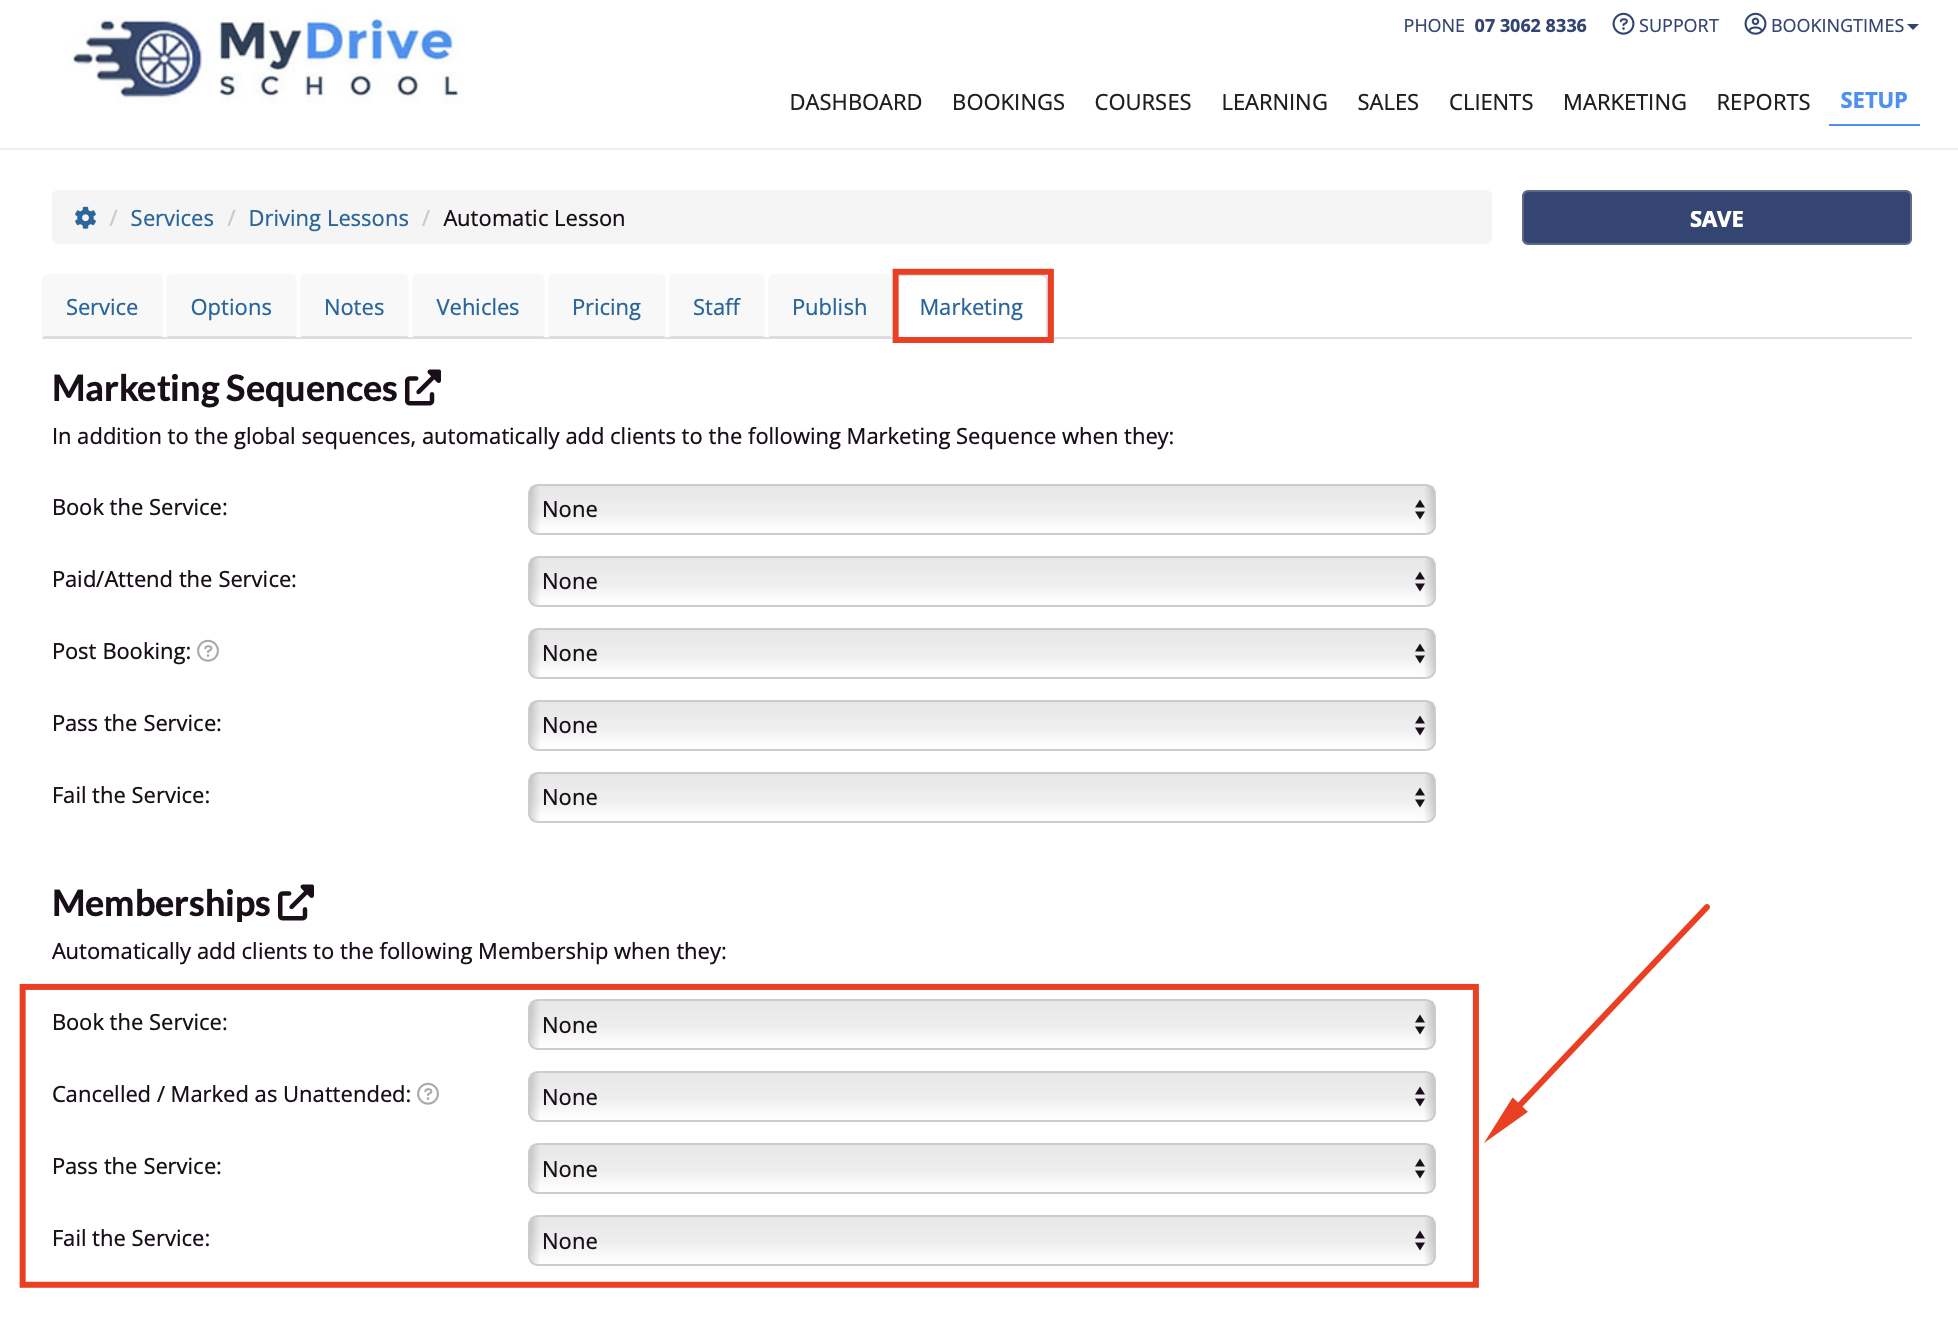
Navigate to Setup > Bookings > Services
Select a Service
Go to the Marketing tab
Select a relevant trigger (e.g. book, cancelled, pass, fail) and select a membership group
Click Save
Product triggered membership
Steps
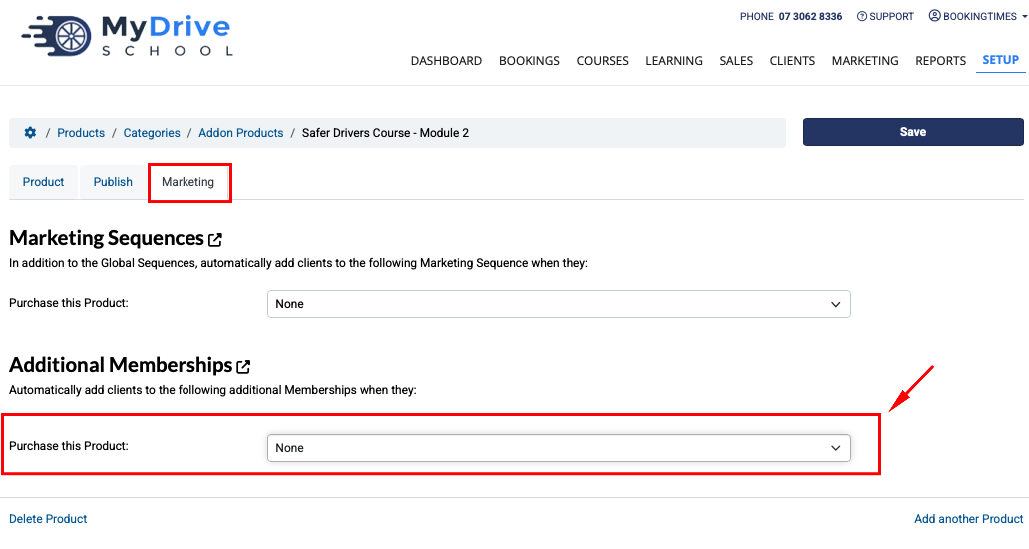
Navigate to Setup > Shopping > Products & Packages
Select a Product
Go to the Marketing tab
Select a relevant trigger (e.g. purchase) and select a membership group and click Save
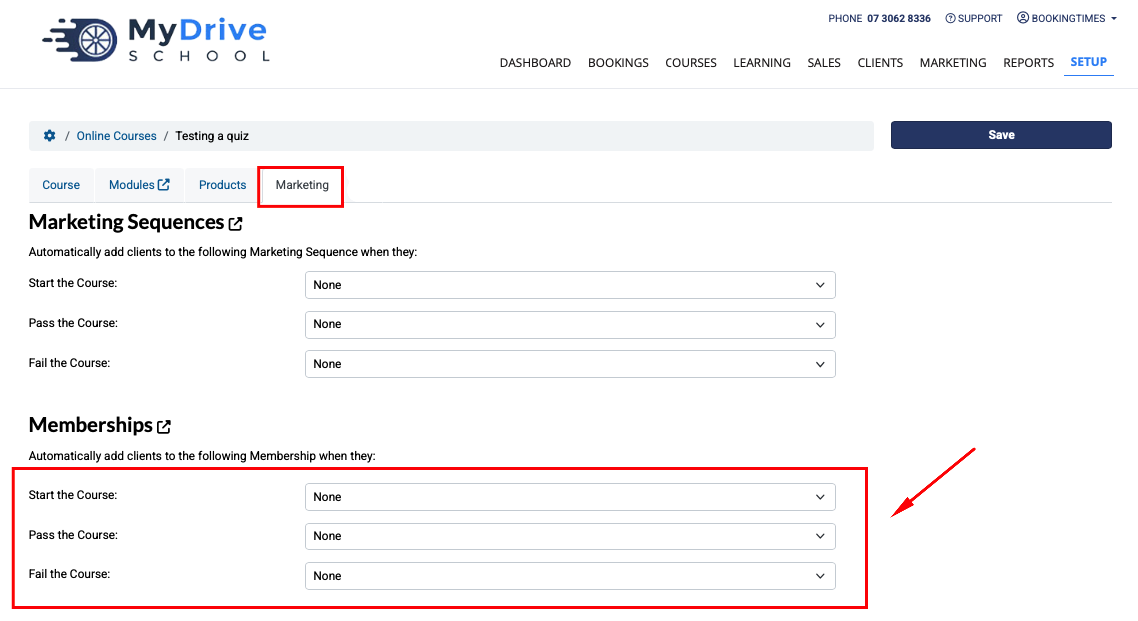
Online course triggered membership
Steps
Navigate to Setup > Bookings > Online Courses
Select a Product
Go to the Marketing tab
Select a relevant trigger (e.g. pass, fail) and select a membership group and click Save
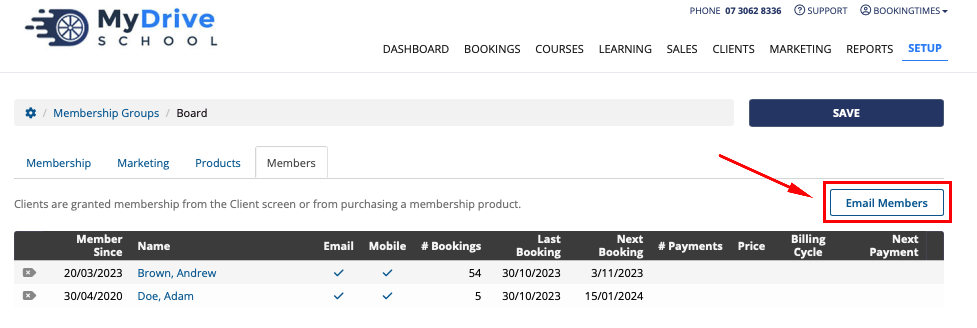
Sending newsletters to membership groups
Newsletters can also be sent directly to membership groups by clicking the Email Members button. It will take you to the Newsletters area where the List of Recipients has been pre-selected to the membership group you have in focus.
Please refer to the Newsletters article for more details to how to create a newsletter.
Restricting services to a membership group
Services can be restricted to certain membership groups, so only clients within that group can book a particular service.
For example, if you want to only allow certain clients access to a service, you can certain clients to a membership group (and not based on a trigger from a service/product purchase). In this case you would manually add them to the group first, and then set up the restriction on the service.
To set up a service please see the Setting up services article.
Steps
Navigate to Setup > Bookings > Services
Select a Service
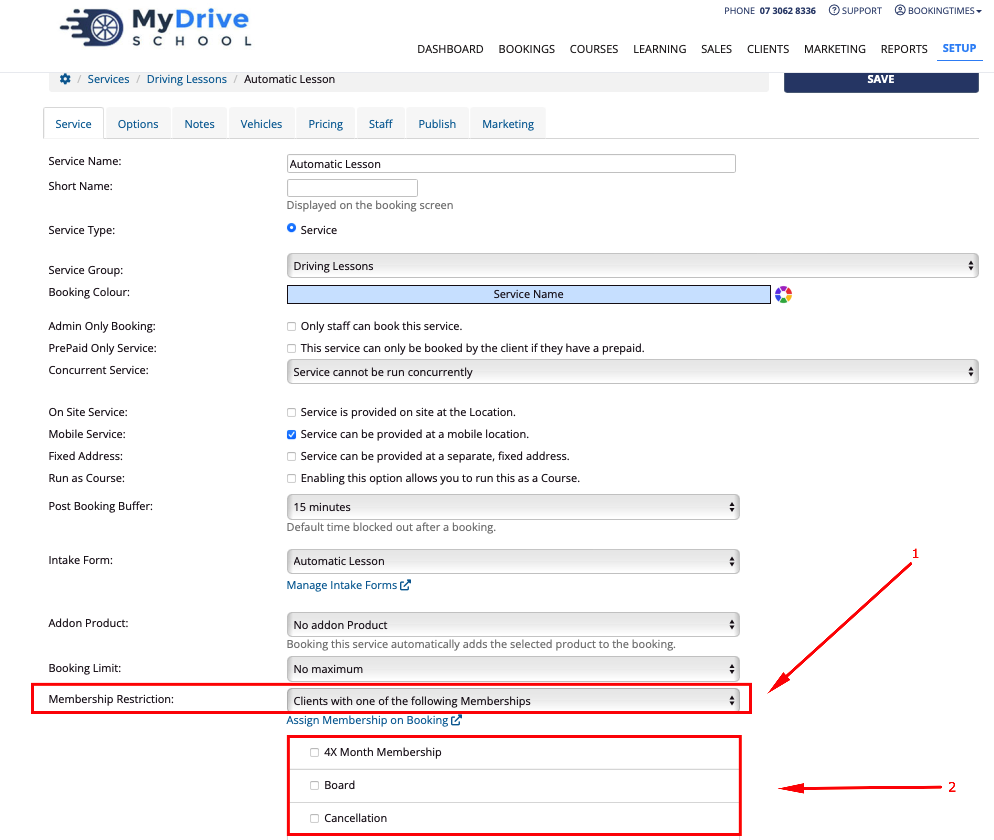
Go to the Membership Restriction section and select Clients with one of the following Memberships option [1]. All available membership groups will appear below [2].
Select all the membership group/s that apply
Click Save
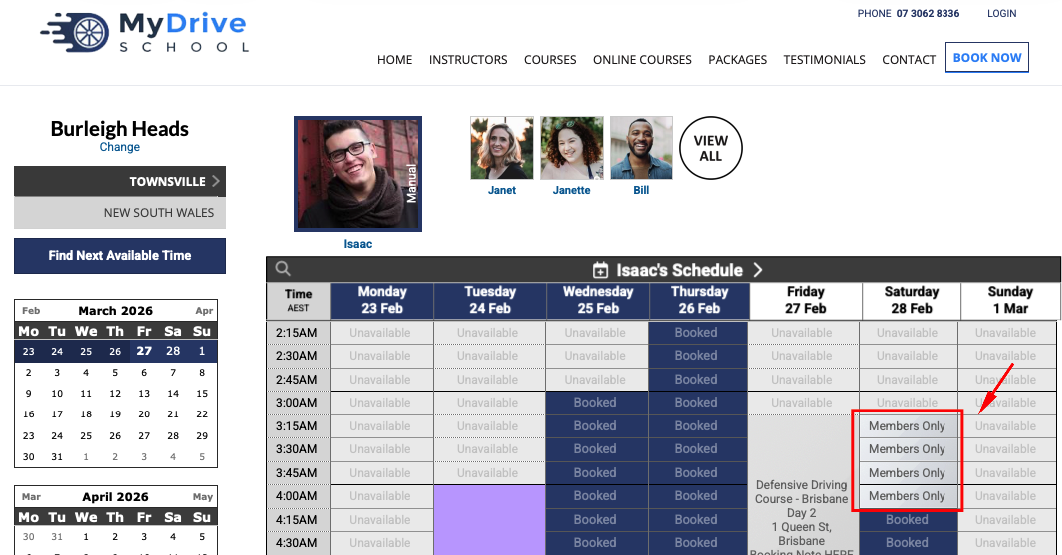
Restricting booking schedule/calendar to membership group/s
This feature is available on these plans (view pricing)
The booking calendar/schedule can be restricted to only certain membership group/s booking in.
Steps
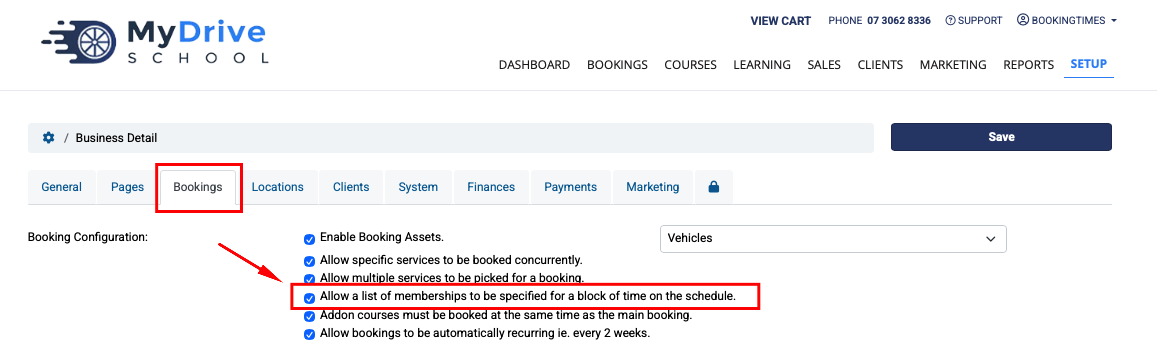
Ensure this feature is enabled via Setup > System Settings > Business Detail > Bookings tab > select Allow a list of memberships to be specified for a block of time on the schedule, and click Save.
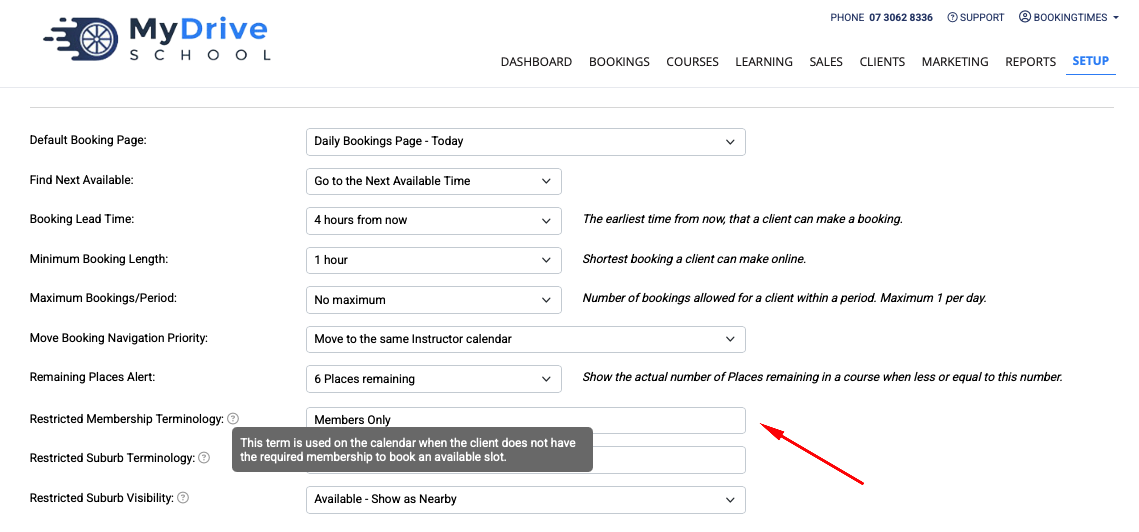
You can also optionally set up different terminology to appear on the calendar when the client does not have the required membership to book an available slot. This is on the same Bookings tab as above under Restricted Membership Terminology. If you update this, ensure you click on Save.
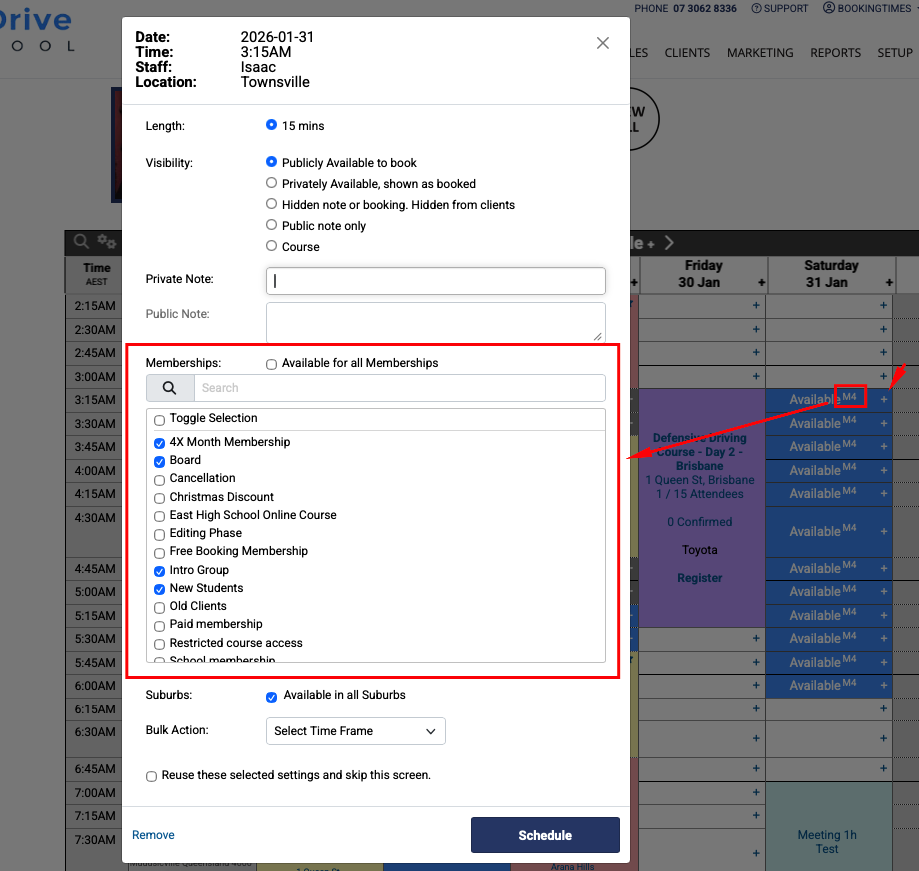
To restrict the calendar, navigate to the Booking menu item to get to the booking calendar
Click on the + of the timeslot that you wish to restrict to certain memberships:
Select the membership/s you wish to allow
Use Bulk Action drop down list to apply to subsequent slots)
Click Schedule button
When this restriction has been added in, this is how it looks to a client that does NOT have the membership (or if the client is not yet logged in to determine if they have the required membership or not).