The schedule, or also referred to as the calendar, is a core component of the BookingTimes platform. Here you can manage you and your staff's availability, bookings and post public and private notices for staff and clients.
There are many features available so you can configure your schedule to suit your business. These include:
Setting up available slots for clients to book in directly.
Setting up private slots which appear as ‘booked’ publicly to allow staff to add unavailability without showing this publicly.
Setting booking restrictions to restrict clients to book in of a minimum amount of time and minimise unusable gaps.
Easily copying day and week schedules once set up.
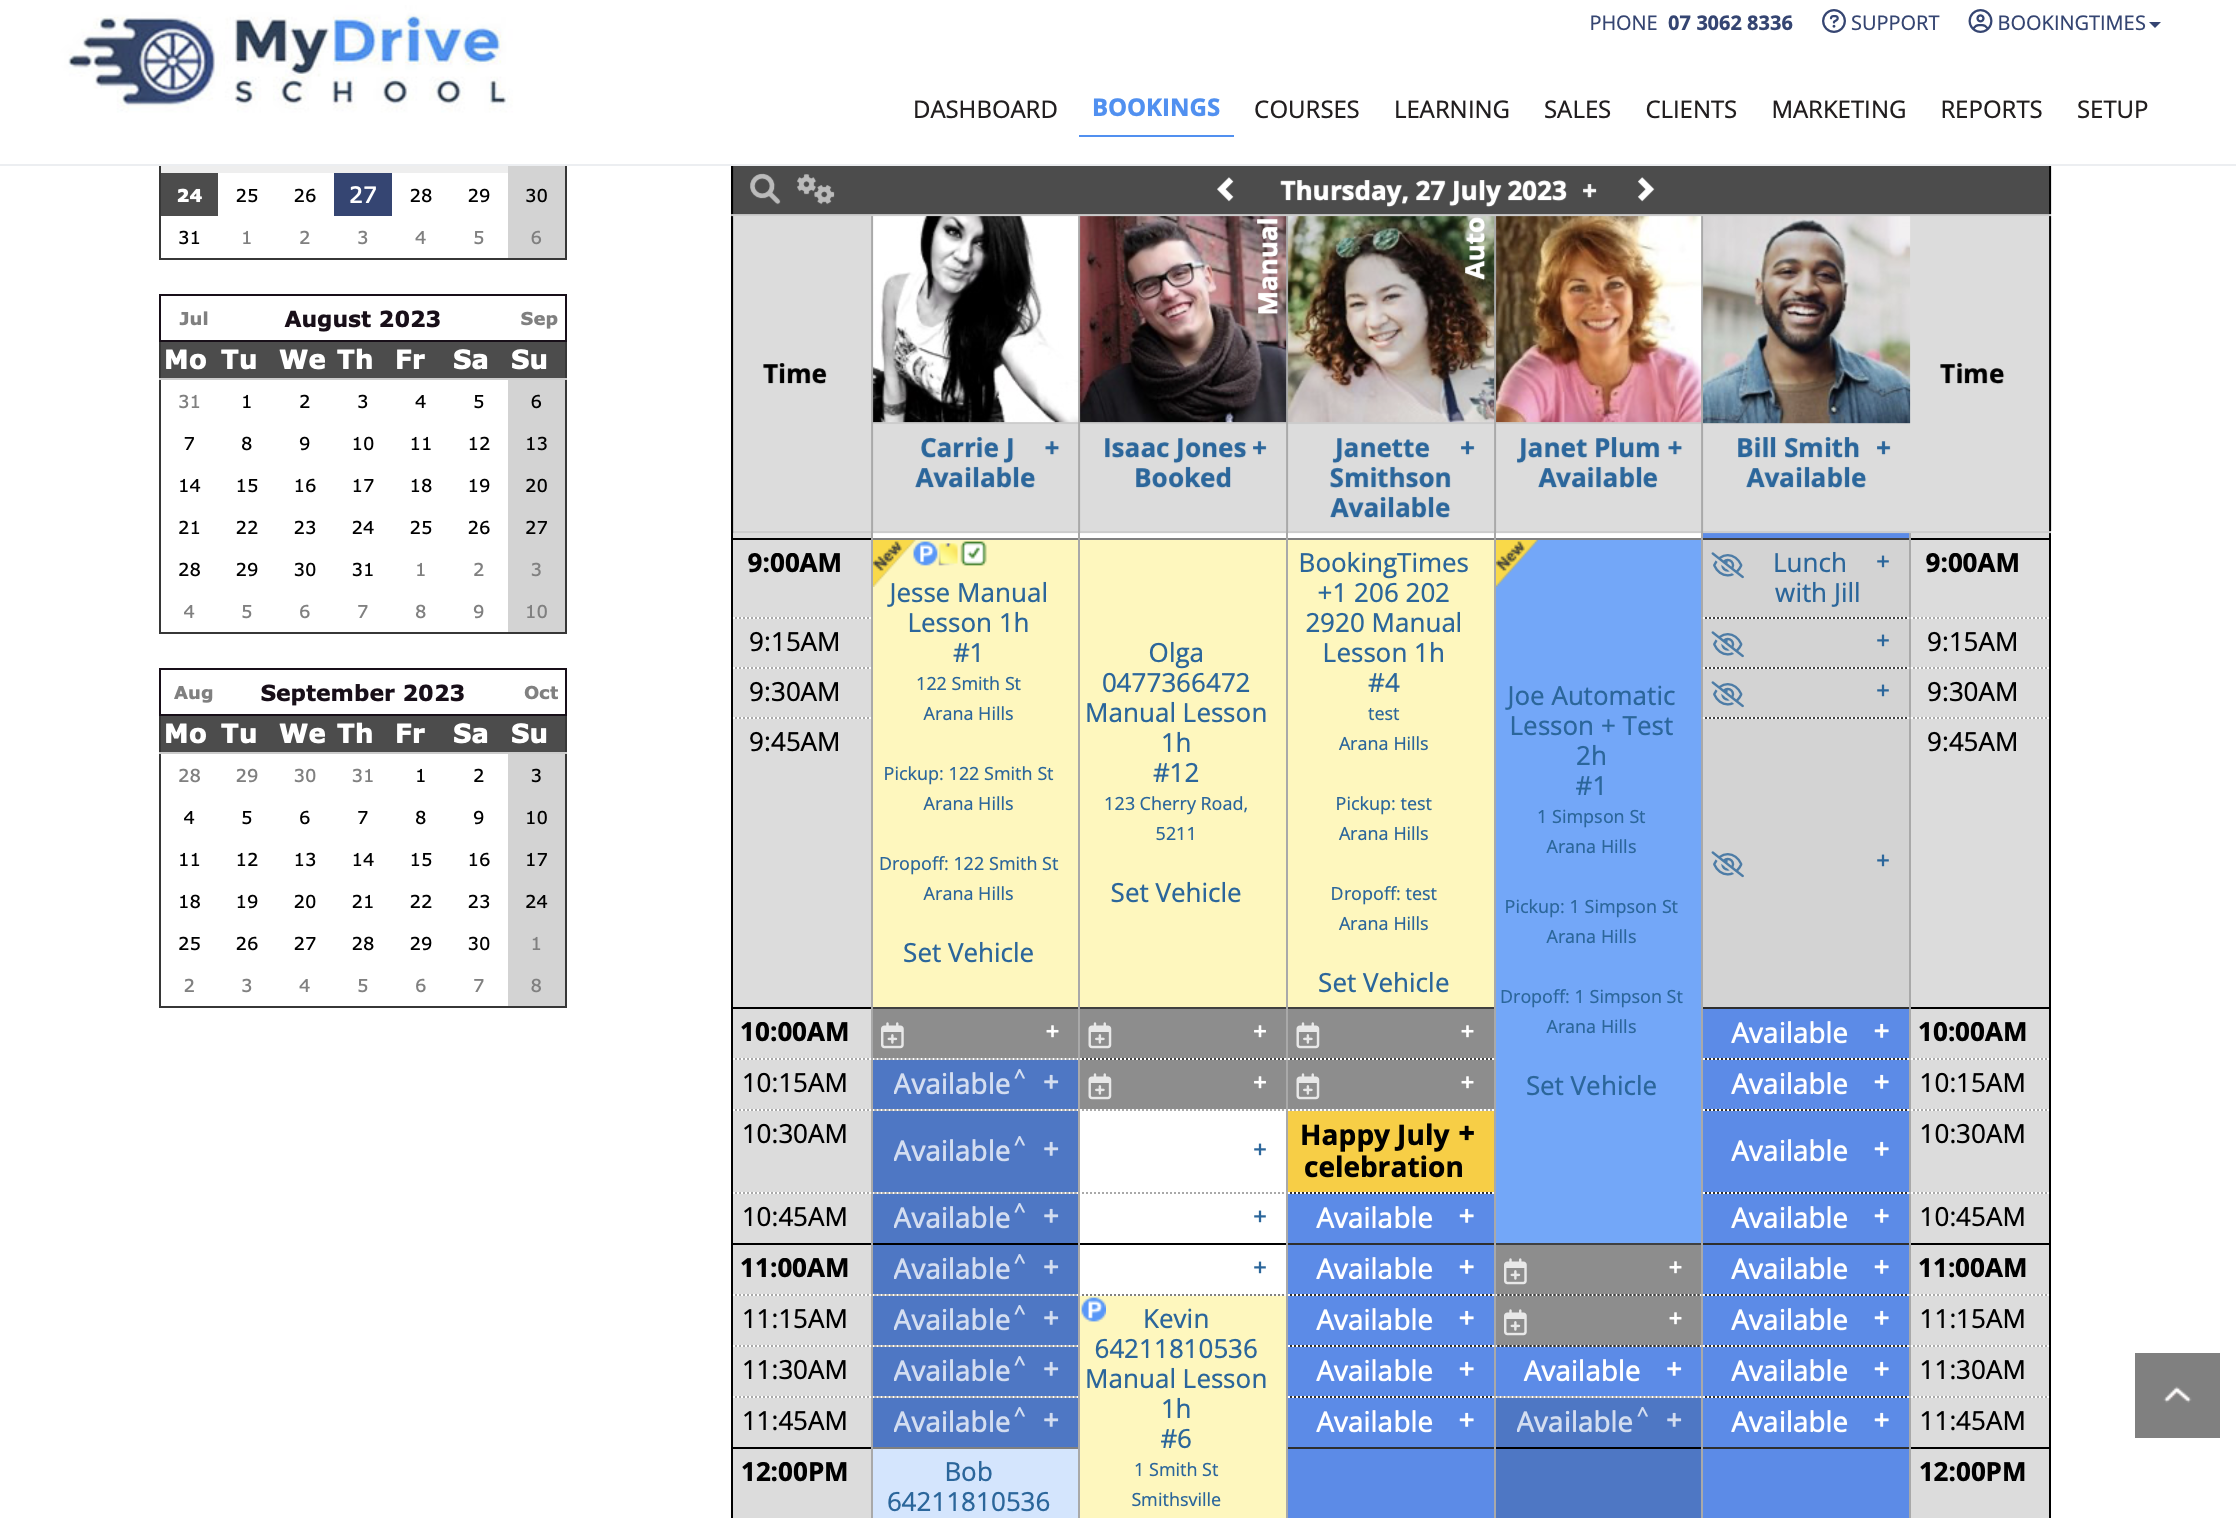
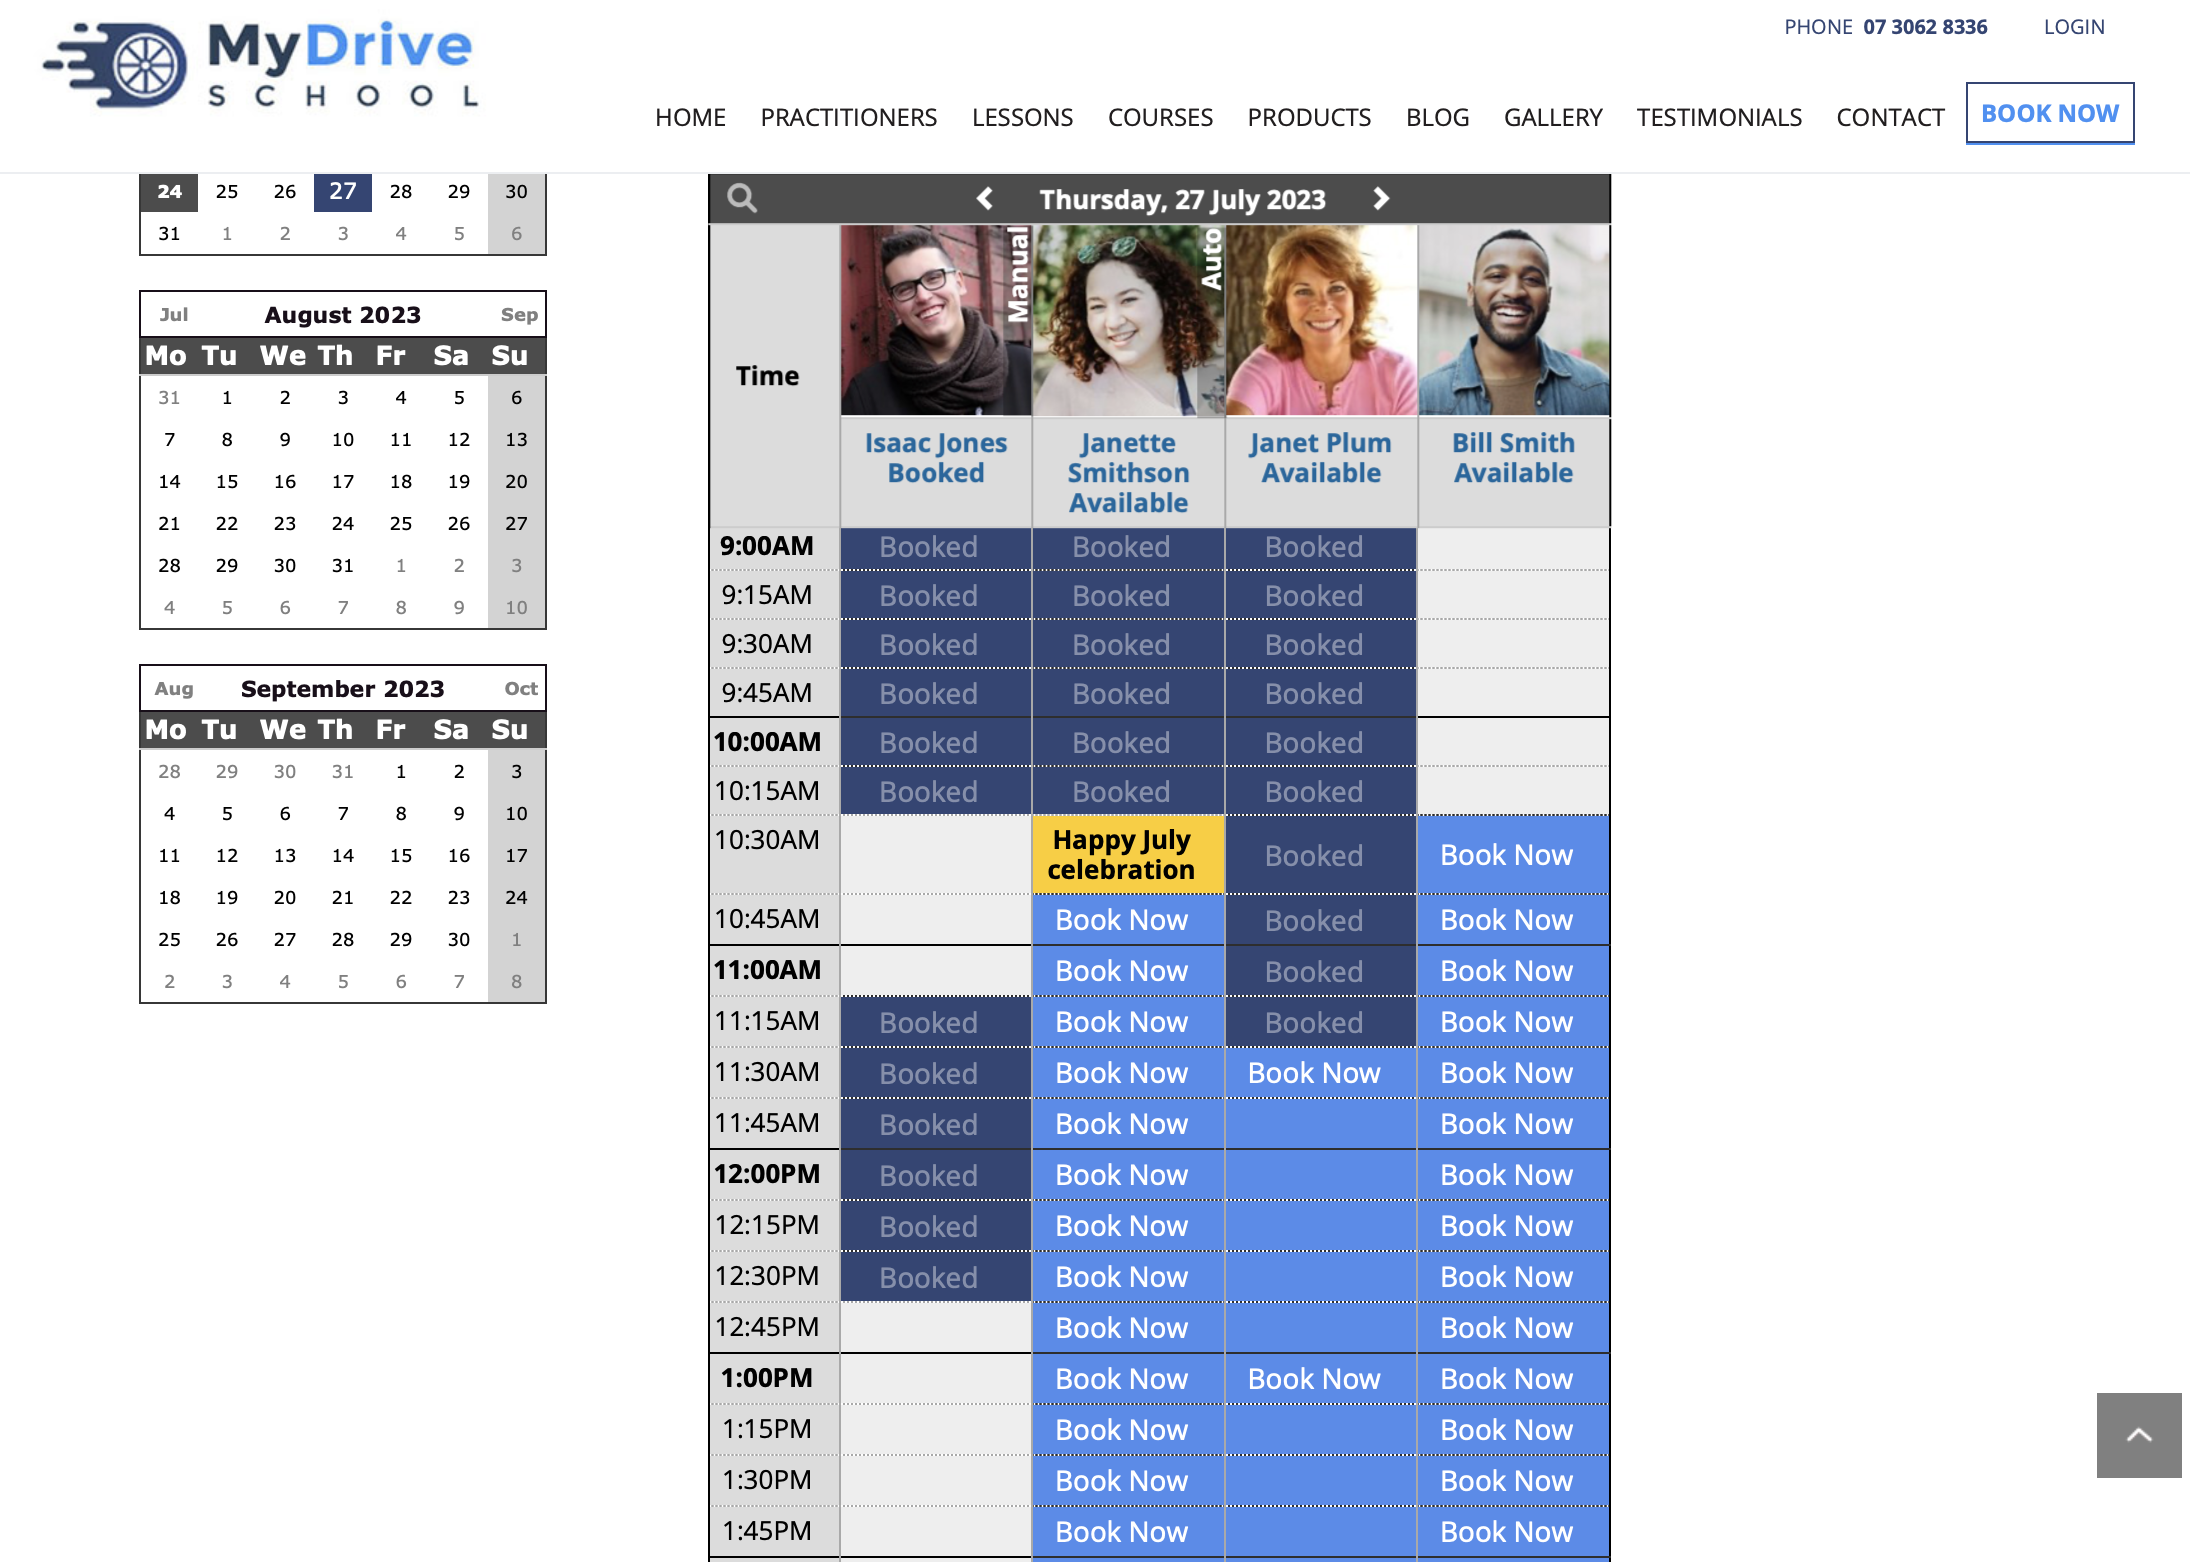
The schedule will appear differently to you and and your staff, in comparison to what your clients see publicly, please see the below images as an example.
View of schedule to admin/staff
View of schedule to public clients
Initially, your schedule is completely closed and cannot be booked by you or your client. You must open up schedule slots to allow bookings to be made, and it's recommended to open up your schedule for as far in advance as you can. Not just to allow clients more flexibility in their booking times, but it's also a huge benefit to your SEO rankings.
When you open up schedule slots, there are a number of options of how to configure these so you can choose exactly how it's set up for your business, and also determines how it will appear to your clients publicly. Please refer to the Schedule slot settings article for more details with examples.
This article will focus on showing you how you can open up your schedule.
Opening schedule slots
Please see this short video below first to explain how to open up your schedule, with written instructions following below.
Steps
Navigate to the Bookings menu
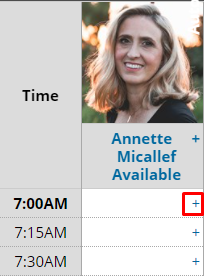
Select the " +" icon on the relevant day and time slot
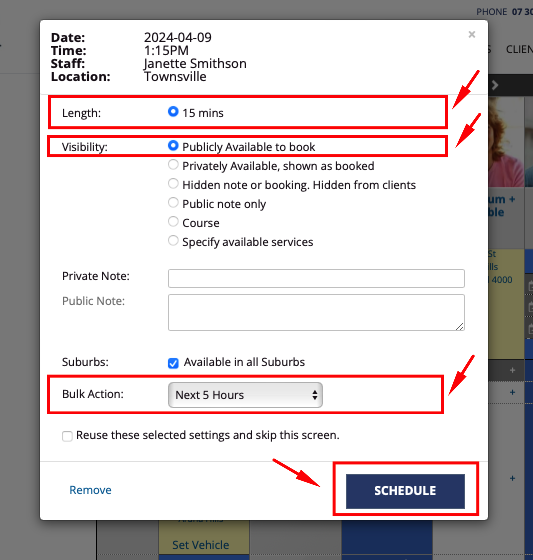
Configure the Schedule slot settings
Length: recommended to keep at 15 mins slot to maximise flexibility
Visibility: select Publicly Available to book
(Optional) Bulk Action: select a duration to apply these slot settings to (otherwise this will only make a single slot available)
Click Schedule
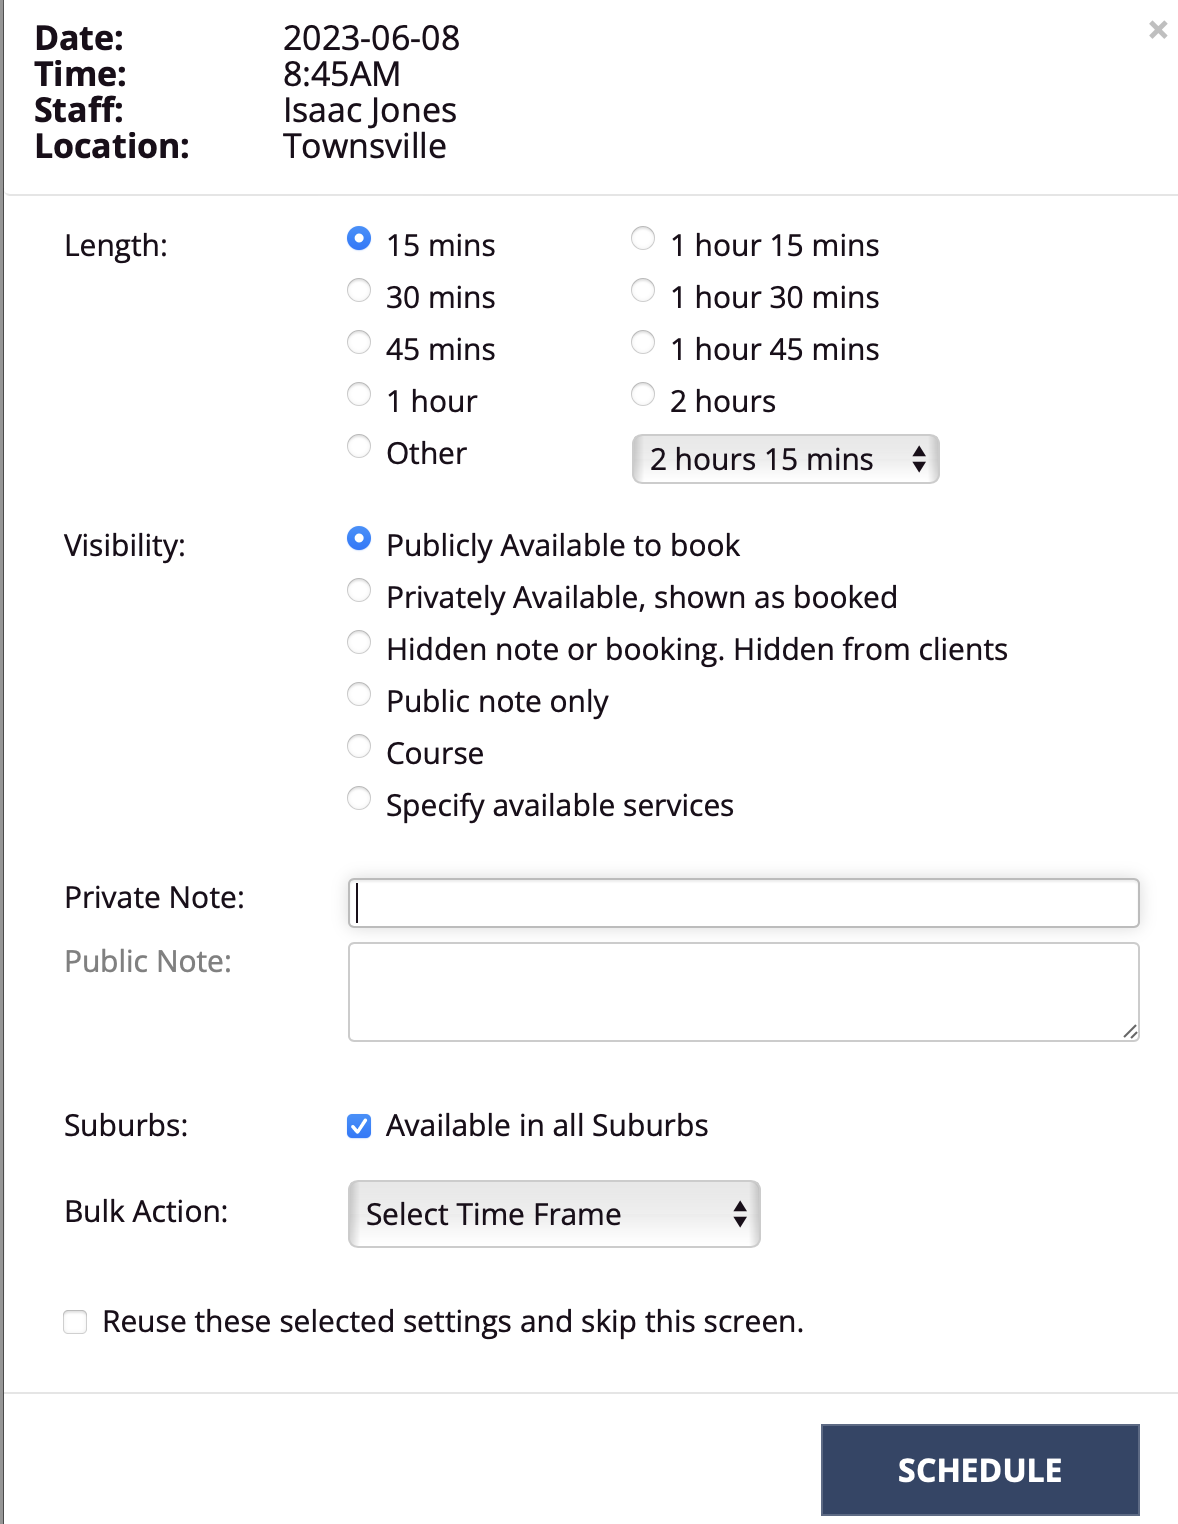
If you don’t use the Bulk Action drop down, you would need to repeat this process to open up all your desired scheduled slots, though that could be very time consuming especially if you're doing it in the recommended 15 minute blocks. There are a few features that allow you to open up your schedule more quickly which are covered in the next sections of this article.
Tip: Process to quickly schedule a day/week/months ahead for full day availability
If the staff member’s calendar matches the business hours of the business, please follow this process to quickly set up your calendar for months in advance:
Refer to the Scheduling a whole day at once section which allows you to schedule a whole day
Refer to the Copying your schedule article to copy the day you set up previously for the remainder of the week, and then copy that week in advance for up to 4 months.
Reusing schedule slot settings
Selecting the same settings every time you want to open a schedule slot can take a long time, so you can choose to reuse the schedule slot settings for every future schedule slot you open.
Steps
Navigate to the Bookings menu
Select the "+" icon in the relevant time slot
Configure the schedule slot settings
Check Reuse these selected settings and skip this screen
Click Schedule
Click on the " +" icon in the next relevant time slot that these same settings will be applied to
The next schedule slot will automatically open with the same settings:
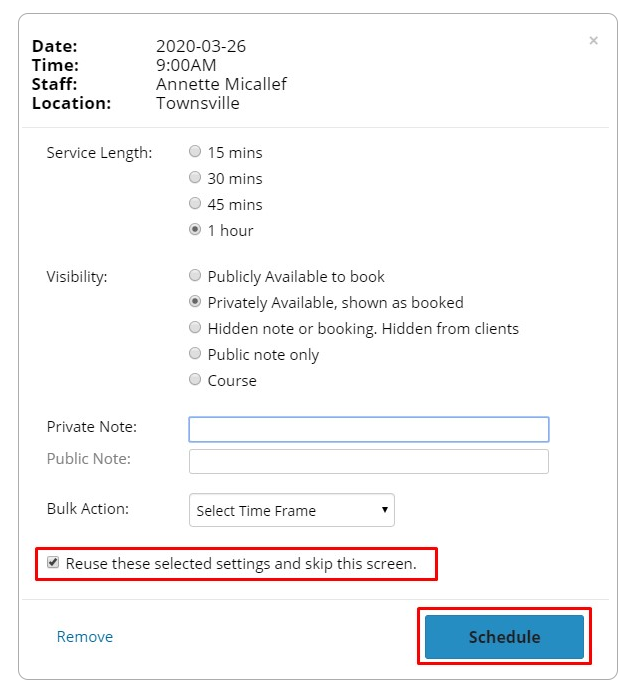
Schedule slot settings set to be reused
Bulk Action drop down list
Please note if you’re opening up slots consecutively to each other, you could also use the Bulk Action drop down menu which allows you to specify a time frame that you want to apply the schedule slot settings to rather than set up them individually. Refer to the Bulk Action section within the Schedule slot settings for more details.
Turning off schedule slot setting reuse
Steps
Click the " +" icon on an already open schedule slot
Uncheck Reuse these selected settings and skip this screen
Click Schedule
Scheduling a whole day at once
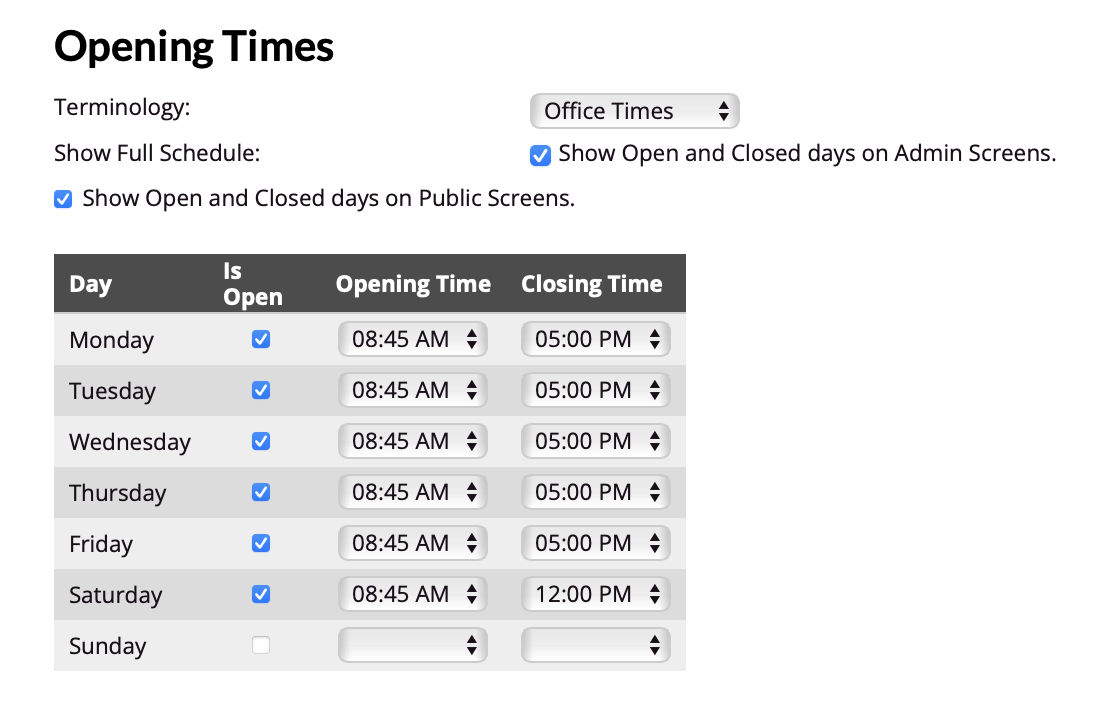
This allows you to open your schedule for the whole day in one go. The time that the schedule will open up automatically for is determined by the opening hours that you have specified for the location.
Steps
Navigate to the Bookings menu
Click the " +" icon next to the relevant staff member name
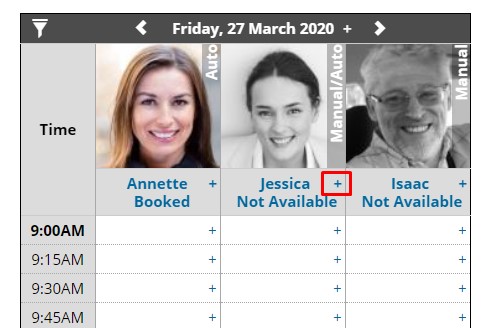
Clicking the "+" icon next to the staff member name
Under Actions, click Make Day Fully Available link
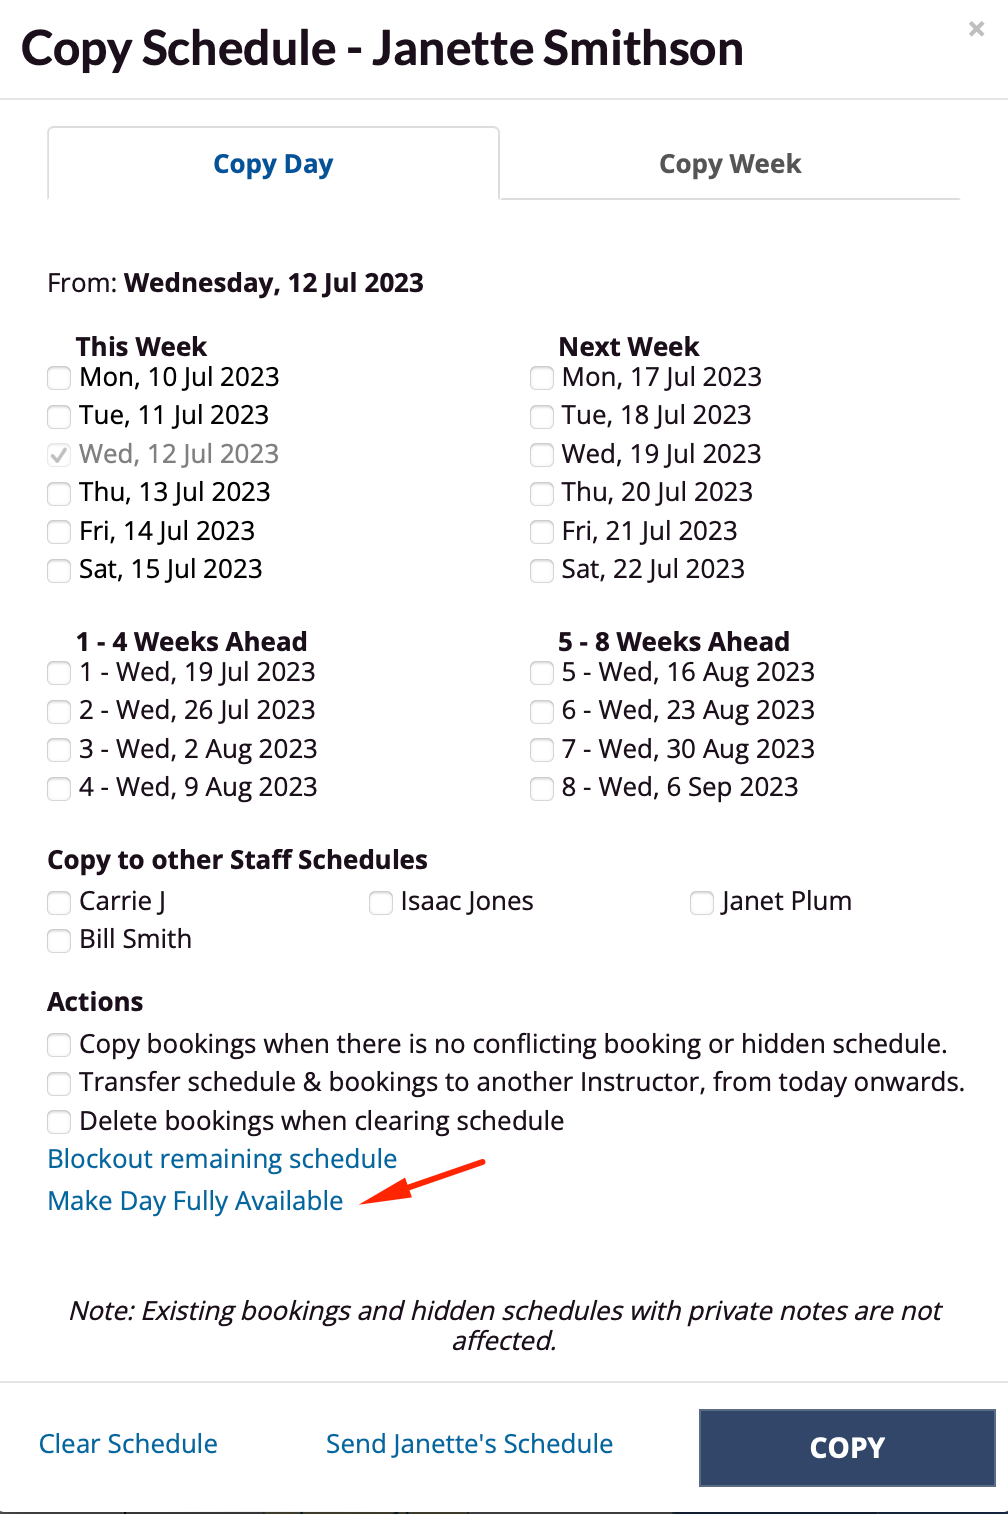
To check your location’s opening hours, navigate to Setup > Bookings > Locations > select location > Detail tab and scroll down to the opening hours. Make any changes required, and click Save.
Note: The opening hours specified here can be overridden by what you open up in the calendar for special events or appointments.
Note: This does not take into account any post booking buffer times that are against any services. e.g. if you have a 1 hour lesson with a 30 min post booking buffer, and you have closing time at 5pm, to allow a one hour booking from 4-5pm you will need to open up an extra 2 × 15min slots from 5-5.30pm to cater for this post booking buffer.
Tip - bulk copying of schedules
Once you have a day or week set up that you're happy with, these can be bulk copied into future days/weeks. Please see the Copying your schedule article for more details.
Scheduling outside normal work hours
This allows you to open your schedule for any time slots that day (i.e. the full 24 hours is available) outside the normal work hours. e.g. 7am or 6pm appointments.
Steps
Navigate to the Bookings menu
Click the More link at the bottom of the time column
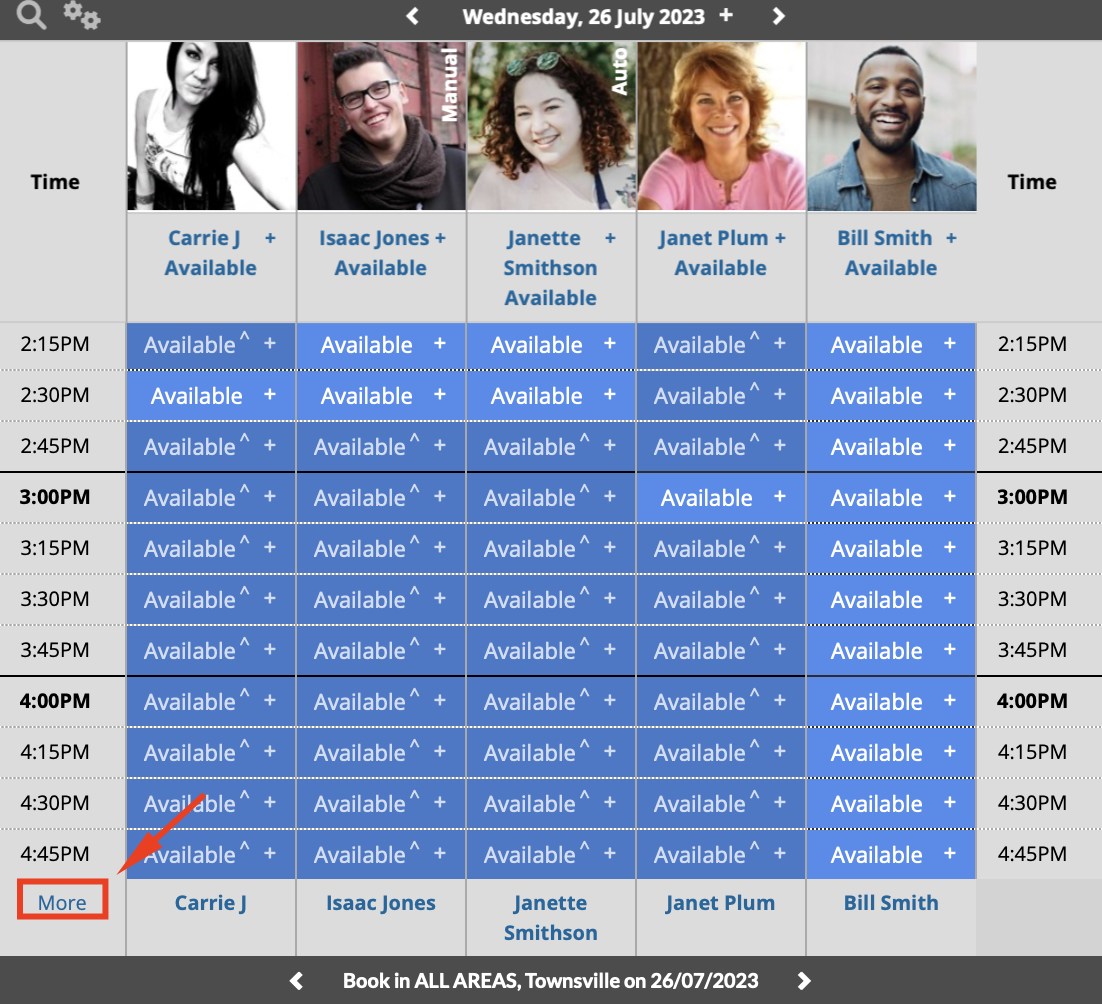
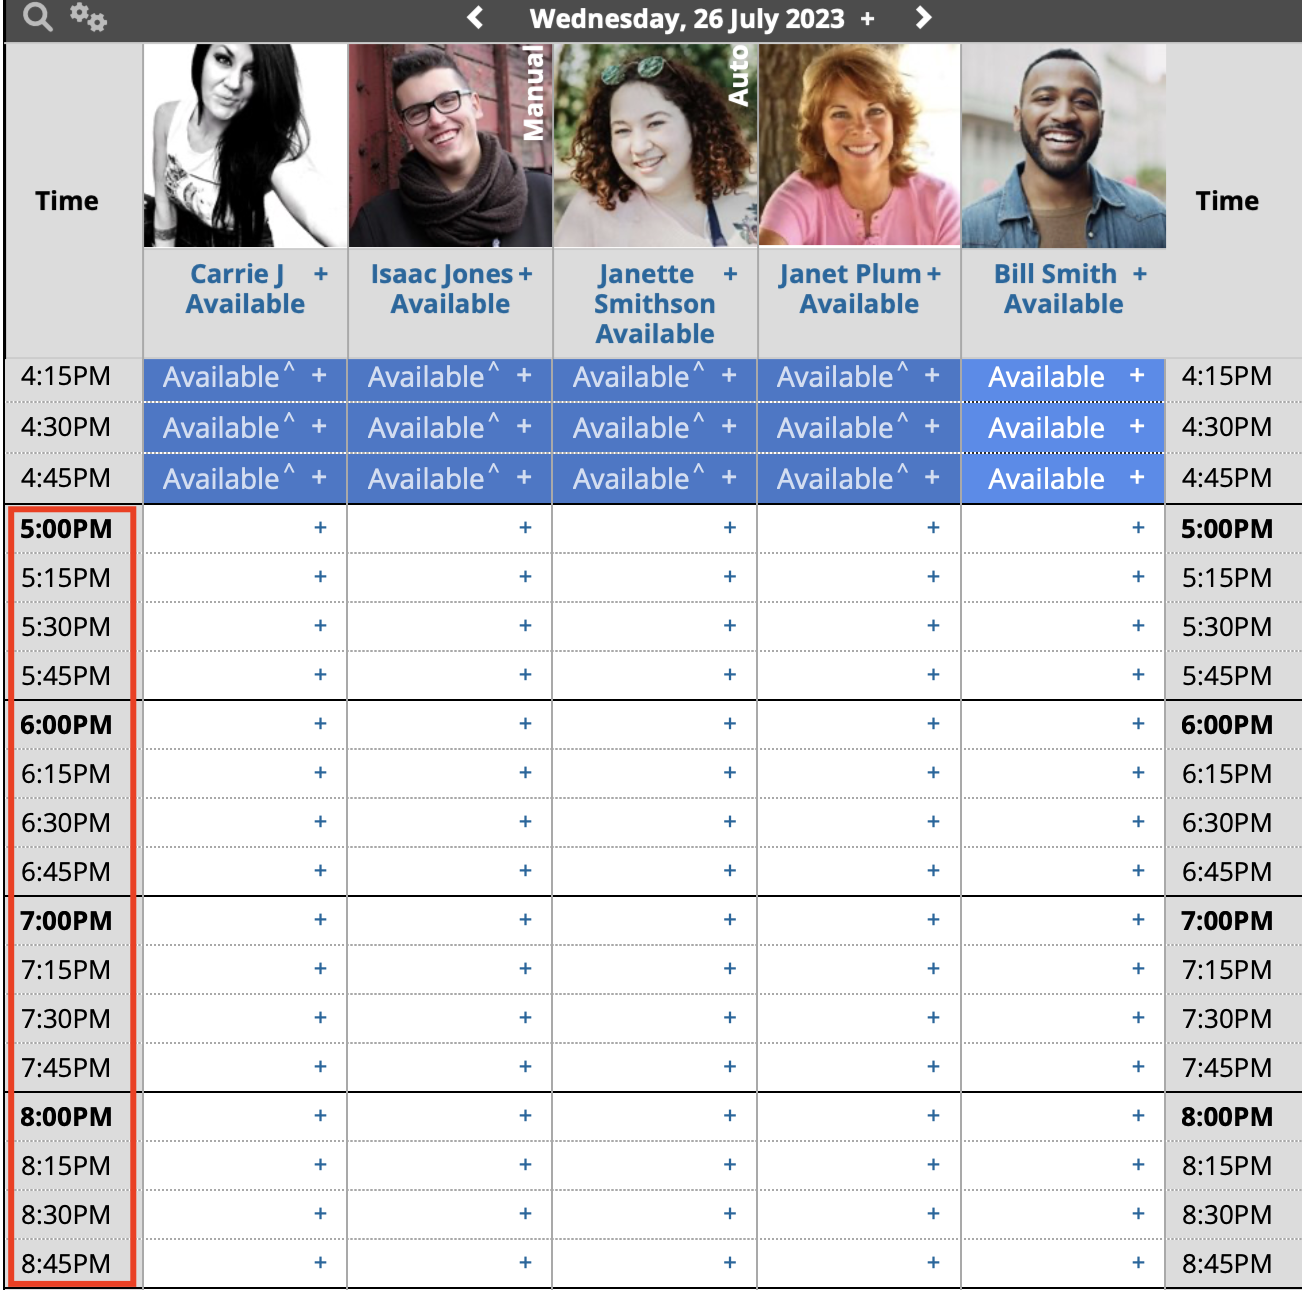
3. Scheduled slots for the full 24 hours of that day are now available, simply scroll up and down
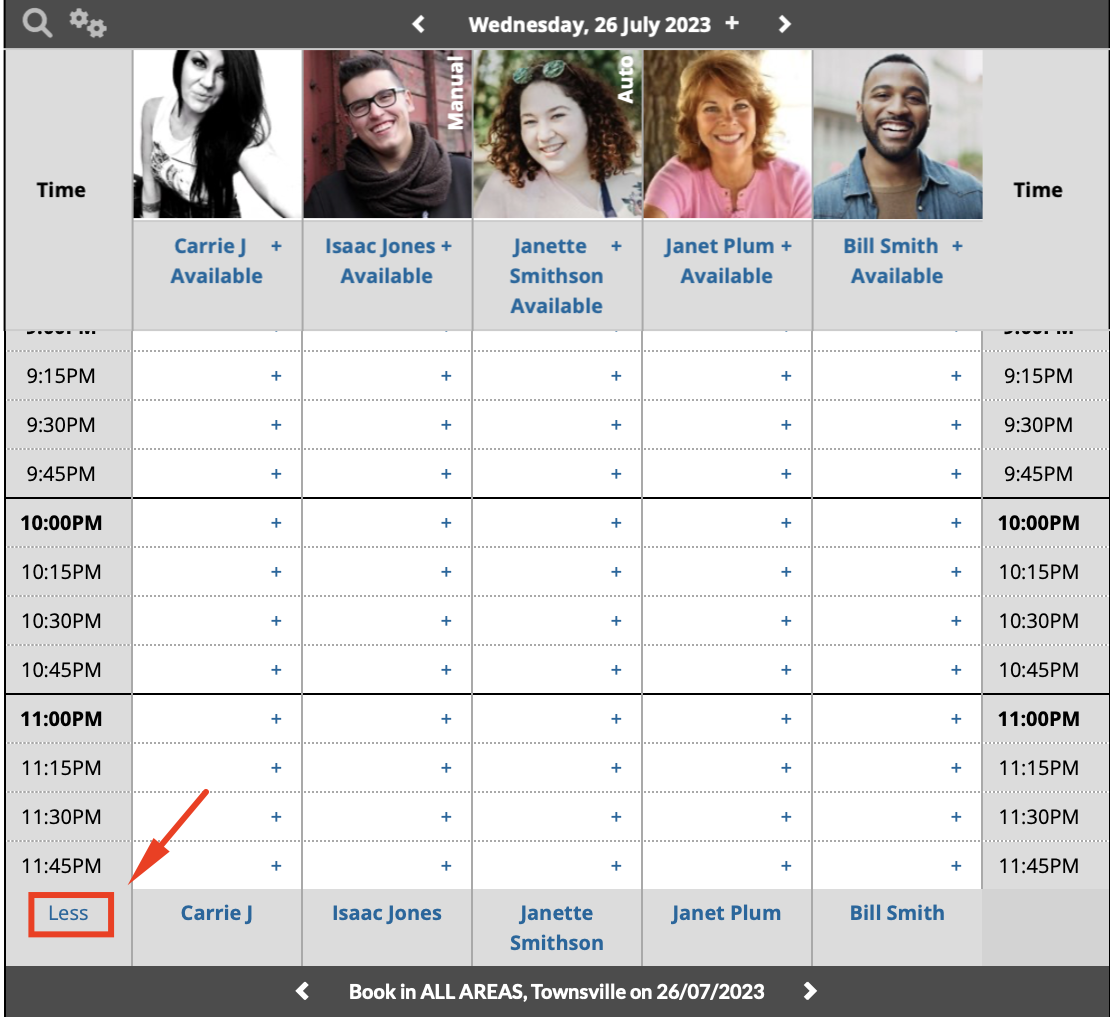
4. Click the Less link at the bottom of the time column, any appointments made in these new hours will appear in the calendar as it will scale appropriately
Clearing and blocking out your schedule
Please see the Clearing your schedule article for details about how you can quickly clear and block out your schedule. This is handy as you're setting up your schedule, or when unforeseen circumstances come up and you need to quickly change your availability.
