This guide will detail how to create staff members, including setting up their security level permissions, activating and resetting their login details, and publishing their details on your website and setting up their alerts and runsheets.
Staff members include those with booking calendars, and administrative staff who use the system but do not have calendars.
Staff terminology
Depending on what industry you are in your staff may be referred to as "Trainers", "Instructors" or "Practitioners" etc, and this terminology will be reflected in the system.
Creating the staff member
Steps
Navigate to Setup > Accounts & Security > Staff
Click Add New User
Enter the staff details. At a minium you will need to add First Name, Last Name, Email and Phone Number.
Click Save
Note
The email you enter will be used for staff to login to the system. An email can only be used once.
If you would like to add a new email for your domain AND we are hosting your email, you must contact support to activate the email.
Setting the staff security level
This will control the level of access they have to the system. To modify the security level options you have available, please see: Security & Permissions
Steps
Under Role Type chose their role
Click Save

Activating the staff login
You will need to create a login password to activate the account. You can do this via 2 ways:
Steps
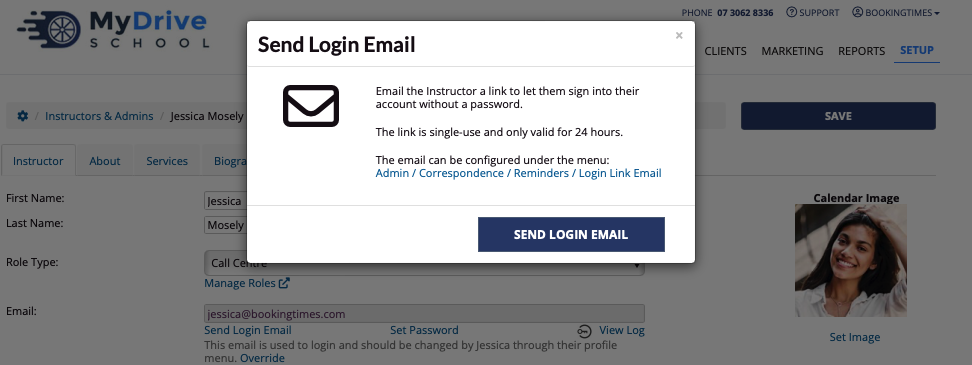
Click on Send login email or Set Password link.
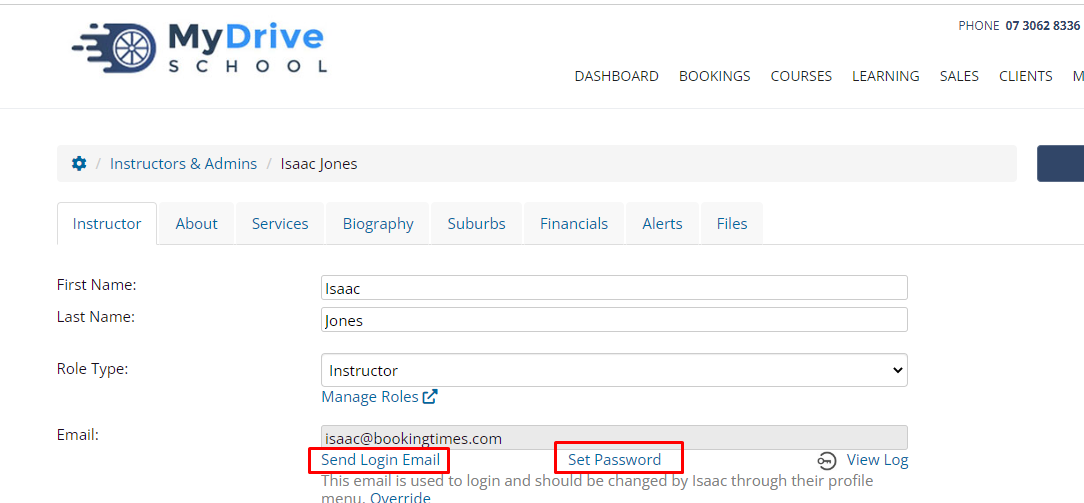
Clicking Send Login Email will send a login link to the staff member's email address. If the staff member doesn't have a login account yet, it will also send them to set a New Password.
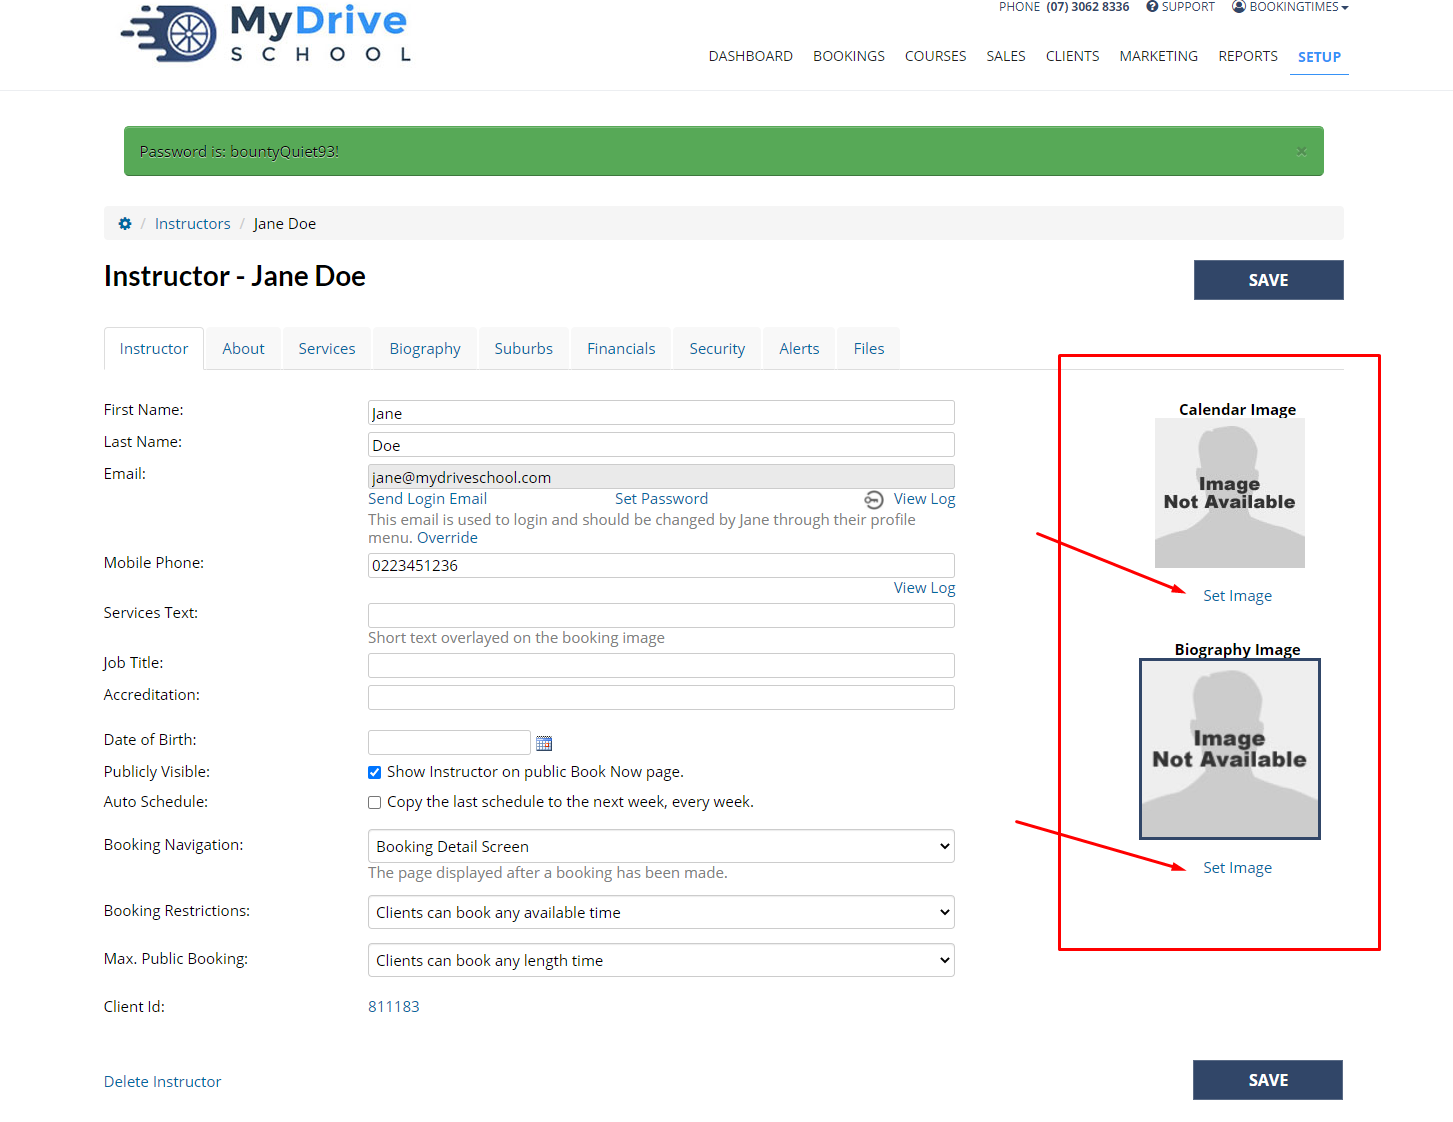
Clicking Set Password allows you to set up a new password, including the option to auto generate a password. Once set ensure you advise the staff member of the new password.

Publishing a staff biography
You can choose if you’d like to display the staff member and biography on your website. It's a good idea to introduce your staff to your potential clients and highlight their experience and achievements.
Image sizes
Please note the following suggested image sizes. To resize your images please use a tool such as Photoshop or any of the available online tools such as Canva.
Calendar image: 150px wide x 150px high
Biography image: 250px wide (but can be longer than 250px)
Steps
Under Calendar image click Set Image and upload your picture - this will display their image on the booking calendar
Under Biography image click Set Image and upload your picture - this will display their image on the about page
Click on the Biography tab at the top of the staff profile
Enter text for the biography
Click the Show biography on the Instructors page checkbox
Note: to show these biographies on a public page on your website (e.g. About, Instructors menu item) please see this article: Menu layout
Click Save

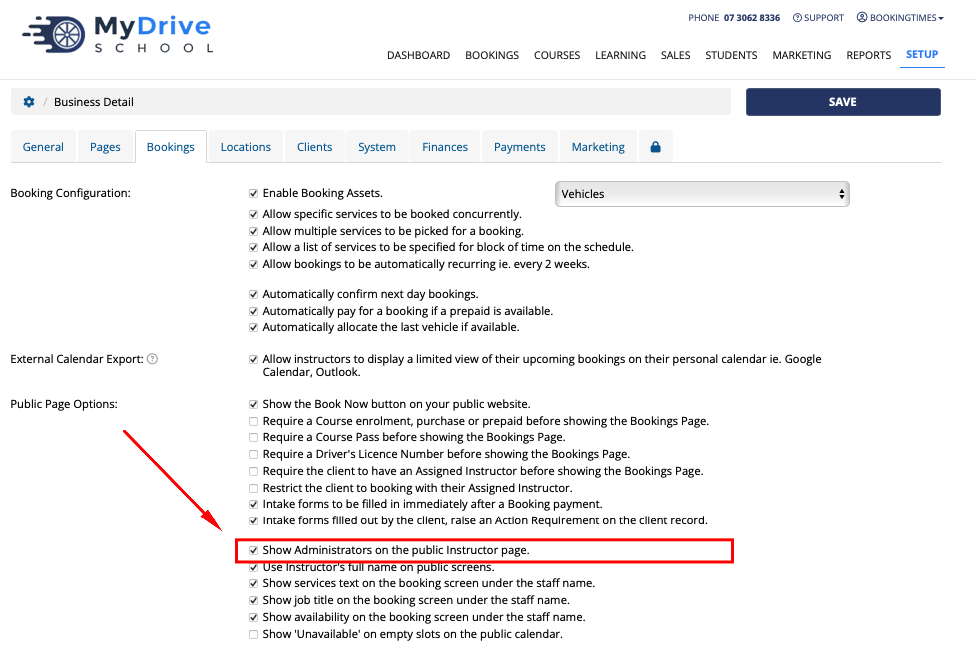
If you have administrative staff who use the system but do not have calendars and you want their biography to appear, ensure you also select this configuration option also via Setup > System Settings > Business Detail > Bookings tab
Select Show Administrators on the public Instructor page
Click Save
More options
These are the basic settings for creating a staff member. There are a variety of other options available:
Set up your staff member with services and a calendar: Setting staff up with a calendar and services
Set up their reminders/alerts and runsheets based on booking activity: Sending staff alerts and runsheets
Learn more about the staff profile: Staff overview