BookingTimes allows you to collect and display testimonials, including Google reviews. You'll want to collect your client feedback so that people who are considering your business can see what others think.
An important feature is that you get to control what testimonials and reviews will be publicly visible, and they can be assigned to a particular staff member.
This article will detail how to ask clients for their feedback and approve feedback, as well as manually add and delete feedback. We will also cover how to incorporate Google reviews.
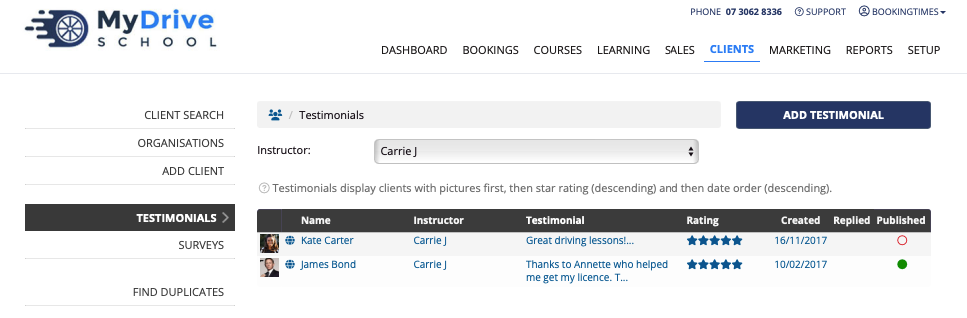
BookingTimes user view of testimonials, can be filtered by staff member
When Testimonials are assigned to a staff member, their testimonials will appear publicly (if published) against that staff member on the website.
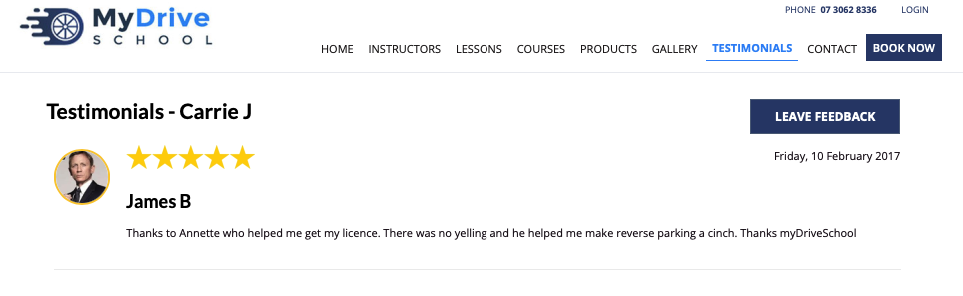
Public view of a staff member's testimonial
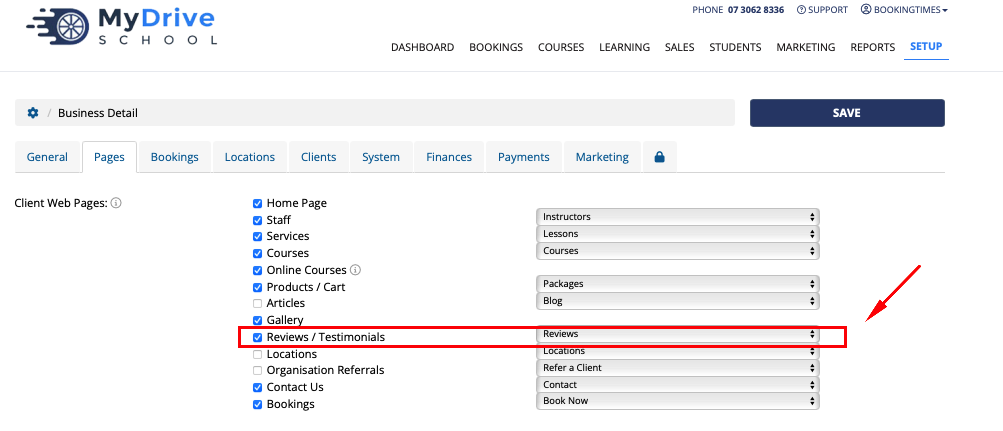
Publish Testimonials/Review page
To publish your Testimonials page go to
Setup > System Settings > Business Detail > Pages tab
Select Testimonials, set your preferred terminology e.g Testimonials, Reviews
Click Save
Asking clients for feedback
You can ask all your customers for their feedback by sending them a message with a link to your testimonials page either via reminders or sending manually via an email template.
Steps
Navigate to Setup > Correspondence > Reminders
Select the relevant correspondence type (such as the Booking Invoice or Product Sale) where you want to have a link to your feedback.

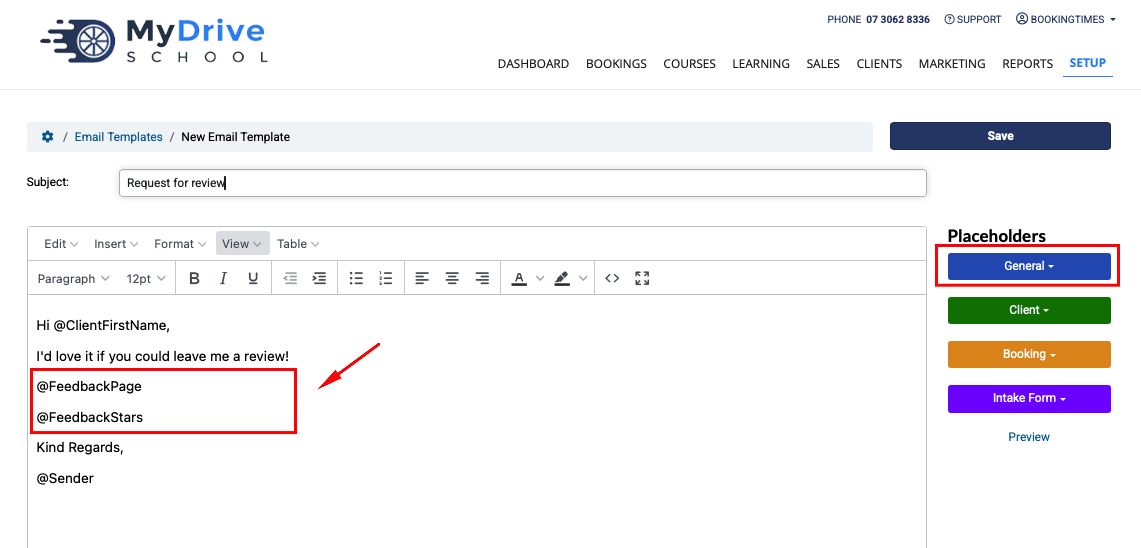
Add the @FeedbackPage and/or @FeedbackStars placeholders to the email text (these automatically add a link to your feedback page).
Note a @GoogleReviewButton placeholder is available if you have the SEO+ subscription enabled, see the section Google Reviews further below.
Click on the Preview button to preview the email
Click on the Save button to save your updates
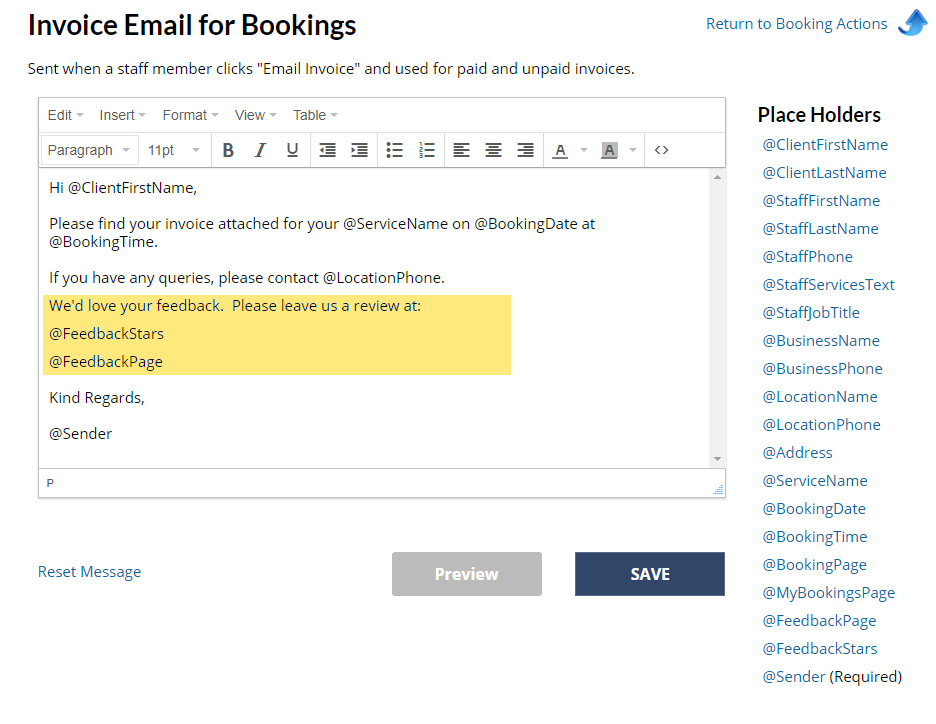
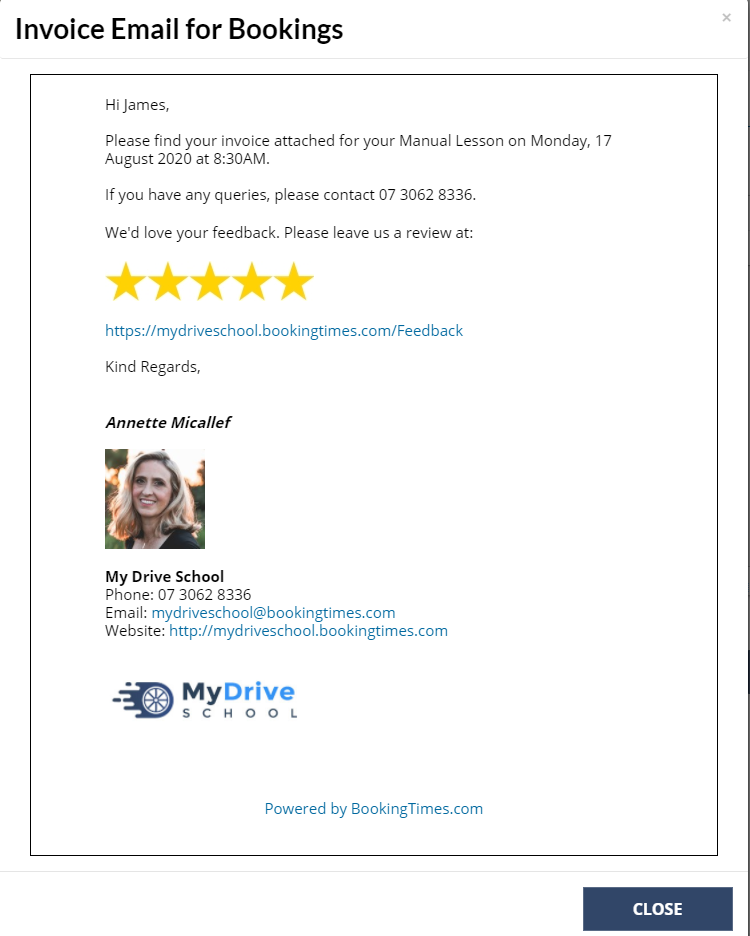
This is an example of the correspondence the client sees. They will now have the option to click on these links to open the feedback page everytime an invoice is sent out:
Requesting feedback via an Email Template
These steps outline how to do this using the reminders, but you can also request this via Email templates using the same feedback placeholders available under the General Placeholders category.
Approving client feedback
Once the client has added their feedback, the system will send you an email of the feedback content and an approval link to publish it.
Alternatively, you can see all the approved and pending reviews on your testimonial page.
Steps
Navigate to Marketing menu
Select Reviews tab
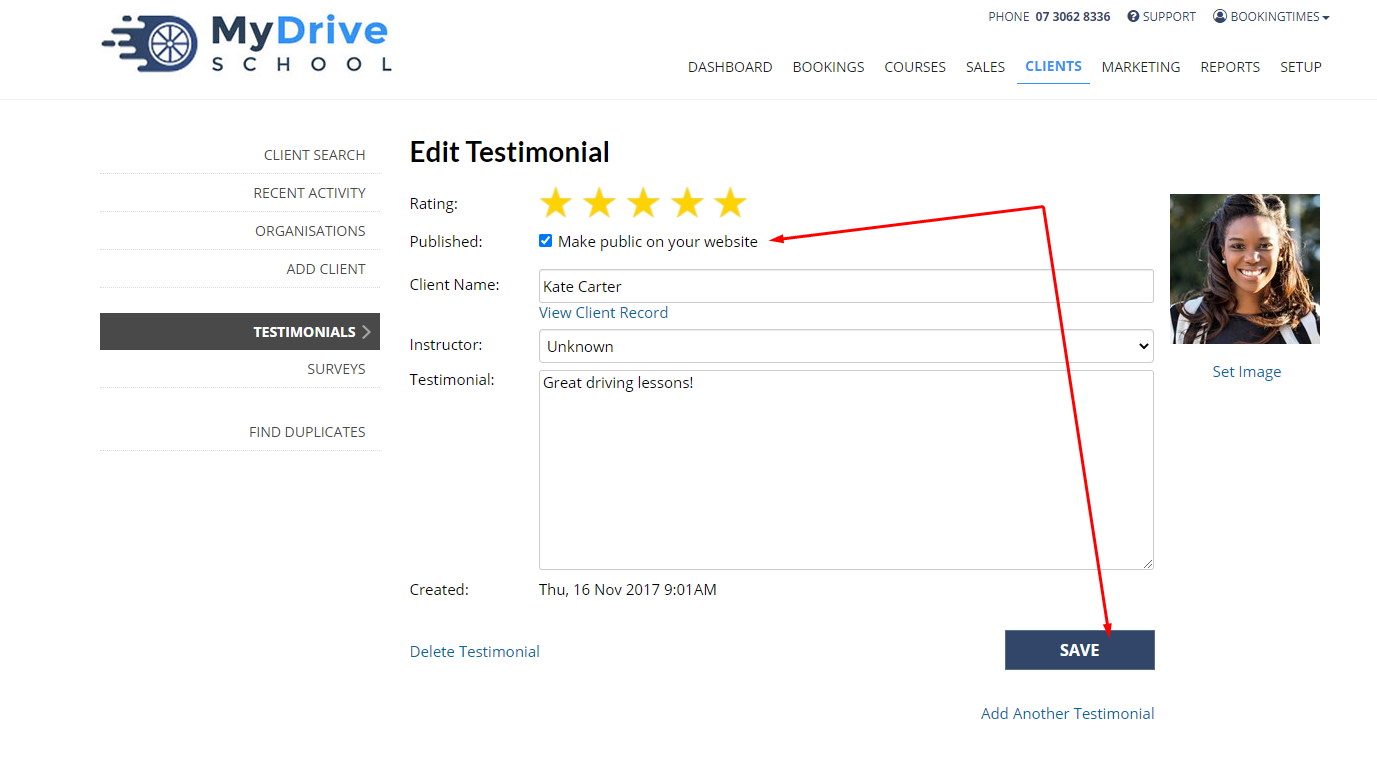
Select the relevant testimonial (click any of the columns)
Check Make public on your website
Click Save
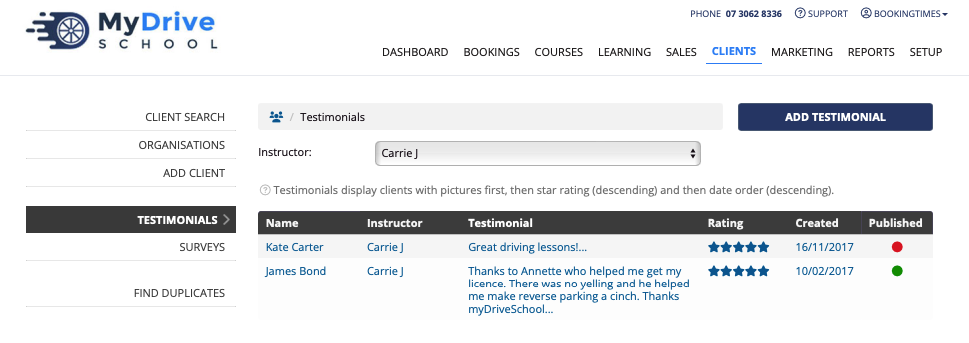
The testimonial is now marked as Published and has a green dot to indicate this
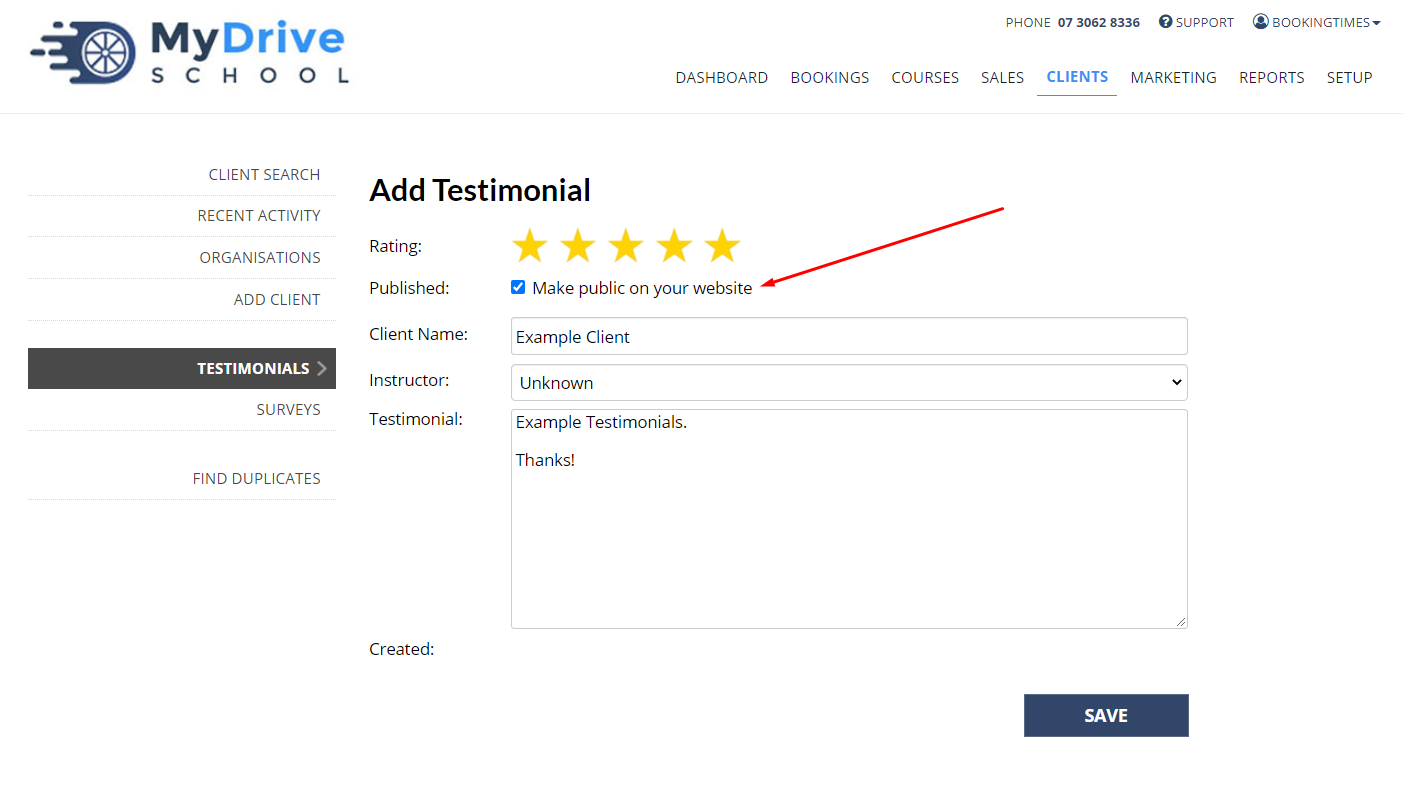
Manually adding testimonials
Steps
Navigate to Marketing menu
Select Review tab
Click Add Testimonials (or Add Review) button
Enter testimonial details
Ensure "Make public on my website is checked"
Click Save
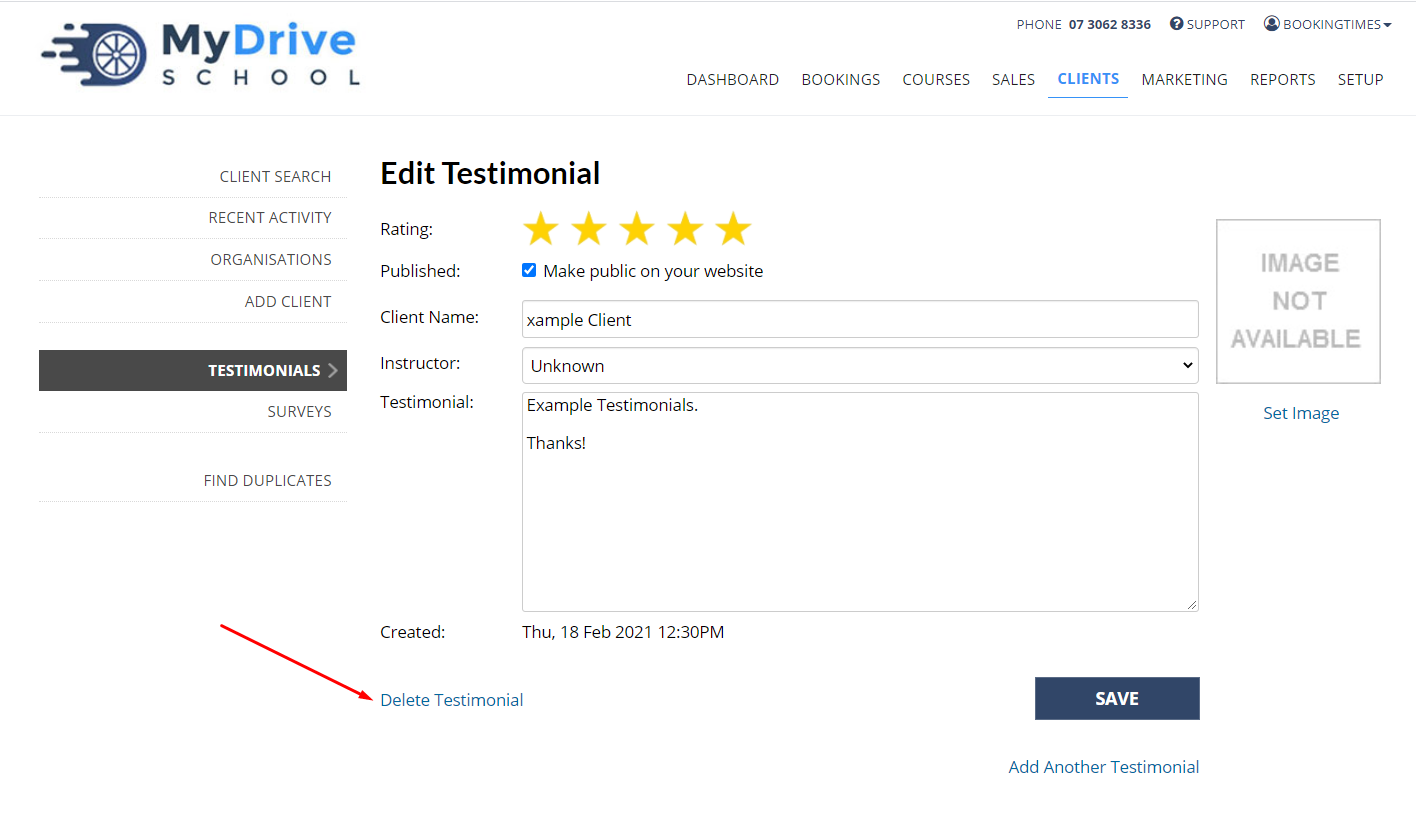
Deleting testimonials
Steps
Navigate to Marketing menu
Select Review tab
Select the relevant testimonial
Click Delete Testimonial
Sorting testimonials
Testimonials have a default sort order which cannot be changed. They are sorted by:
Pictured testimonials first (i.e. where clients have a Facebook login)
Then sorted by star rating (descending order - highest star rating first)
Then sorted by date (descending order - most recent date first)
Google reviews
How to connect
Your website must be connected to Google Tools (via the Marketing menu). Please refer to the following article on how to connect: Connect to Google Analytics.
Once connected, 5 of your Google reviews will be synchronised with your other testimonials (if you don’t have an SEO Data Subscription).
SEO Data Subscription
If you’d like all of your Google reviews to be synchronised with your testimonials, and also allow you to reply directly to those Google reviews from within your system, you will need to purchase an SEO Data Subscription.
For more details, price and how to activate it, go to the Marketing menu > SEO+.
How to reply to reviews
Replying to Google reviews can be a key part of your website's SEO strategy. If you have an SEO+ Data Subscription, you can respond to your Google reviews directly from your website via Clients > Testimonials. The Replied column will toggle green appropriately to show which ones have been replied to.
Google reviews without a reply are displayed on your Dashboard under the Action tab.
How to ask for Google reviews
If Google reviews are connected, a @GoogleReviewButton placeholder to ask for a Google review can be added to both Newsletters and Reminders.
You can also create a link directly from your Google Business account. Google business is all managed from Chrome Google search, therefore if you search your own business (and are a manager) you will see the below image, then select the "Ask for reviews" link:

A review link will appear that you can copy and send to your clients, create a QR code from, or share directly on social media:
