This video and article will give you a quick introduction to creating a booking from a BookingTimes admin perspective. And it also covers interpreting the helpful symbols on the calendar - which let you know the status of your booking and schedule slots.
Making a booking
This outlines how to make a booking from a BookingTimes admin perspective. Please note when a booking is made in this way, there are 2 options on how to take payment:
You email the client an invoice which will allow them to pay (or the client can log into their account and pay there), or
Take payment on behalf of the client
Note
You must have open schedule slots to make a booking. Refer to the opening schedule slots article for details on how to do this if you haven't already.
Steps
Navigate to the Bookings menu
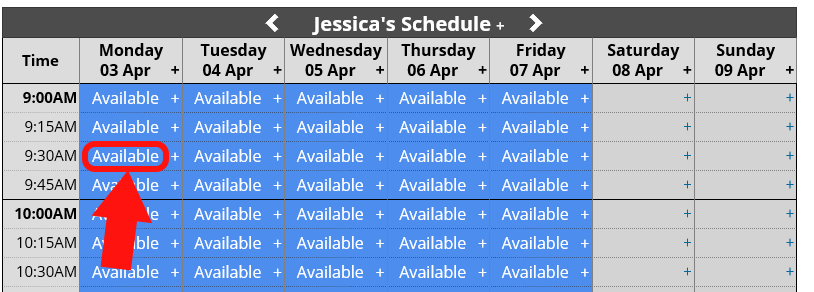
Click on Available in the relevant schedule slot
Select Service type and length
Click Confirm

Search for an existing client OR
Add a new client if the client does not already exist (optional)
.png)
Enter booking address (optional for services where travel is required)
Click Make Booking button

You will now see the booking details screen. There are now 2 options to take payment:
EMAIL INVOICE: click on the Email Invoice link in the left hand menu. The invoice will contain a Pay Now button so the client can pay directly from there.

The email that is sent is configured under Setup > Correspondence > Reminders > Booking Invoice + attachment
Please note if they log into their account they will also see this booking and also be able to pay the booking from there - please refer them to the following article Managing your bookings and purchases
TAKE PAYMENT: click on the Pay Now button and apply the appropriate payment.

The booking will now appear in the calendar:
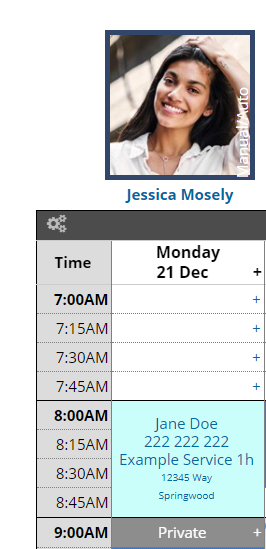
A completed booking
Tip when adding new clients
You should always try and get a client's address and mobile number. This will ensure they get booking reminders and you can email them their invoices.
Introduction to booking symbols
There are certain symbols which may show on your schedule slots or on your bookings.
"^" on a schedule slot means that there's not enough time for any service in that schedule slot.
"Private" greyed out schedule slots after a booking are called "post-booking buffers". They can be set up against each service and are used to automatically block out your availability after a booking so you have time to travel or prepare for your next booking. Read about how to configure post-booking buffers in the following article: Adding a Service.

Also see Understanding booking symbols to learn about other symbols which may appear on your calendar.