Registering your website to Google is a crucial step that we highly recommend you do once your website is live if you’d like to use Google in your marketing strategy.
This process includes registering your website with Google to ensure you appear in Google’s search results. You can trigger this directly from within the system itself via a simple step by step guided process and your Google account which this article will outline, including some recommended next steps.
Being connected to Google also allows you to take advantage of invaluable information that can feed into your marketing strategy. Some of the benefits include:
Automatic resubmissions of your SiteMap so you appear in Google’s search results
Report of your daily website visitors
Retrieval of your Top Search Queries, Top Keywords & Top Search Pages
Tracking your Citation growth each month
At a glance, see which Citations contain missing or incorrect information that are hurting your search engine rank
Google Account required
You must have a Google Account set up in order to complete this process.
If you have multiple email addresses set up with Google, please ensure you use the correct Google Account email address for this process. e.g. if you have already set up a Google Business Profile under a particular email address. If you get navigated to Google during the connect process, ensure that you are logged in with the SAME Google Account as you initiated this process with.
Also ensure that your Google Account has sufficient permissions set up. To check your permissions please refer to the Google Business Profile article.
Connecting to Google
This guided process will step you through how to register with Google, which includes connecting or setting up Google Analytics, Google Search Console and your Google Business Profile.
Steps
Navigate to the Dashboard or Marketing menu
Click on Register Website with Google

Click Connect to begin the process

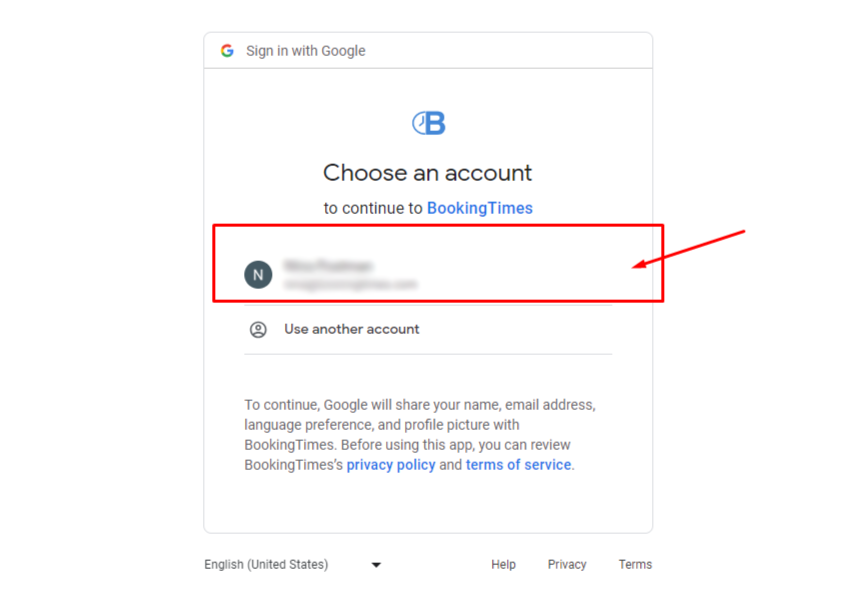
Choose your Google account. Ensure you’ve selected the account that you have associated with your business (and if you already have a Google Business Profile set up ensure you’re using this same Google account).
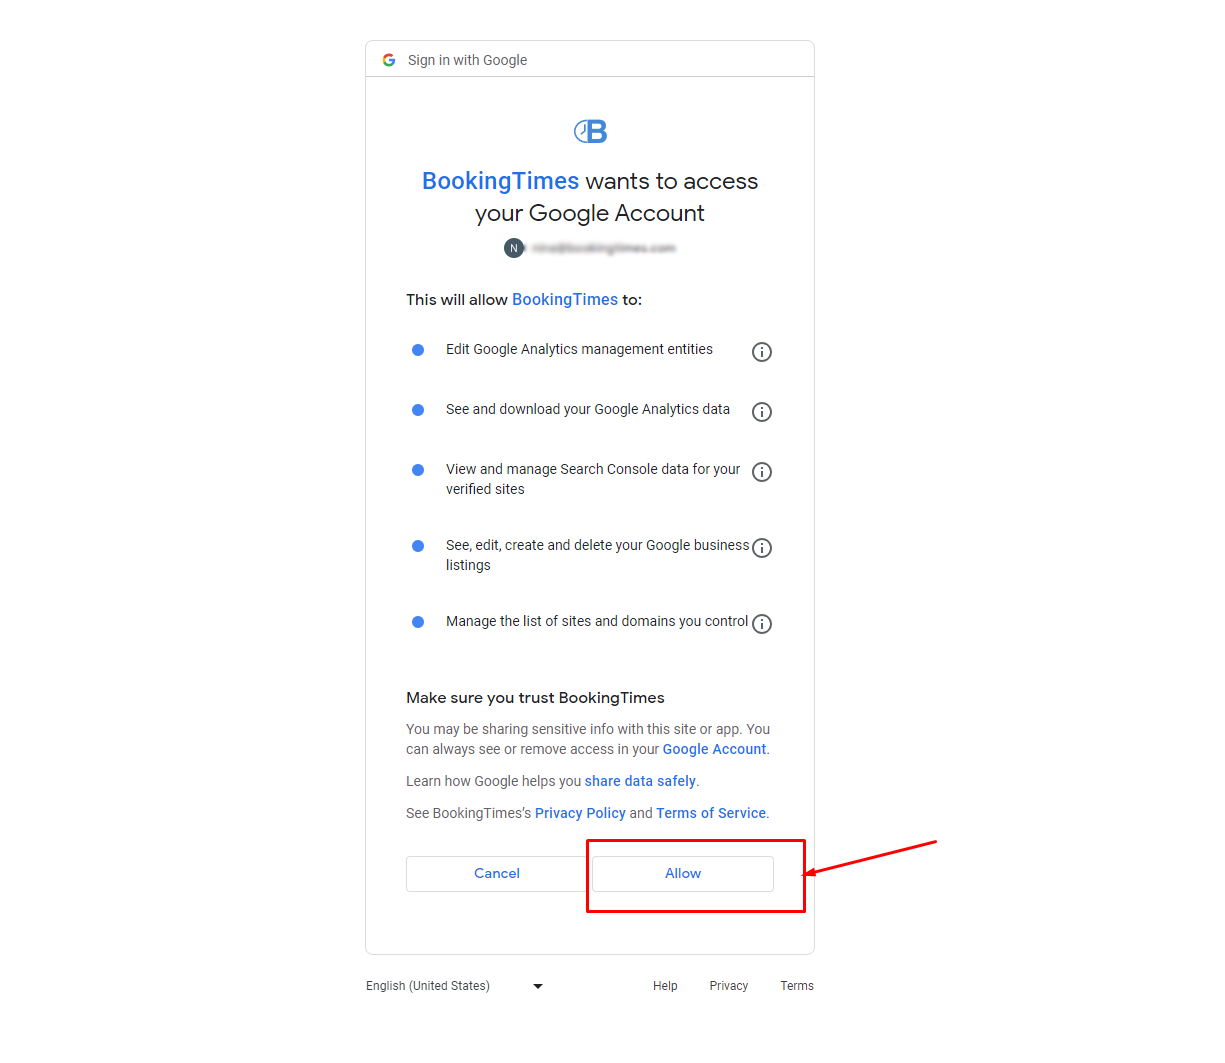
Click Allow to allow your BookingTimes website access to your Google Account
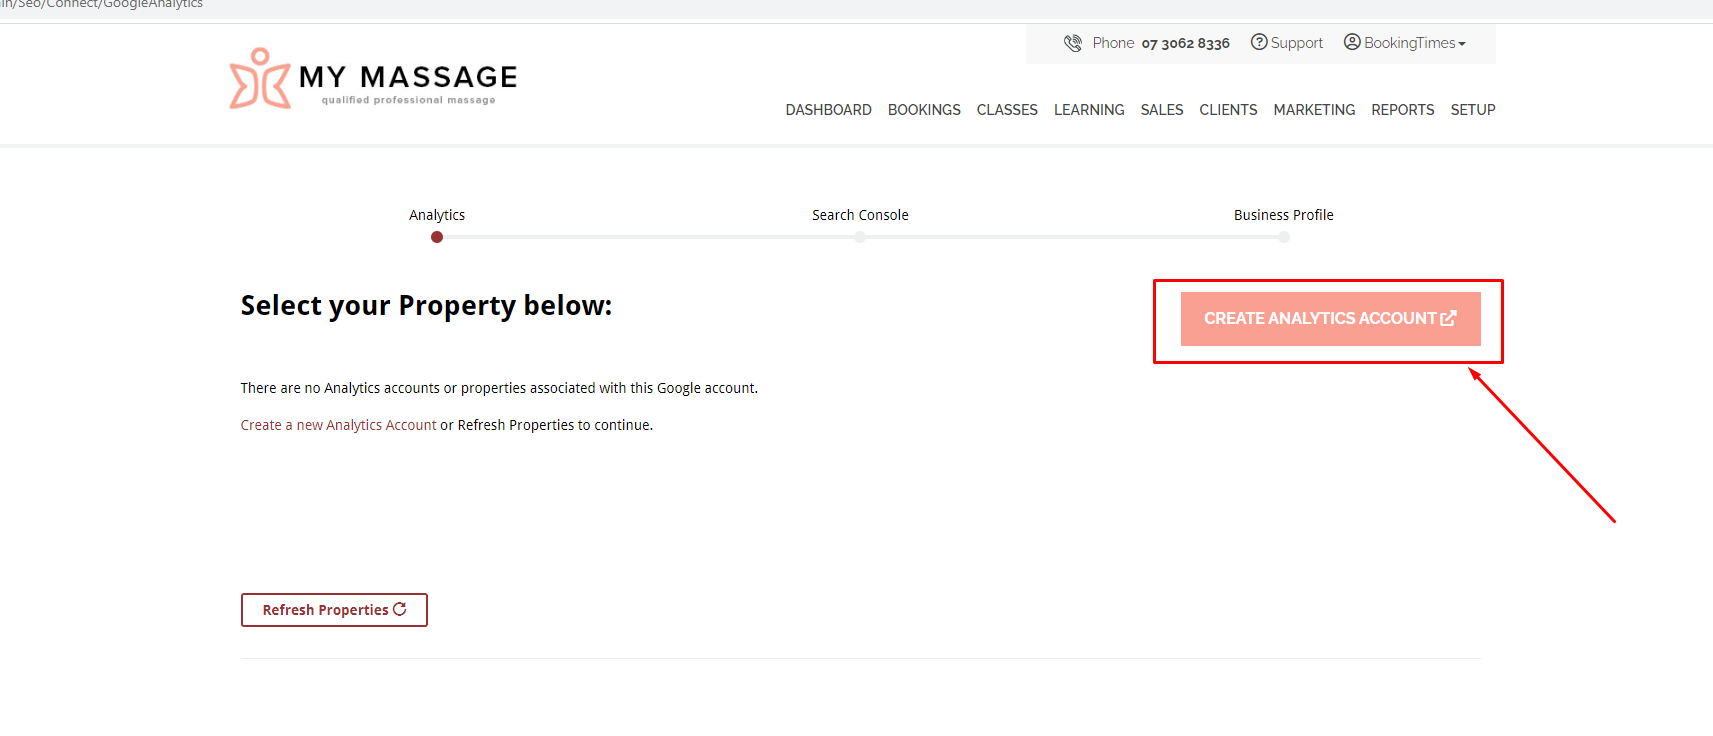
If you don't have any existing Google Analytics properties, click Create analytics account button. This will open a new browser tab and take you onto a Google website to create a Google Analytics account for you. If you do have an existing property, simply click Connect next to it and skip the below steps that take you into Google to create this property and move onto the Search Console section.
Note: a property is simply a generic term for a website that you have added to your Google Analytics account so just name it as your business name.
Note
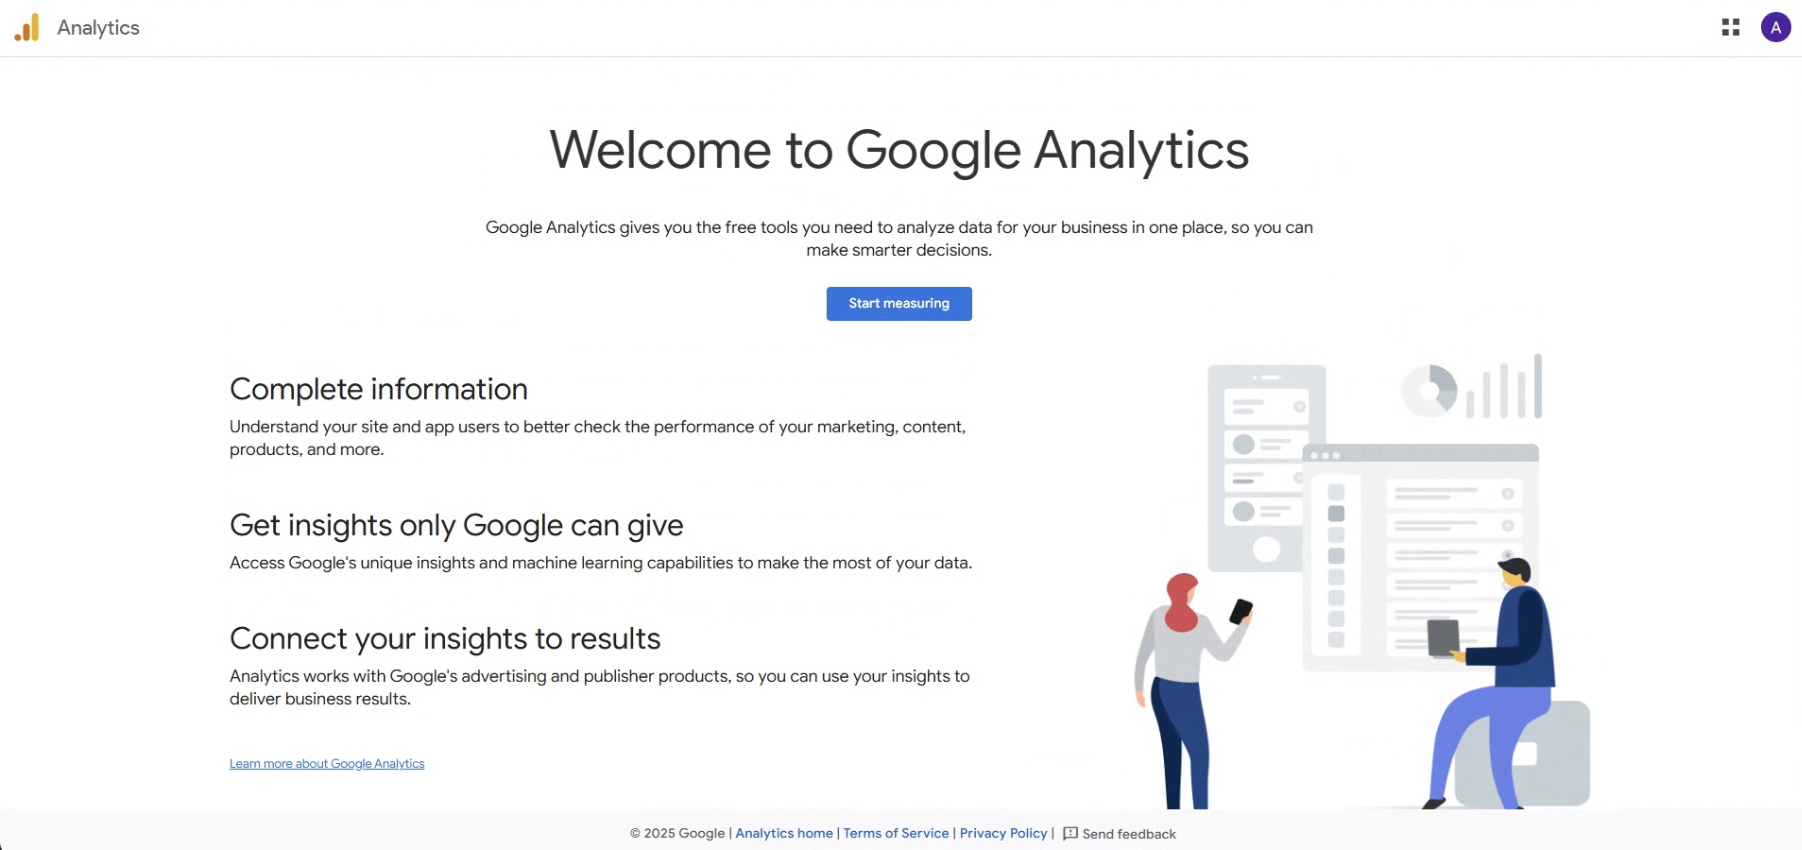
This will open a new browser tab and take you onto a Google website to create a Google Analytics account for you. Ensure you leave your BookingTimes tab open in your browser as you will return to it once you’ve created your Google Analytics account.
The following steps show you how to create and set up a new Google Analytics property within Google if you don’t already have one - otherwise please skip these specific Google steps :
IMPORTANT: Ensure you are logged in with the SAME Google Account in your browser as you initiated this process with by clicking your account bubble icon in the top right hand corner of the screen, and select the correct account if needed.
Click on Start Measuring button
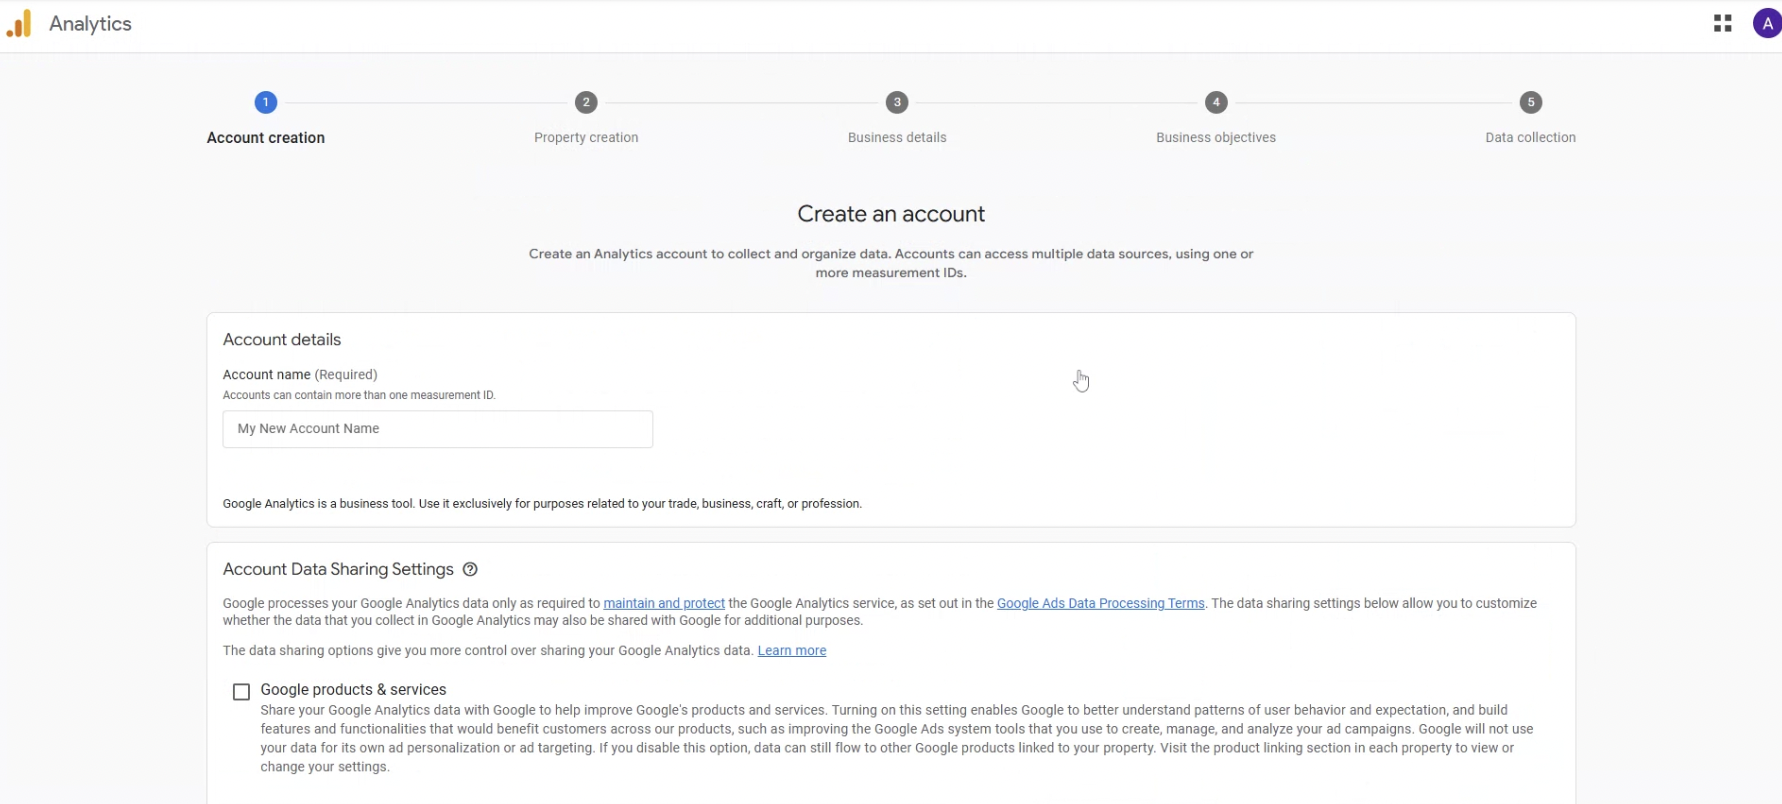
Enter in an Account name. e.g. My Business Name. Select your desired the account data sharing settings and click Next button
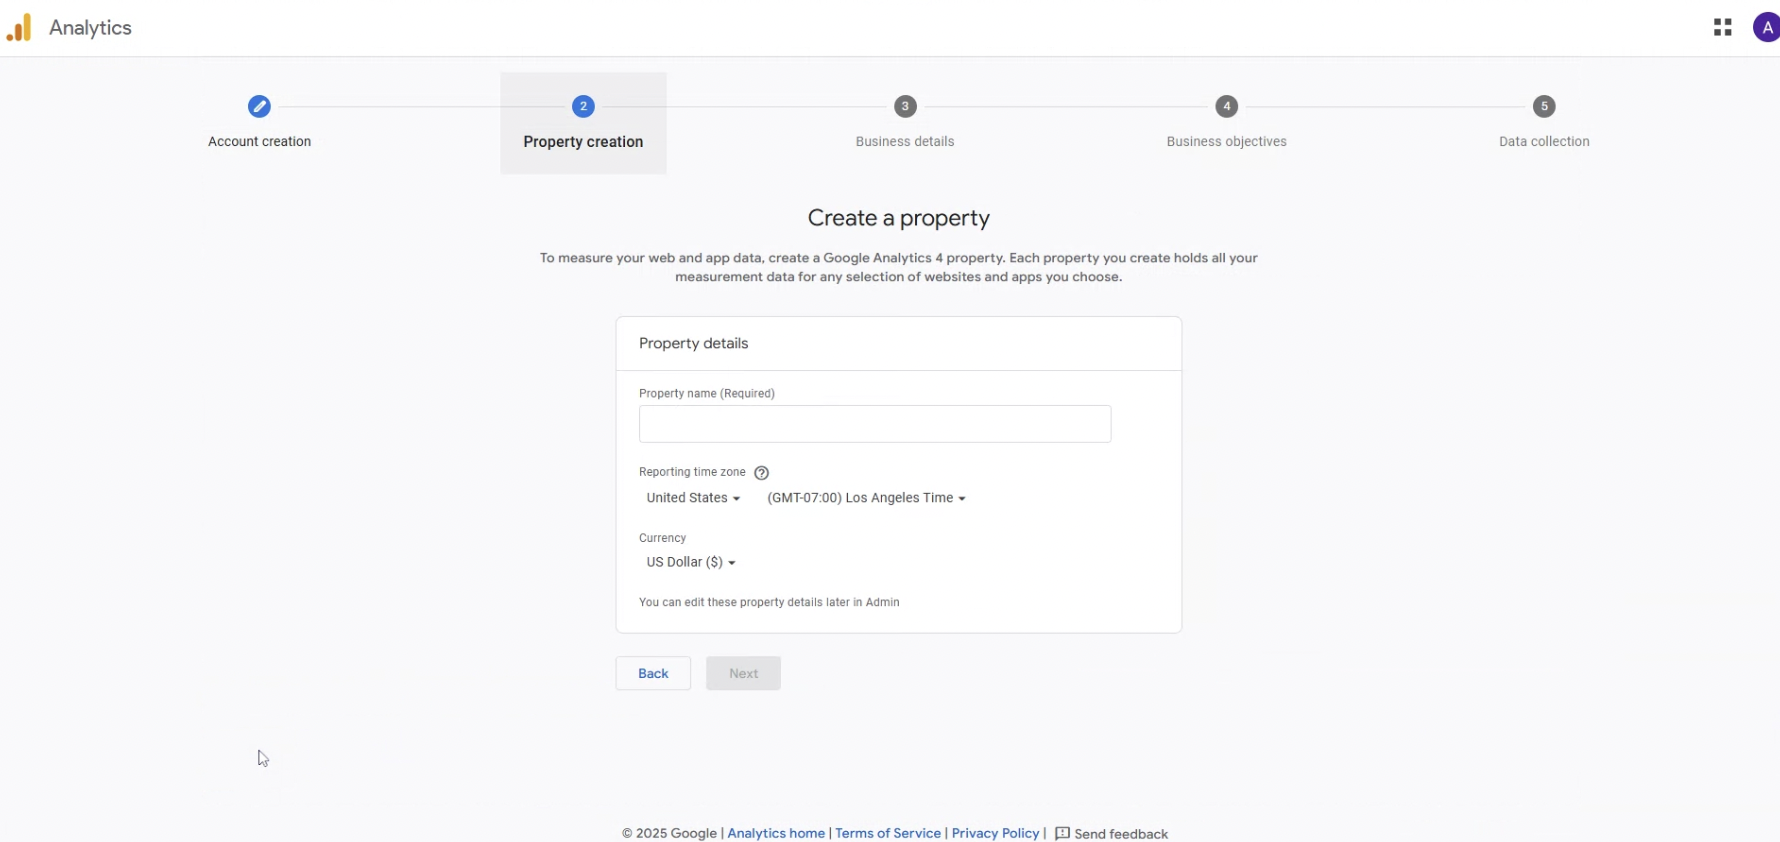
Enter in a Property name. e.g. My Business Name. Set the appropriated Reporting time zone and currency and click Next button
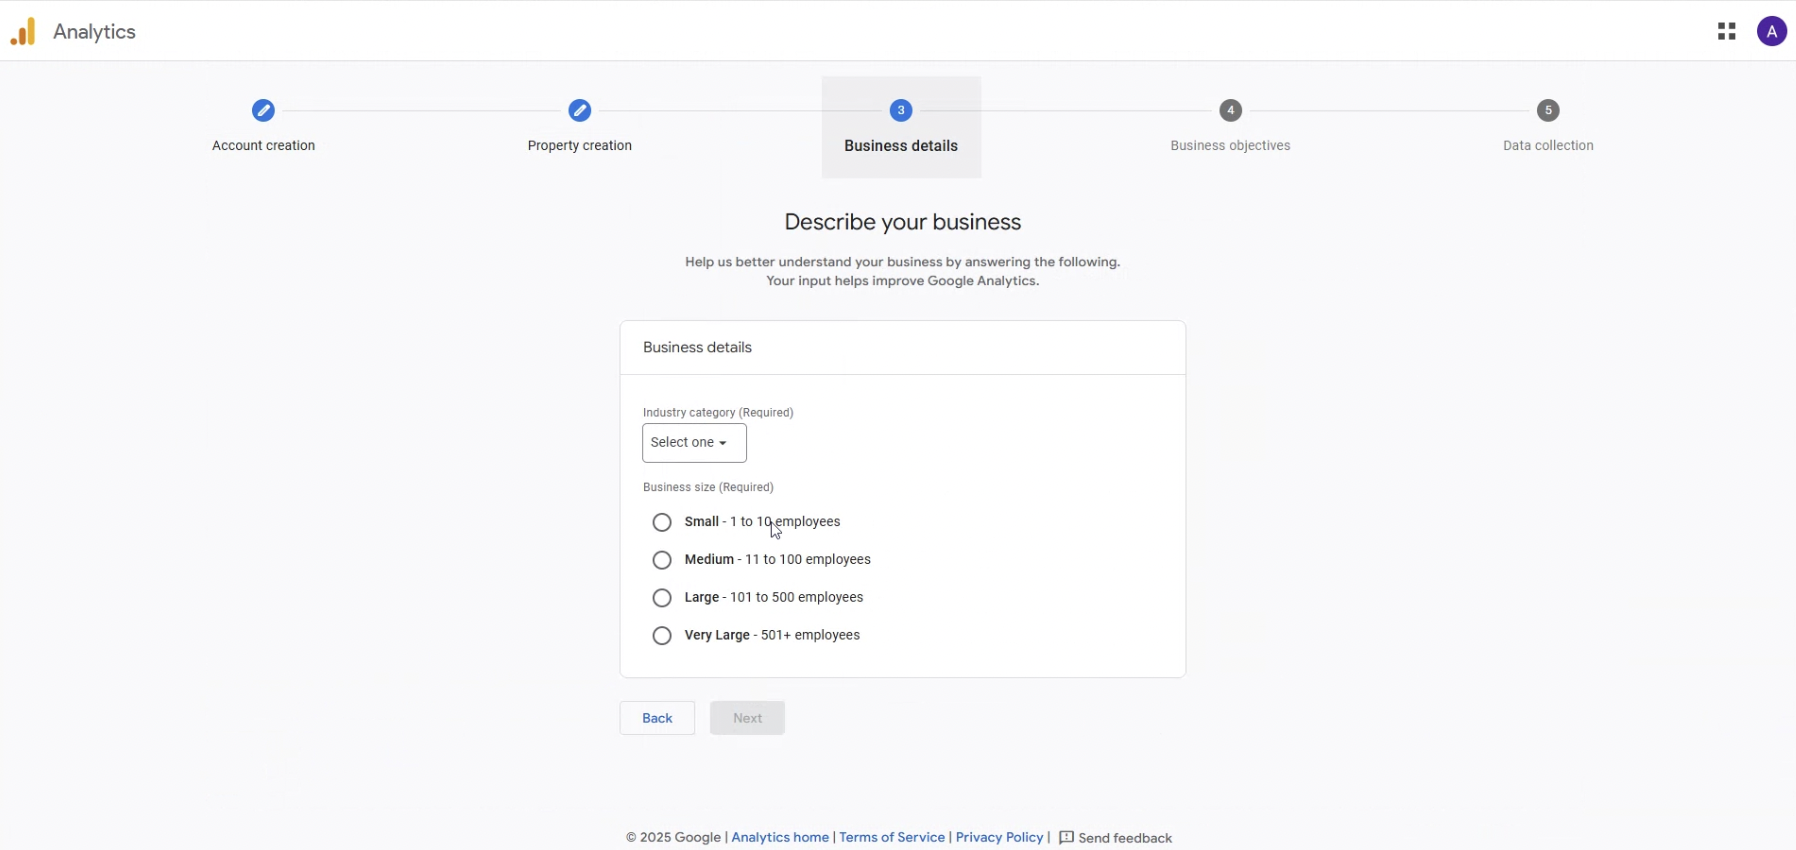
Select your Industry category. e.g. Jobs and education. Select your Business size and click Next button.
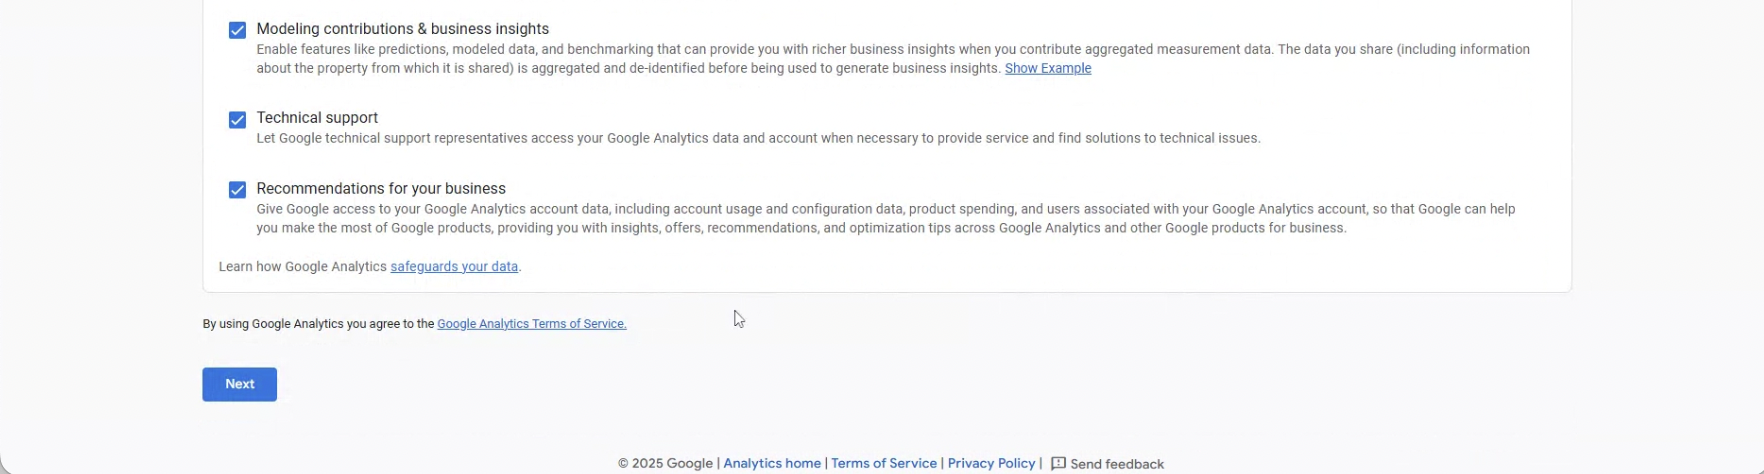
Select your Business Objectives (note if you select ‘Other’ at the bottom it will uncheck all the top ones). Click Create button.


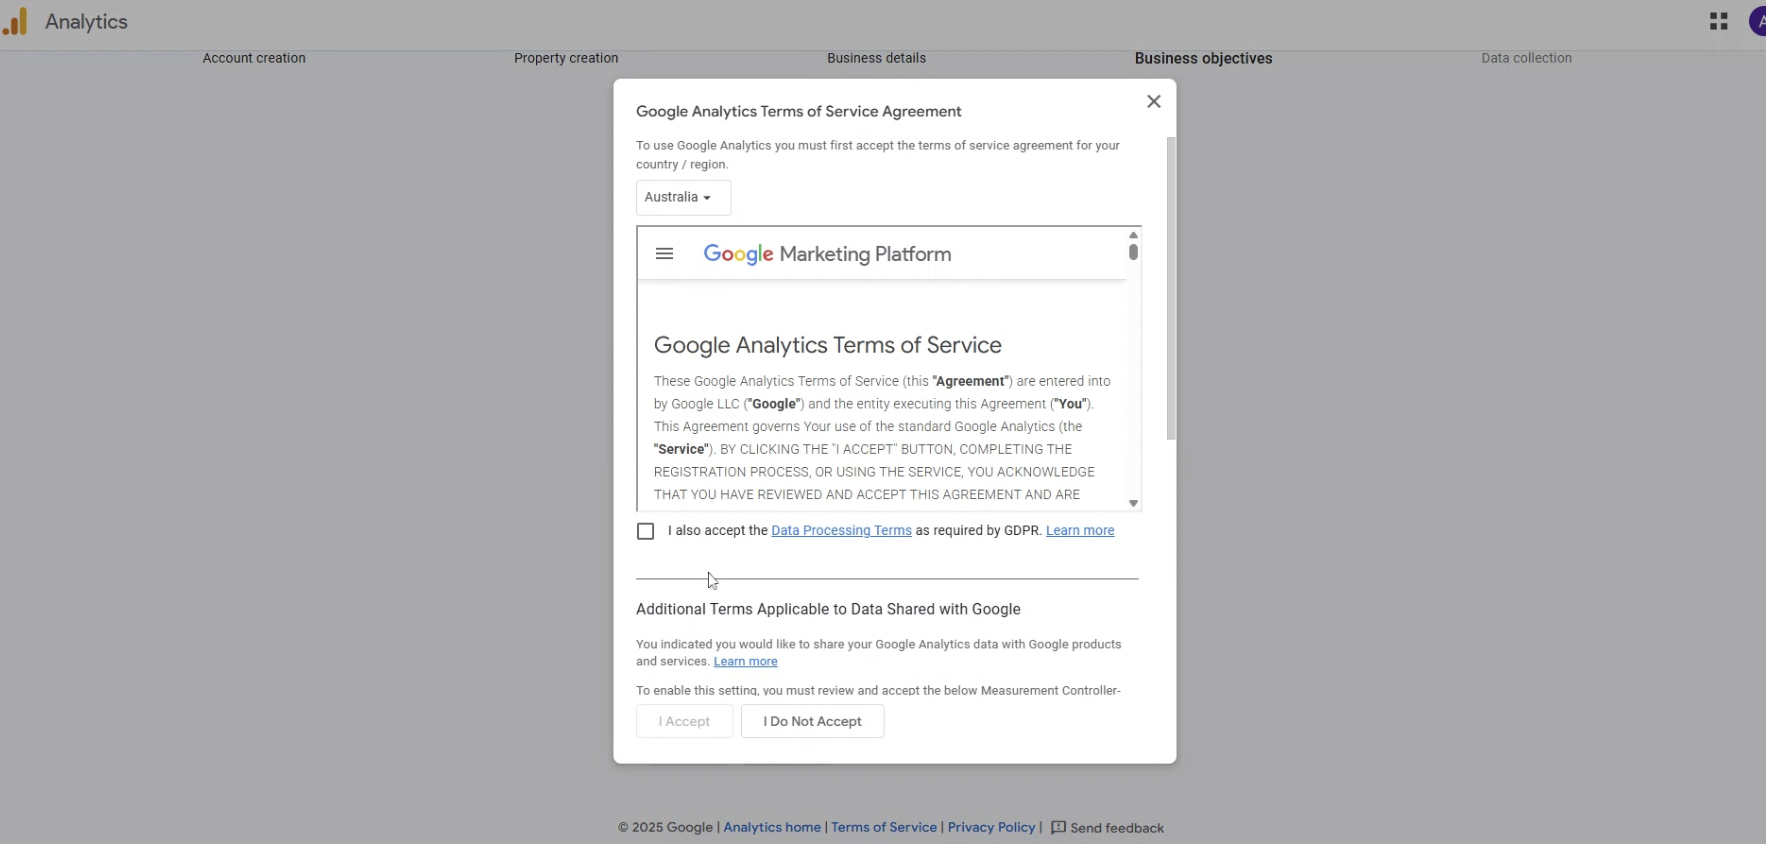
Select the “I also accept…” checkbox, and then click the I Accept button
Select Web as the platform

Add in your website address, and a Stream name. e.g My Business Name
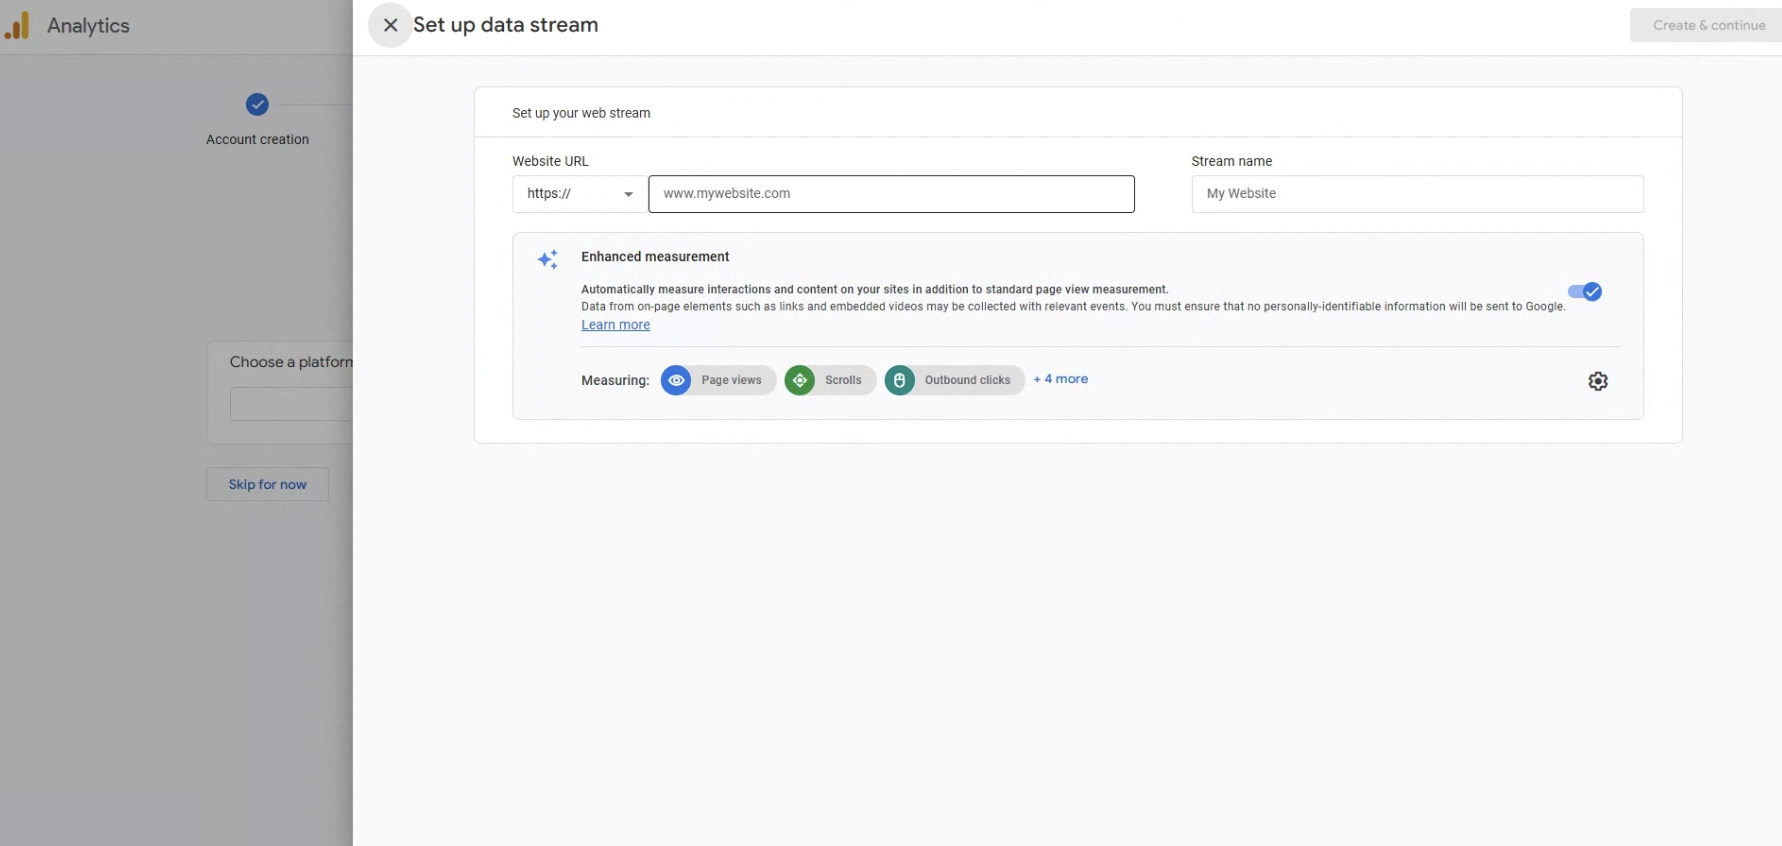
Click Create & continue button at the top of the screen

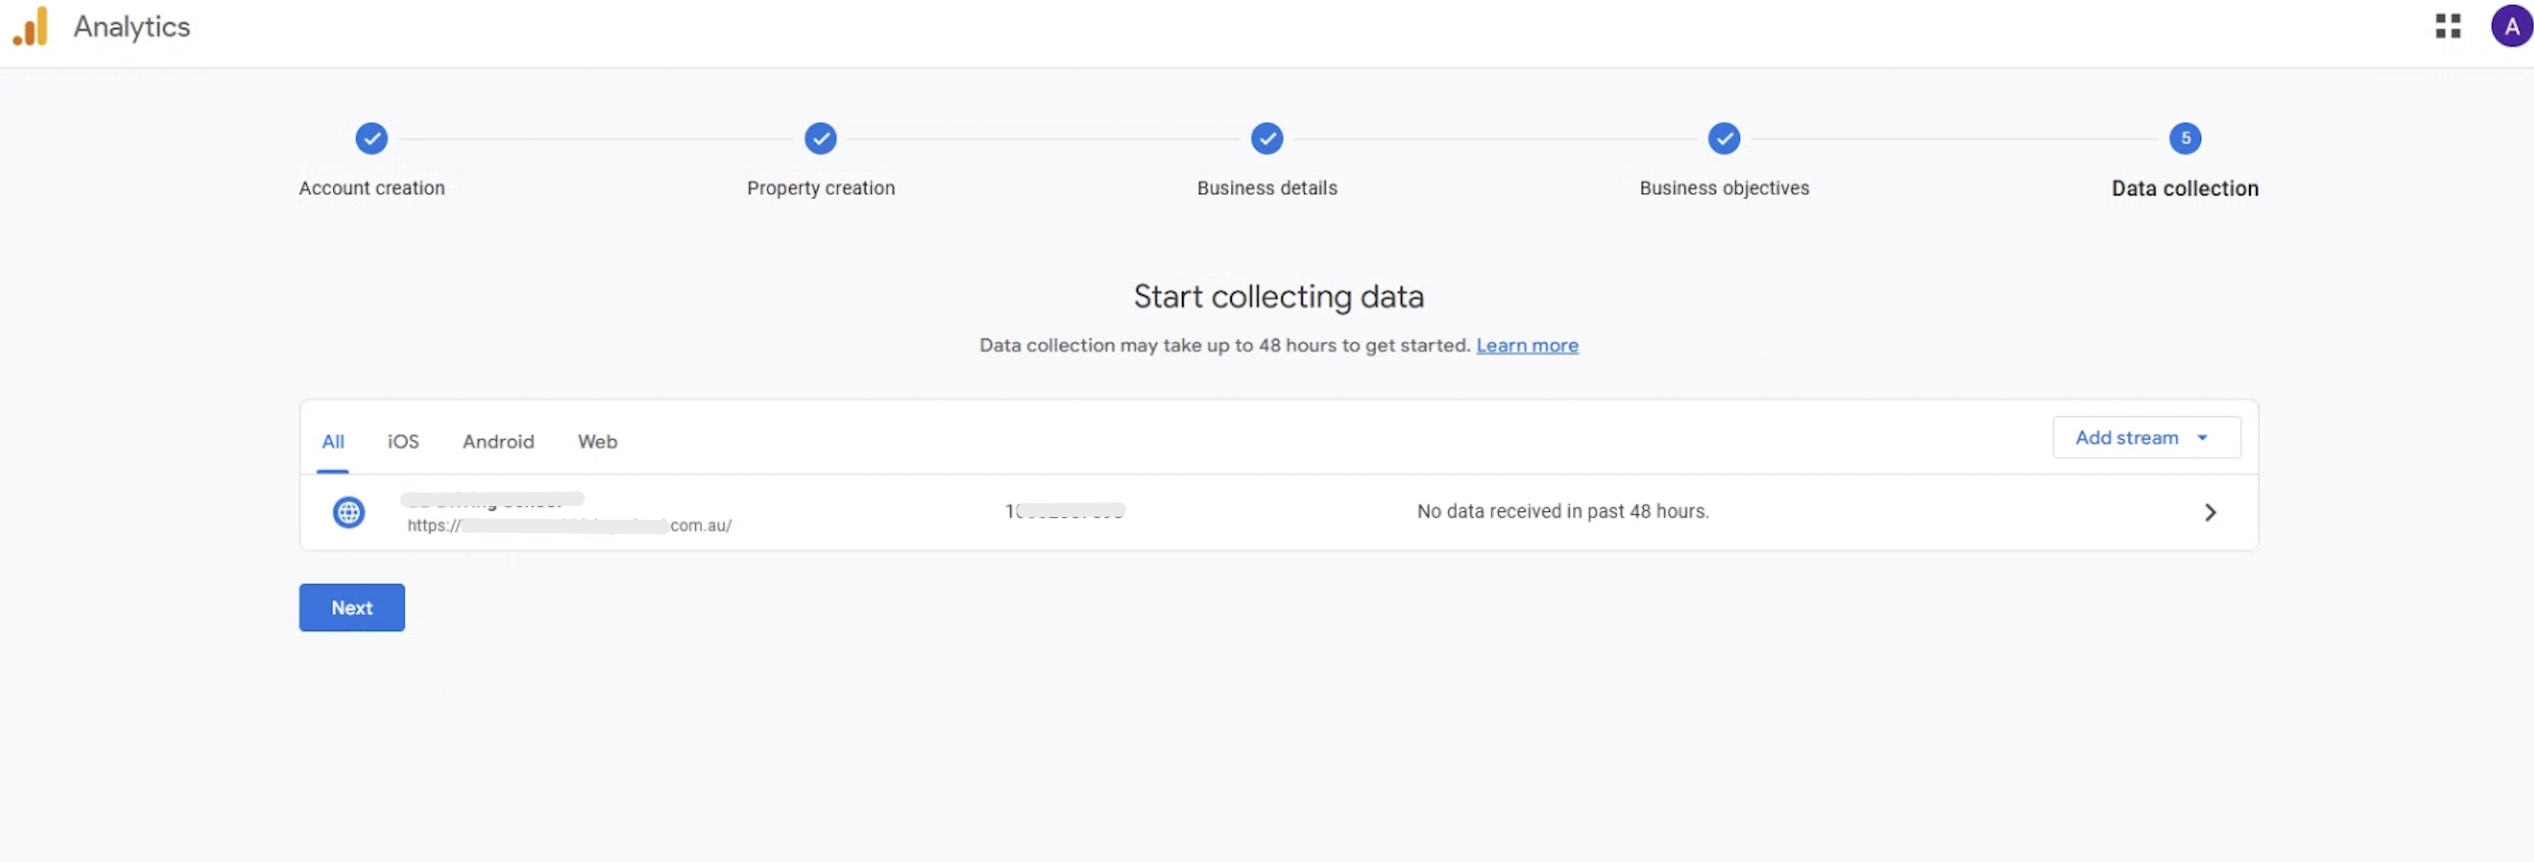
View your Stream details.
NOTE
This is the LAST step required to set up your Google Analytics account. Clicking Next will take you into additional Google settings that are not required as part of this set up. Once you see this screen, go back to your browser tab which has your BookingTimes website open.
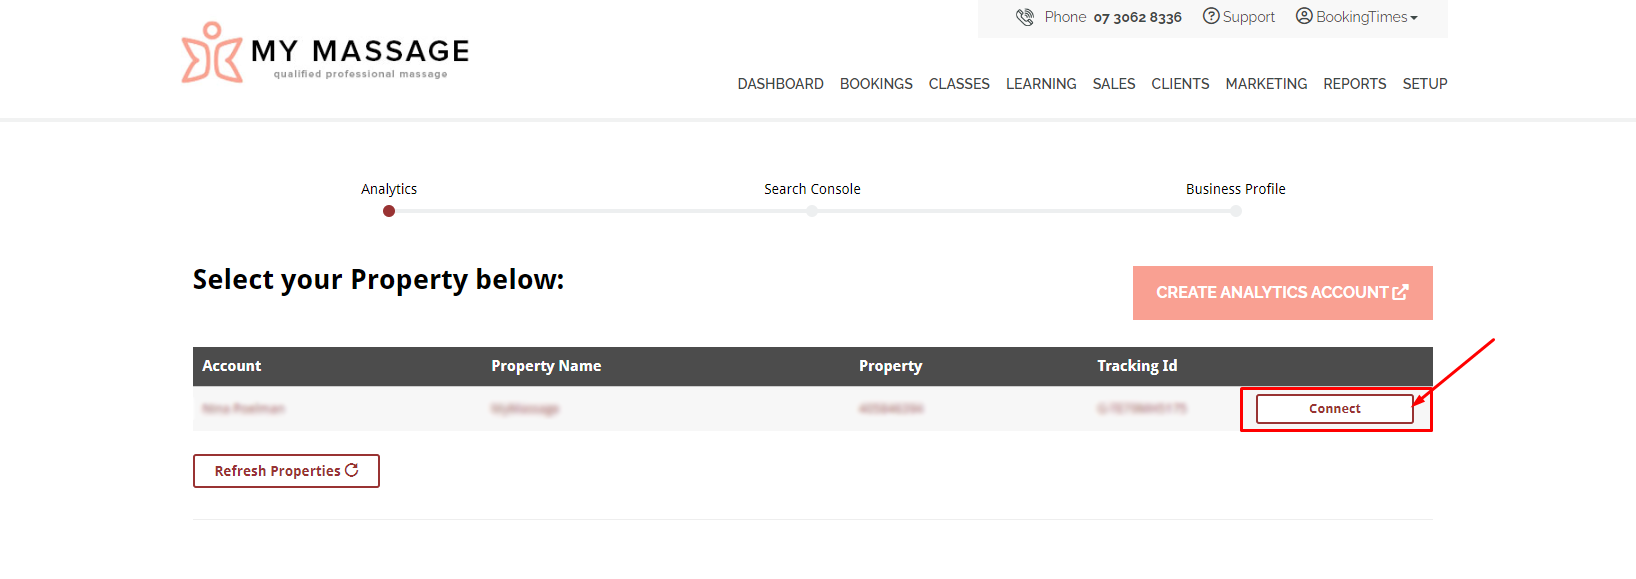
Once you’ve created your property in Google and back into your BookingTimes website tab, click Refresh Properties button under the table for the updated Analytics properties to show, and then click Connect against your property.
If you don't have any existing Search Console properties, click Create new property button, or click Connect if existing properties are already set up. This will create a Google Search Console account for you right there behind the scenes (no need to go back into separate Google screens)
Note: a property is simply a generic term for a website that you have added to your Search Console account so just name it as your business name

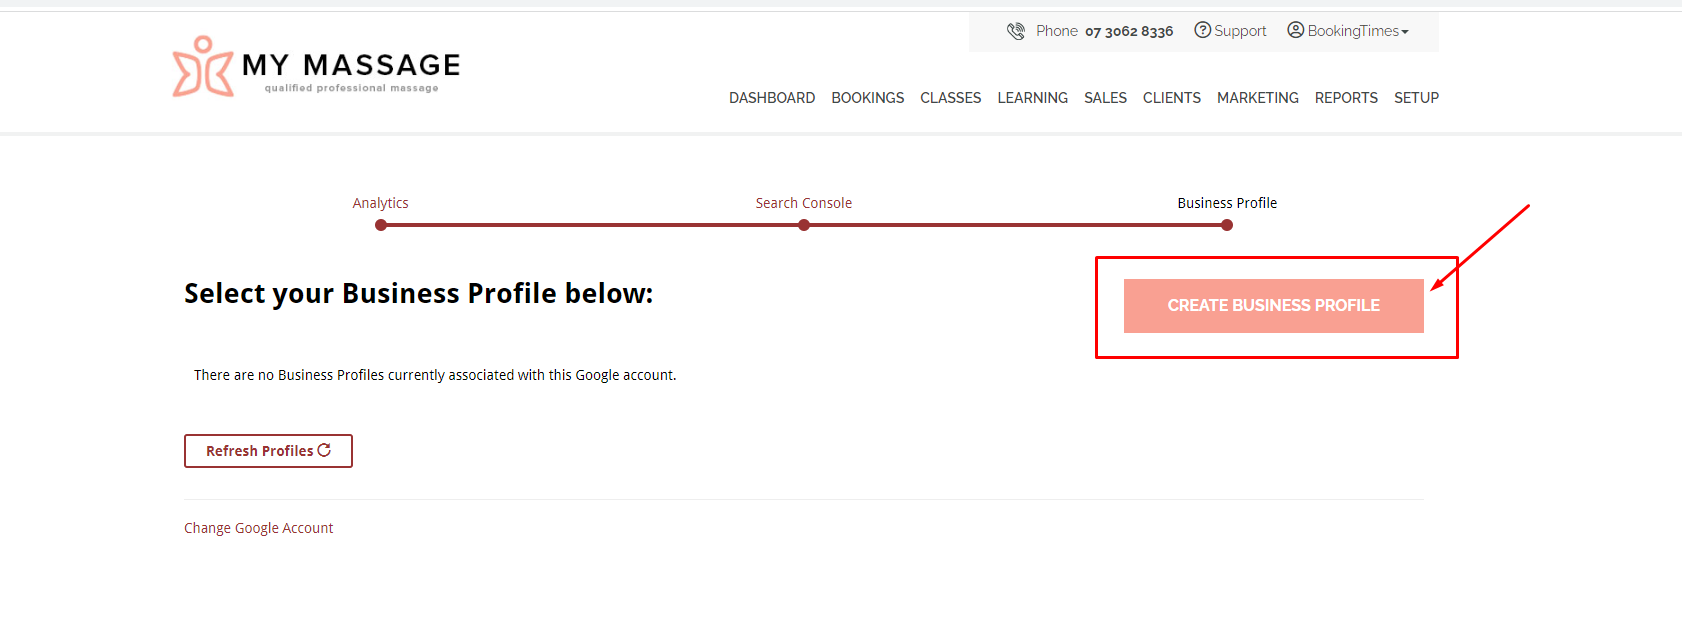
If you have an existing Google Business Profile click Connect in the row item next to the correct Business Profile. If you don't have an existing Business Profile, click Create business profile button. This will only create a skeleton profile, and it’s recommended you go back and edit it directly in Google after this process to ensure it has all the correct details and you have your business “Verified” with Google (i.e. proving that you are a legitimate business).
Note: You can also create a Business Profile first directly via Google here: https://business.google.com/createNote: You can manage your Business Profile directly via Google here: https://www.google.com/business
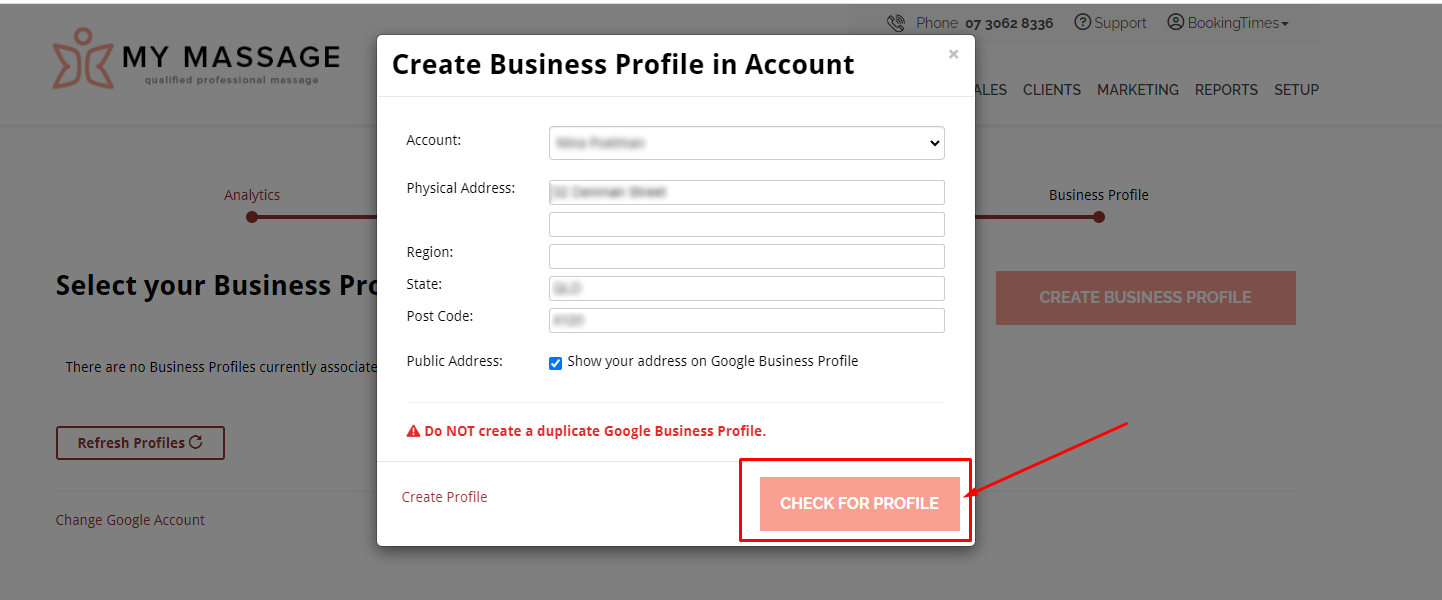
If you’re creating a Business Profile then enter your business profile details, and click Check for profile. This is important to ensure you do NOT create a duplicate Google Business Profile.
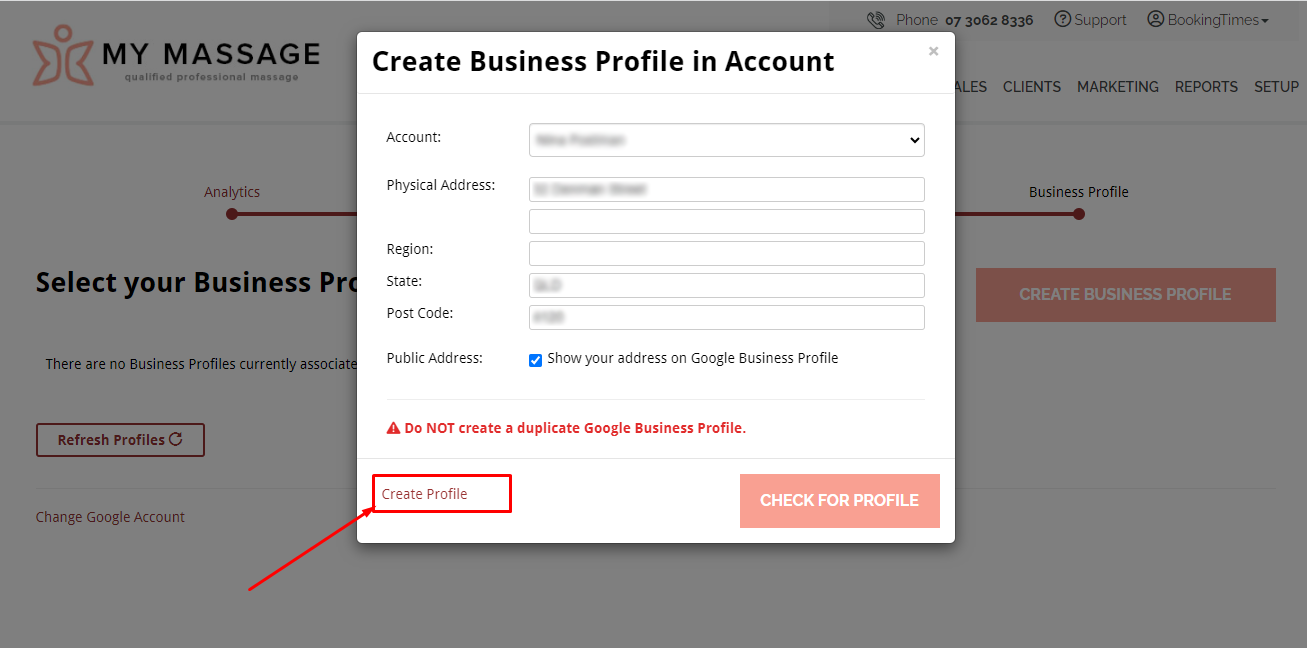
If no other profile is found, click Create profile link
Note
Once this process has been completed it can take several days for Google to be connected to your website. If the Register Website with Google button re-appears a few minutes after this process, please see the Google Business Profile article to ensure your Google Account has sufficient permissions.
Once it's connected you'll see a Connected to Google in the left hand menu when you navigate to the Marketing menu. Then on the main panel of that marketing screen you'll see: Top Search Queries, Top Performing Keywords, Top Pages, Directory Listings and other information across the available tabs.
Next steps to boost SEO
The BookingTimes software has been designed with SEO as a priority. It has all the right page structure, the right tags, great performance - all the things that Google loves. This can be thought of as passive SEO.
The next step is looking at active SEO, once you’ve kicked off registration with Google, there are a number of additional steps you can take to maximise your rankings on Google:
Set up your Google Business Profile - the registration process created an account for you if you didn’t already have one, but make sure you update all your business details and get it Verified with Google.
SEO overview will help you understand the basics of what SEO, why it’s important and some actions you can take. This includes:
Adding Meta tag titles and descriptions to your pages
Optimizing location pages (if applicable)
Activate your SEO+ subscription plan! See details below also.
SEO+
This optional monthly add on gives you a boost to how Google interacts on a technical level with your website. It also lets you reply and publish your Google Reviews on your website to boost your rankings even further, and gives you reports on where else you can list your website to improve your rankings.
This feature allows you to increase your website's visibility and manage your online reputation easily:
Manage, reply-to and publish every Google review directly from your platform - even across multiple Google profiles. Google reviews act as social proof AND are crawled for keywords.
Improve search results by automatically adding structured data markup to every page on your website. This is fancy code that increases the search engine visibility of your company, your services, online courses, locations, hours, and more.
Find new authoritative places to list your business online, complete with regular checks for brand consistency. Also find out where your competitors are listed and where you need to be.
See complete reports on all of your top search queries, keywords and top pages from Google's data.
An LLMS.txt file (Large Language Models file used to input into AI searches) is also automatically added and maintained for your website.
To activate it, simply go to the Marketing menu on your website, select the SEO+ tab, and click the Activate Now button. Please note this is an additional paid feature, it will be added to your monthly billing cycle upon activation.
Traffic+
If you’re working with an ad company or paying for ads, this Traffic+ module which helps you to understand where your traffic is coming from. As you're paying an ad company, you can track from which ad is working well down to the people who actually made an enquiry, booking and purchase. It’s ensuring that the ads that you’re running are giving you a return on investment.
This is data that we collect, it's not being pulled from anywhere.
To activate it, simply go to the Marketing menu on your website, select the Traffic+ tab, and click the Activate Now button. Please note this is an additional paid feature, it will be added to your monthly billing cycle upon activation.
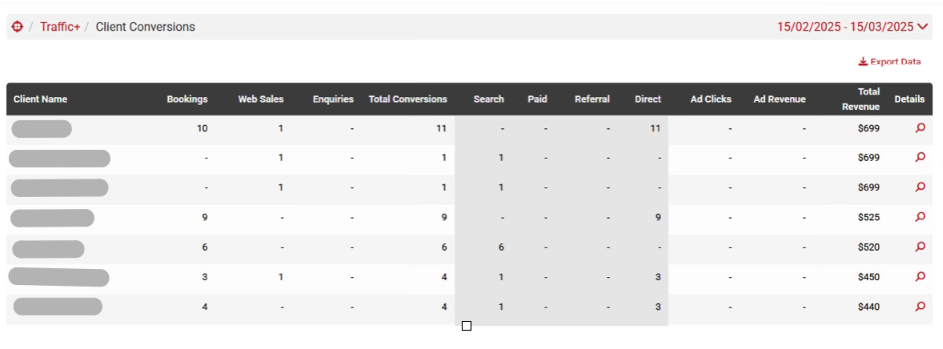
Summary view
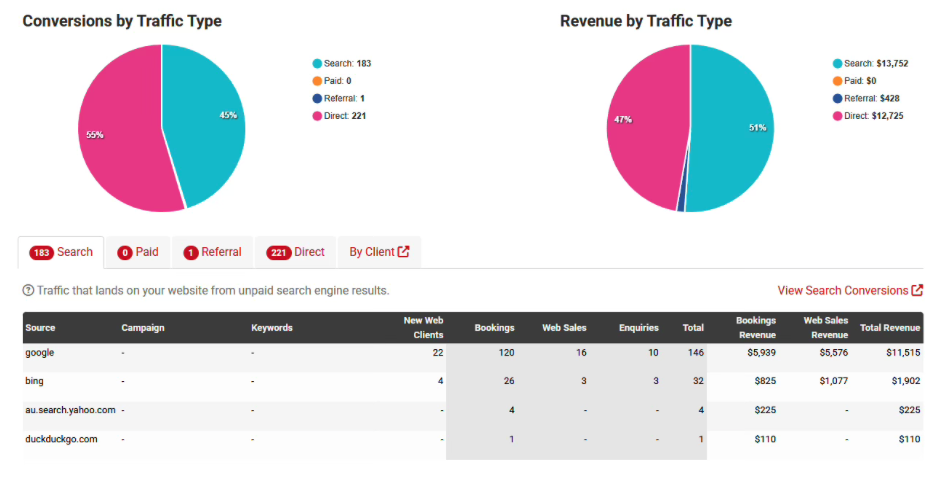
View overall client conversions
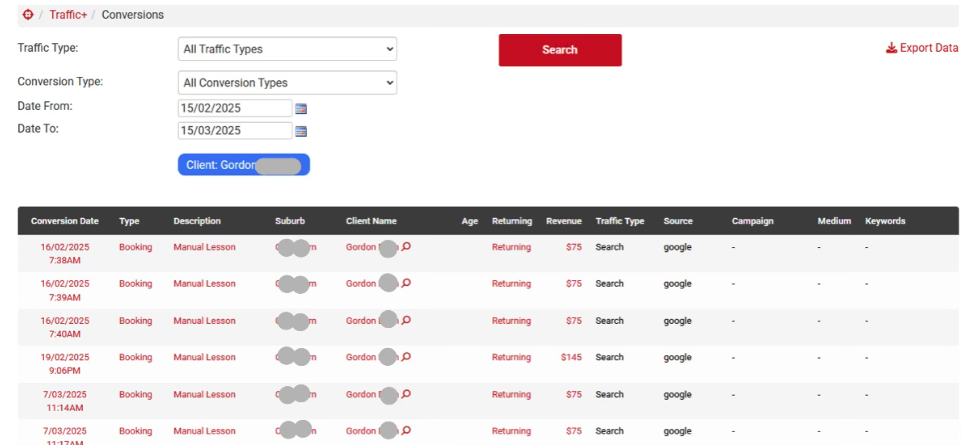
View specific client conversions
Google Analytics Conversion Goals
If you enable this module, you'll want to give this article link to your ad company to track ad conversions - Google Analytics conversion goals