When a client has been set up to be an organisation admin it allows them to create new clients, and make purchases and bookings for clients belonging to the selected organisation. To set up an organisation admin please refer to the Adding clients to an organization article, assuming that an organisation record has already been created.
The following sections will outline what they see when they log in, and some of the common actions that an organisation admin will perform.
Organisation admin view
When an organisation admin is logged in they see the following information.
Note: The first handful of menu items relate to their personal client record (e.g. My profile, My bookings, My online courses, My progress). If they do not intend to act as a client personally, simply click on the My Organisation tab to act as the organisation admin.
My Organisation menu item
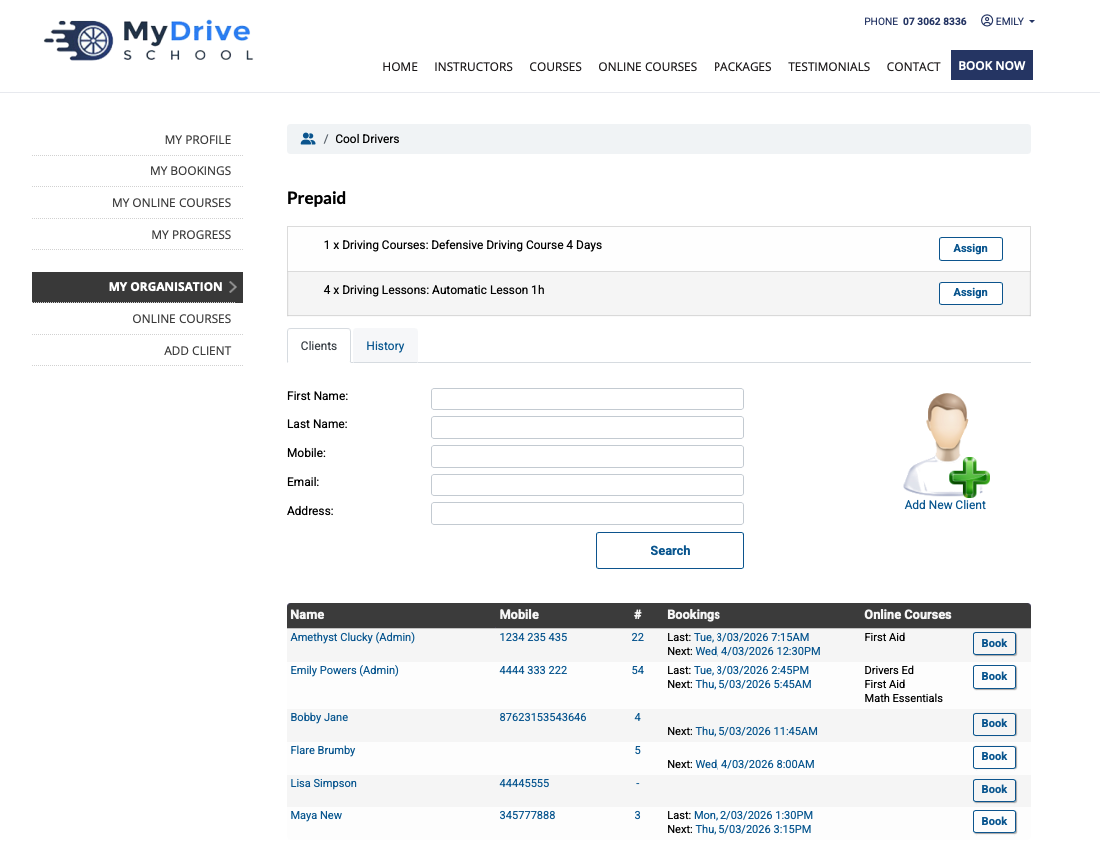
Clients tab includes:
Any available prepaid vouchers (which can be assigned to clients)
Existing clients and some booking statistics
Ability to search and add clients
History tab includes:
Access to download all the bookings for the clients of that organisation
Full history of transactions including the ability to pay for outstanding invoices and downloading paid invoices

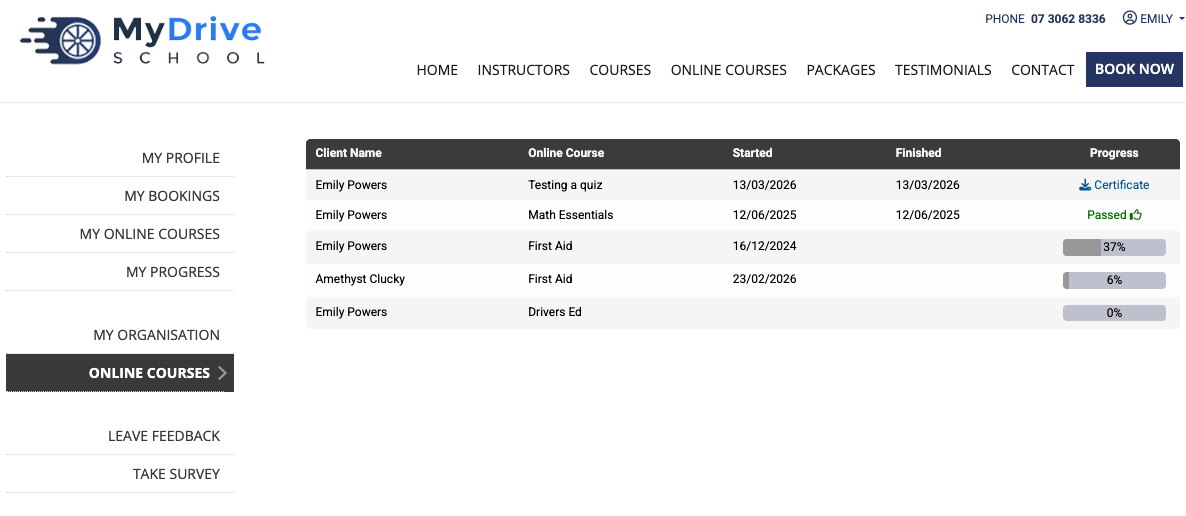
Online course menu item
If any online courses area available, an overview of the clients their progress is displayed, including the ability to download any certificates (if applicable)
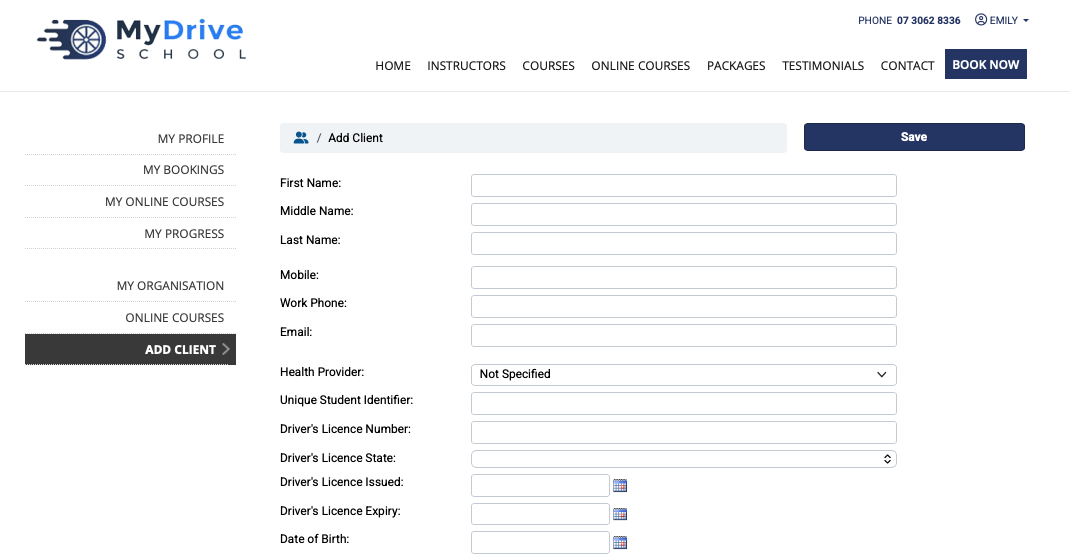
Add client menu item
If a full client record is to be added (versus the minimal information via My Organisation > Clients tab > shortcut add functionality )
Adding a new client
This process outlines how an organisation admin is able to add new clients to the organisation that they’re acting on behalf of. Any clients they add can only be seen by them, or other allocated organisation admins.
Clients can be added via minimal information first (which is outlined here), versus clicking on the Add client menu option where a full client record is displayed immediately.
Steps
When an organisation admin is logged in, go to My Organisation in the left hand menu.
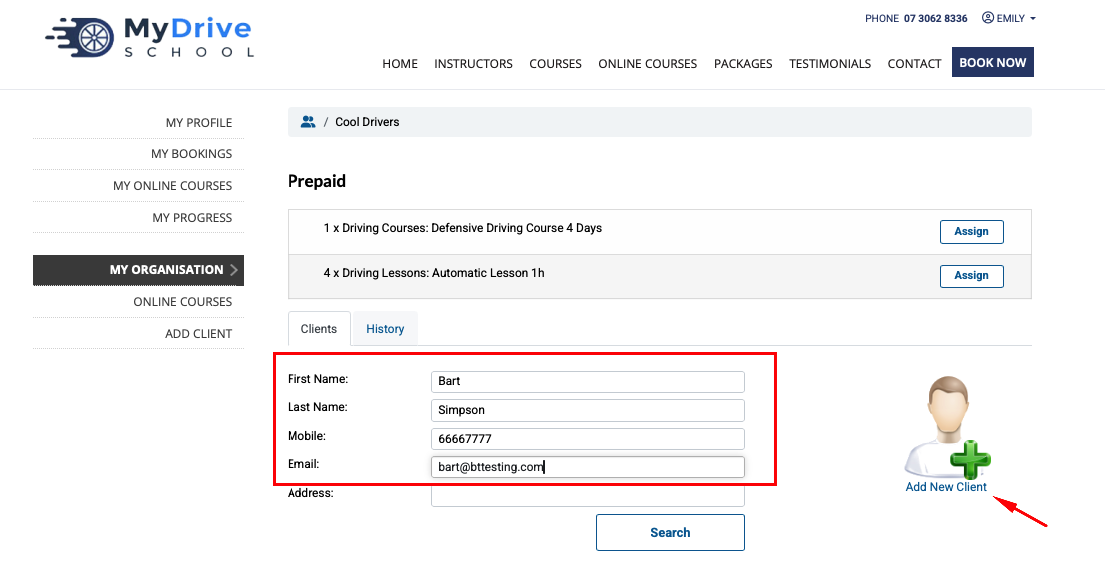
Add new clients to the organisation by completing the First Name, Last Name, Mobile and Email fields, and then clicking on the Add New Client image/link
Note: it’s good practice to first do a partial name search on the client before adding them in case the client already exists.
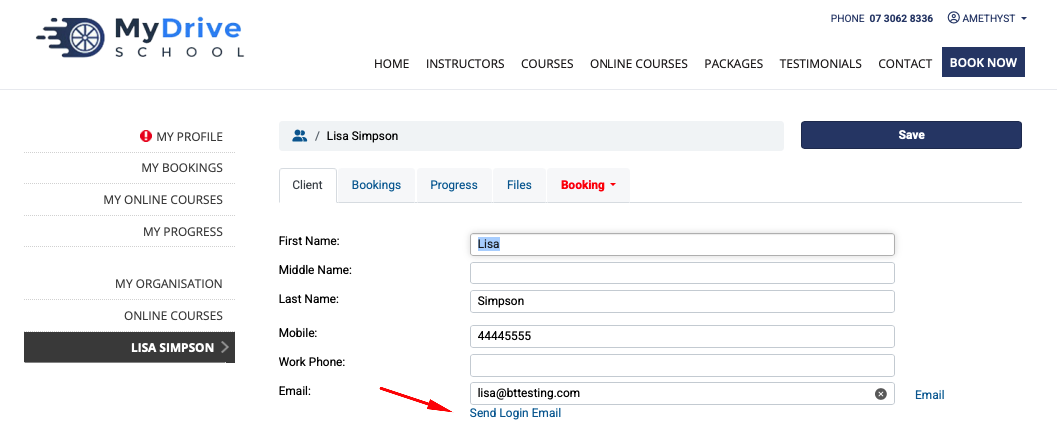
The newly created client record will now be displayed. Any additional client fields that are available on your client record can also be completed (these will be dependent on how your system is configured).
If the client is to manage their own bookings, ensure you click on the Send Login Email link under their email address, which will send them an email that’s valid for 24 hours which allows them to set up a password and access the system.
The other tabs available on a client are:
Bookings tab: any active of previous bookings are displayed
Progress tab: if any checklists are configured, these will appear here
Files tab: any files needed for the client information can be upload here
Booking drop down list: select either New Booking, or New Course Booking to shortcut to the calendar to make a booking.
Booking a client
Steps
When an organisation admin is logged in, go to My Organisation in the left hand menu.
Search for client you wish to add a booking for using partial name searches using the First Name, Last Name, Mobile or Email fields, or simply click on the Book button if your client is already visible.

The usual booking process appears where the organisation admin will select a day/time and staff member for the booking, and then either pay for the booking (if upfront payments are configured), or if there is a prepaid voucher available that can be applied for payment.
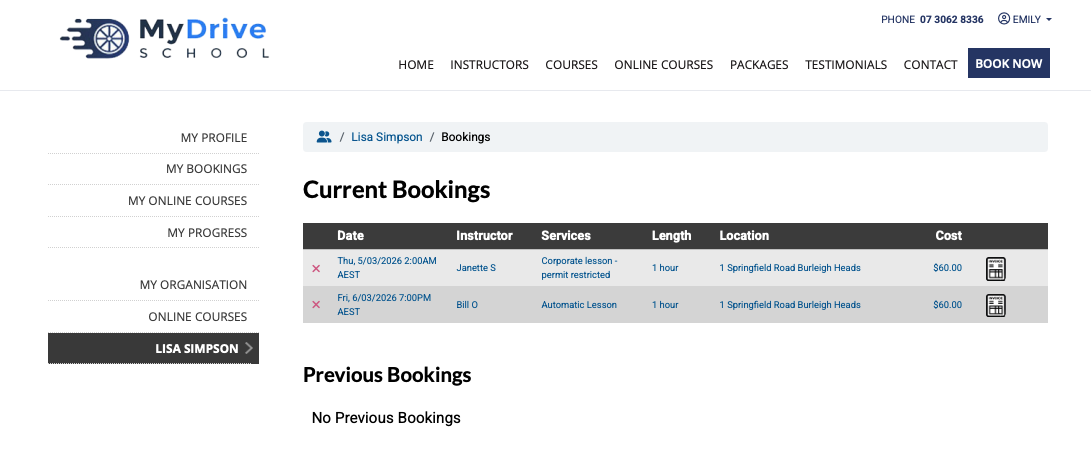
Once a client is booked in, the booking can be viewed by navigating to the Bookings tab

All the clients active and previous bookings are listed including the ability to download the invoice, and ability to paid for any unpaid bookings (usually if the business admin has created that booking on their behalf).
Purchasing products, prepaid vouchers or packages
This process outlines if an organisation admin pays for any purchased products immediately using a the integrated online payment system (e.g. credit card). If an organisation wishes
Purchase Orders or Chargeable Organisation Account
If an organisation wishes to have products/prepaid vouchers allocated and able to be used prior to making payment, they will need to contact the business and arrange a Purchase Order, or set them up to have a chargeable account.
These 2 options will allow the products/prepaid vouchers to be released to the organisation, where they can then be allocated to the right client (by the organisation admin) and ready to make bookings (by the organisation admin or client).
Steps
When an organisation admin is logged in, go to the Products menu item (or Packages, Store, Voucher - whichever terminology has been set up)
Add the required products to the cart, checkout and make payment using a credit card as per the normal client process.
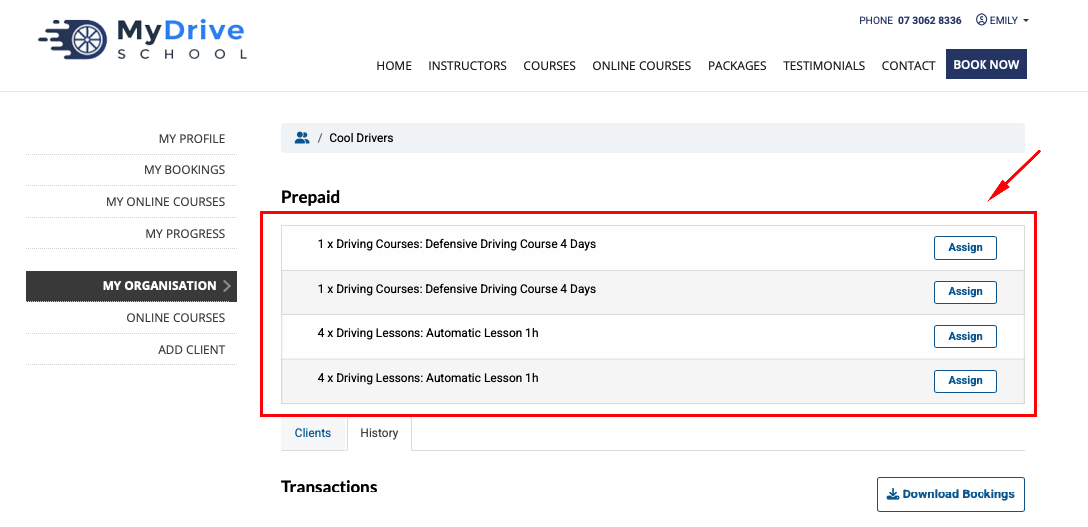
If the product is prepaid vouchers, they will now appear under My Organisation tab ready to use (and the product sale and invoice in the History tab)
Transferring prepaid vouchers to clients
Steps
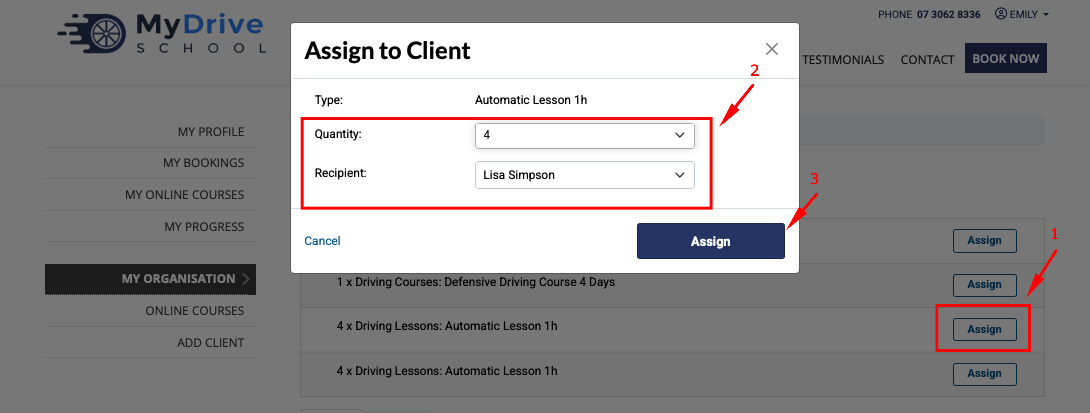
When an organisation admin is logged in, go to My Organisation in the left hand menu to view all the available Prepaid vouchers.
Click on the Assign button next to the voucher/s to be assigned. Then select the Quantity and the Recipient (this list will ONLY show clients from within this organisation) and click Assign.
Upon transfer, you can see the transfer by selecting the History tab
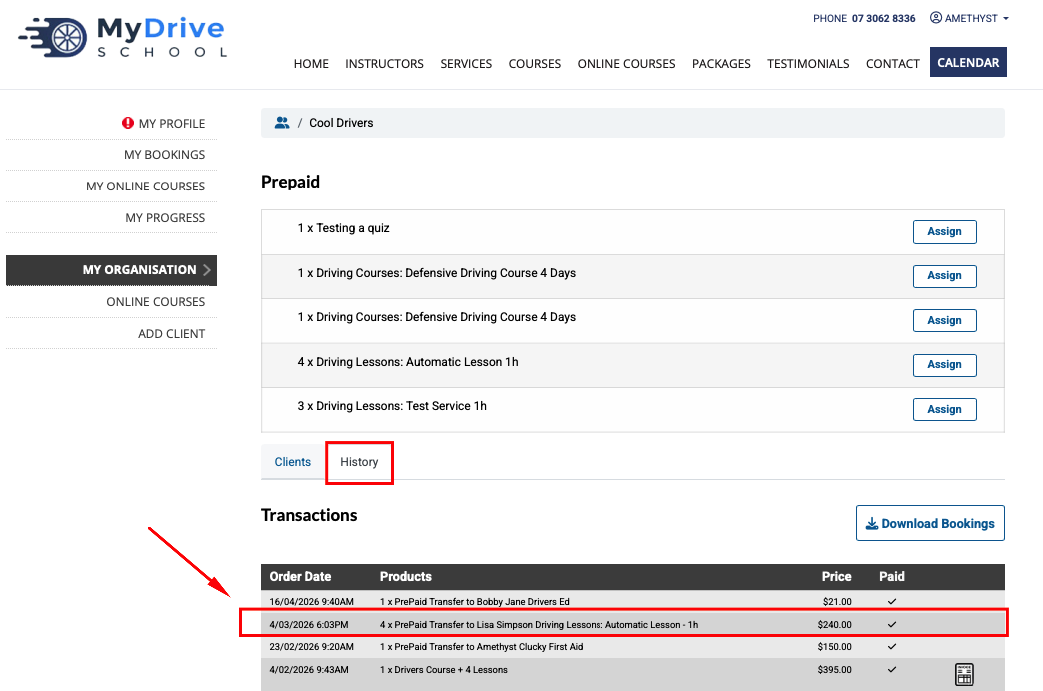
You can then also view the client record, and it will display the prepaid vouchers that are now assigned (scroll down to Prepaid/Vouchers section)

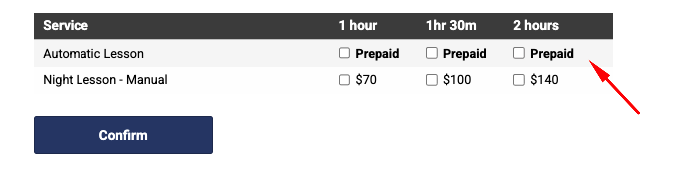
When an organisation admin (or the clients themselves) now goes to make a booking, they will see that a ‘Prepaid/Voucher’ is available for the matching service that they’re booking for. Note: the service and duration must match the prepaid voucher exactly.