This guide will show you how to email an invoice (manually by booking/product sale or by invoice number), as well as how to set up automatic emailing of invoices to clients after payment. Once an invoice is sent, this can be seen on the client's record (in the Messages tab). Finally this article also outlines where the invoice content is set up in case you wish to make any updates to it.
No email address
If the client does not have an email address on file, there will be no option to email invoices to them.
Email a booking or product sale invoice
Typically this is done when an admin makes a booking or purchase so you can send the client an email with the option to make payment.
If the client logs in themselves, they can view the bookings or purchases that have been made on their behalf, and make payment directly from there also.
Steps
Navigate to the relevant booking or product sale
Select Email Invoice from the side menu
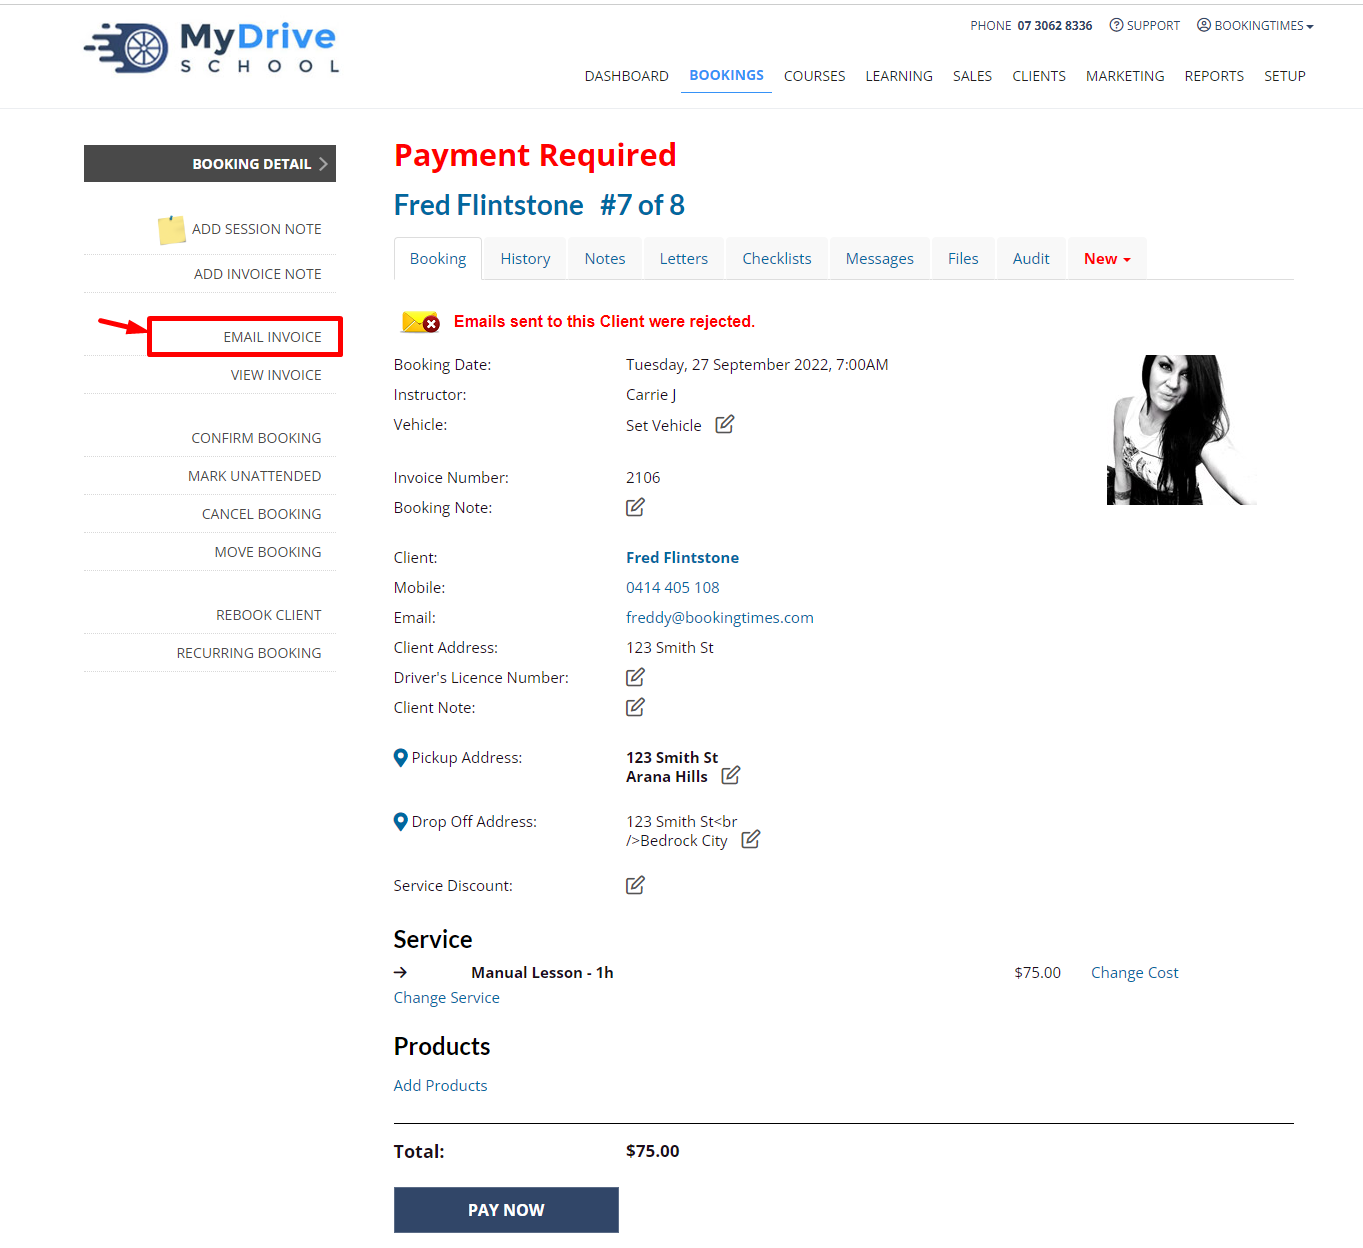
To see what email will be sent to the clients, please refer to the Invoice email content section in this article.
Search by invoice number
Steps
Navigate to the Sales menu
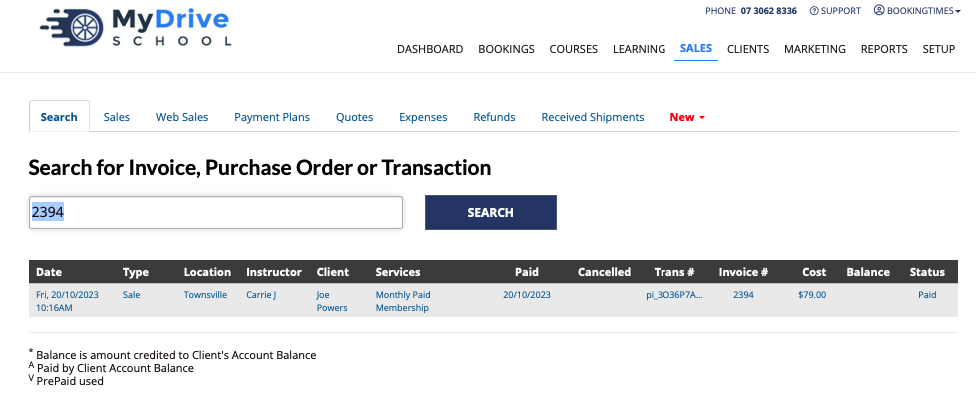
Enter the invoice number in the search bar
Click Search
Select the invoice
Click Email Invoice from the side menu
Automatic emailing of invoices after payment
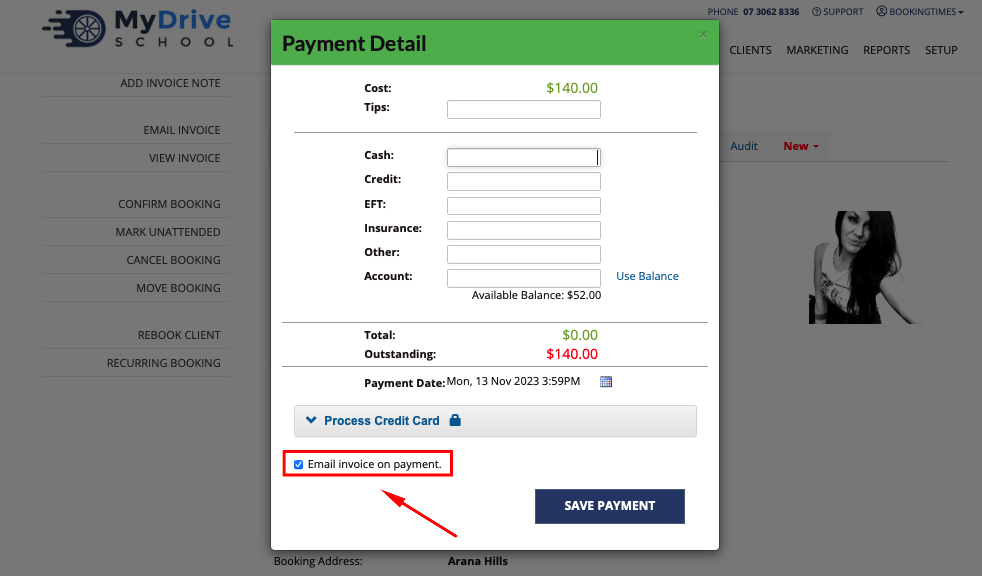
Enabling this option essentially automatically ticks the Email invoice after payment option that displays on the payment details screen. If this option isn't enabled, you will simply have to tick this option before finalising the payment to have the invoice emailed to the client.
Steps
Navigate to Setup > System Setting > Business Detail > Finances tab
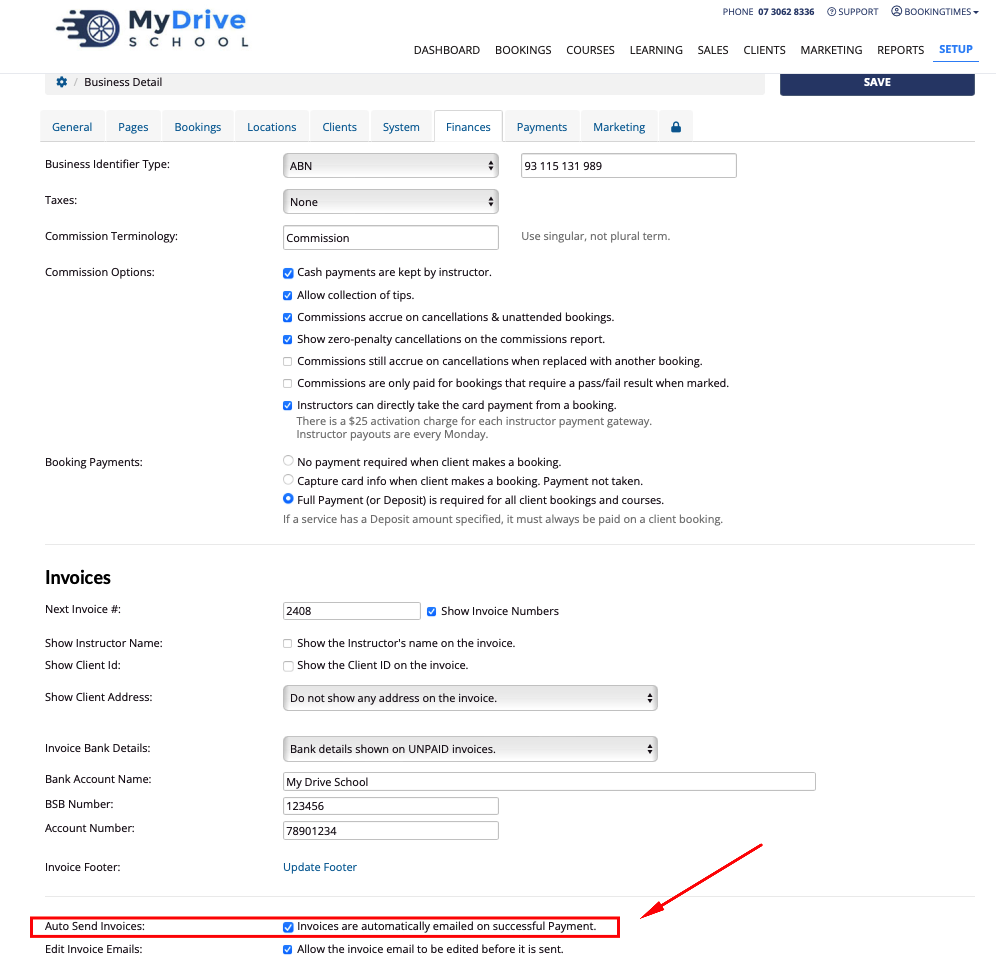
Go to the Auto Send Invoices field and select the Invoices are automatically emailed on successful payment
Click Save
Now when you go to a booking or product sale to apply a payment, the Email invoice on payment checkbox has been automatically checked, and the invoice will be emailed as soon as the payment is made.
Zero cost services
Please note if you have a zero cost service, then instead of the Pay Now button, you will see a Mark as Attended button.
As soon as that is clicked and you have the Auto Send Invoiced option turned on, it will send an invoice (for zero dollars) to the client.
If you do not wish for them to be emailed, this option will need to be turned off, and then for any paid services you will need to manually check the Email invoice on payment option on the Payment Detail popup.
Invoice email content
When an invoice is emailed, the email content is set up within the appropriate system reminders:
Booking Invoice + attachment system reminder for bookings
Product Sale Invoice + attachment reminder for product sales

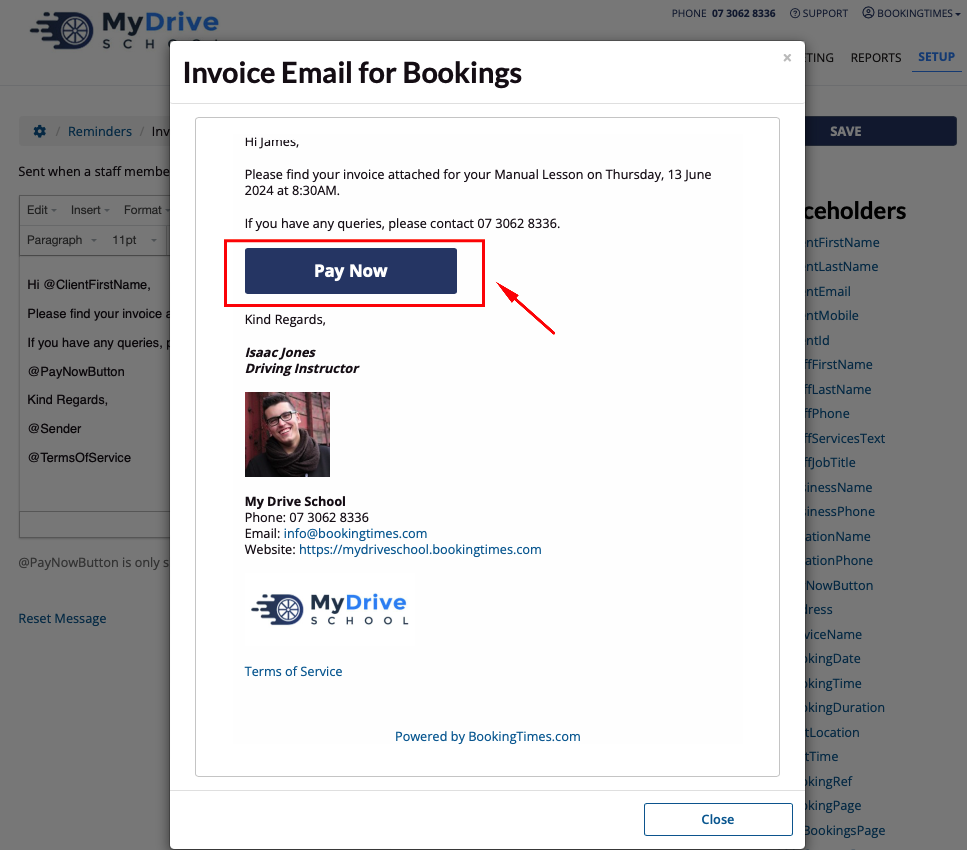
If an admin is sending this invoice and payment is still required, these reminders typically contain a Pay Now button which allows the client to make payment directly from the email. If payment has been made already and you send the invoice, then this button will not appear.
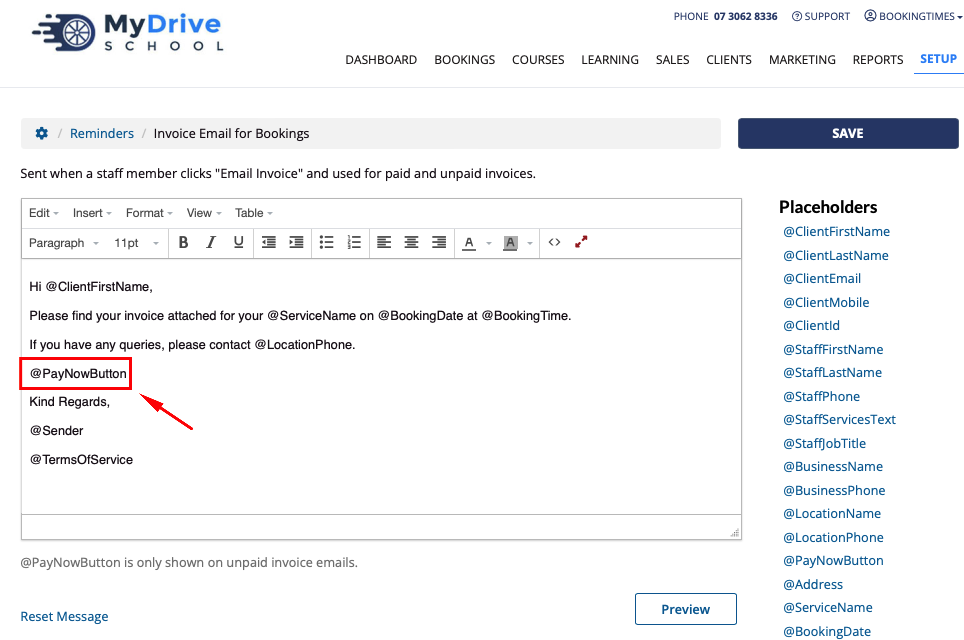
The Pay Now button can be configured as follows:
Navigate to Setup > Correspondence > Reminders
Select the speech bubble icon for the Booking Invoice + attachment or Product Sale Invoice + attachment reminder
Ensure that the @PayNowButton placeholder appears in the email content
Click on the Preview button to see a sample formatted email.
Please refer to the Setting up reminders article for more details on how to edit the content of these emails.
To configure the content of the actual invoice, please refer to the Creating an invoice article.