A payment plan using a client's credit card can be set up for product sales by you as a BookingTimes administrator (i.e. this is not available publicly for clients to set up themselves). The product that is purchased will then be allocated to the client only once it has been paid in full (e.g. a package of driving lesson prepaid vouchers will only be on their account and redeemable once paid in full).
Once set up, it can be paid in full, or stopped if the client wishes to end the payment plan early.
Creating a payment plan
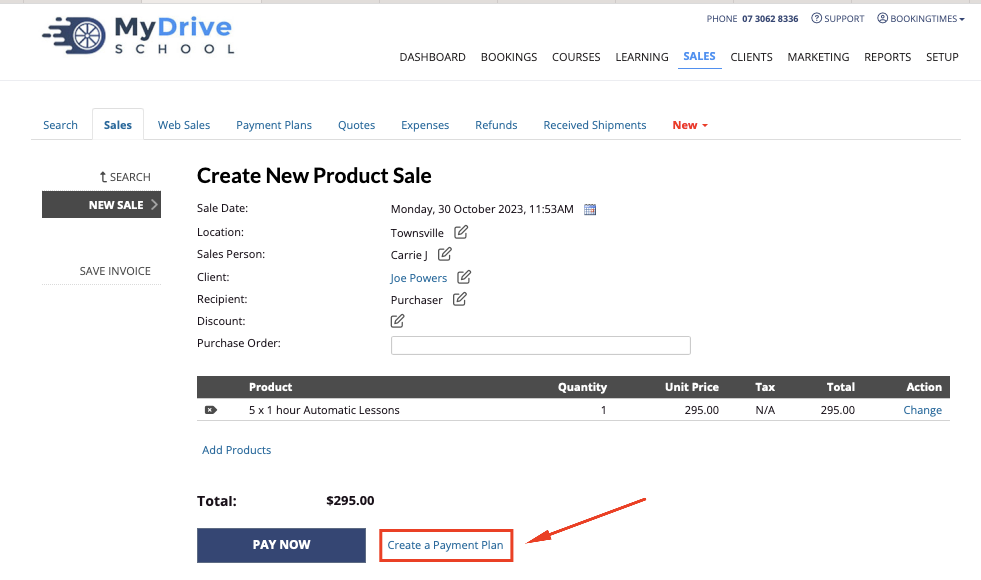
These steps follow on from the Creating a product sale process, but rather than taking payment via card/account/prepaid voucher, a payment plan will be set up instead.
Steps
- Select the Create a Payment Plan link on the product sale
- Complete the payment plan details:
- Initial Payment: the initial payment amount you want to charge
- (Optional) Account Balance: if the client has an available account balance then this can be applied
- Ongoing Payment: how much each of the remaining payments will be
- Frequency: select how often the ongoing remaining payments will charged. e.g. weekly, fortnightly etc.
- Next Payment: select when the next payment will begin from
- Enter the client's credit card payment details
- Click Create payment plan button

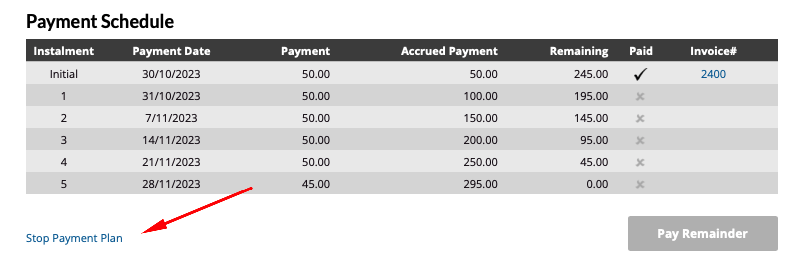
- Once the payment plan is set up it will show you all the payments that have been made (with a link to any invoices), and also the date and amount of any remaining ongoing payments.
- Note: if a client payment fails, the system will retry every morning until payment can be made.
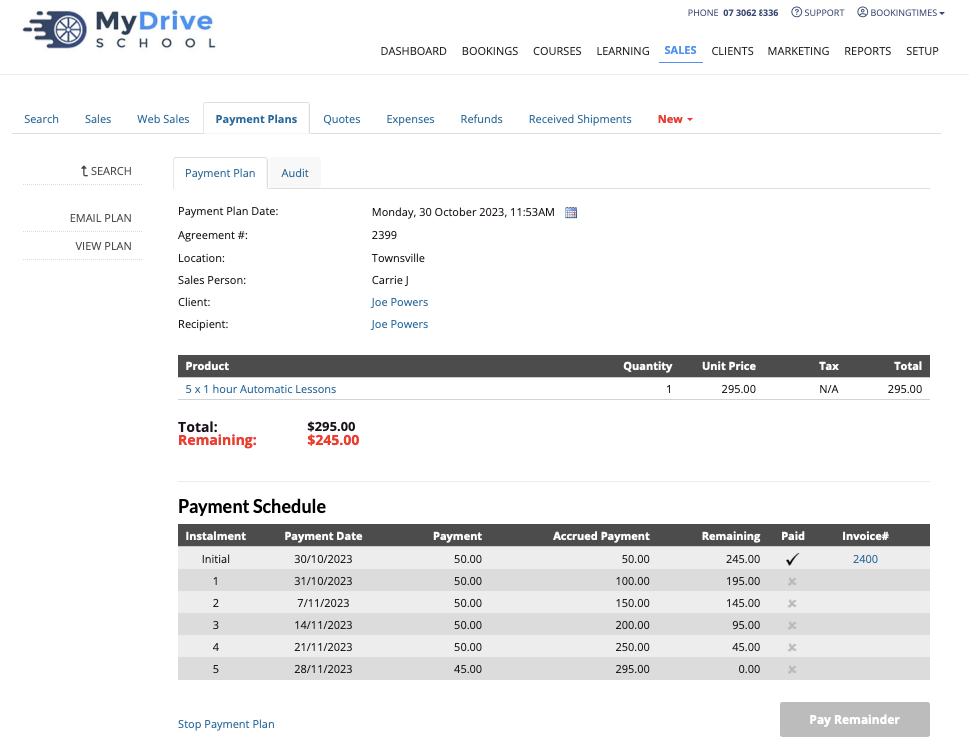
- Payment plans can be viewed at any time via:
- Sales menu > Payment Plans tab
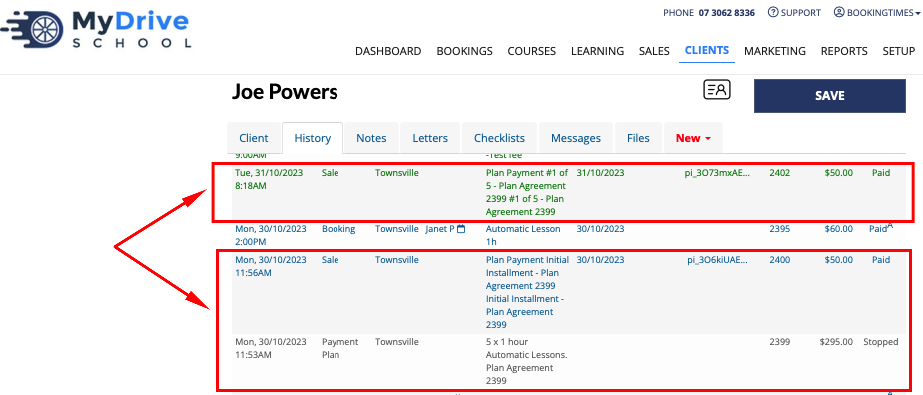
- On the client's history tab
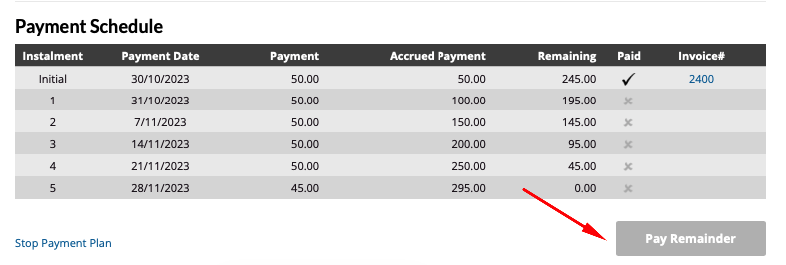
Paying the remainder of a payment plan
This will pay the remainder amount of a payment plan. If the client's credit card is on file the payment will be automatically applied.
Steps
- Go to the client and select their payment plan on their History tab
- Click on the Pay Remainder button at the bottom of the table
- Click the Yes, Pay the Remainder link on the popup

Stopping a payment plan
This will stop any remaining amounts being charged on a payment plan, and any existing payments will be transferred to the client's account balance. This can then be used towards other bookings or product sales, or refunded to the client (see the refund step in the Refunding a product sale article for more details).
Note: This cannot be undone. If it was stopped accidentally, a new payment plan will need to be set up where the client's account balance is used to show the amount paid so far.
Steps
- Go to the client and select their payment plan on their History tab
- Click on the Stop Payment Plan link at the bottom of the table
- Click the Stop Payment Plan link on the popup
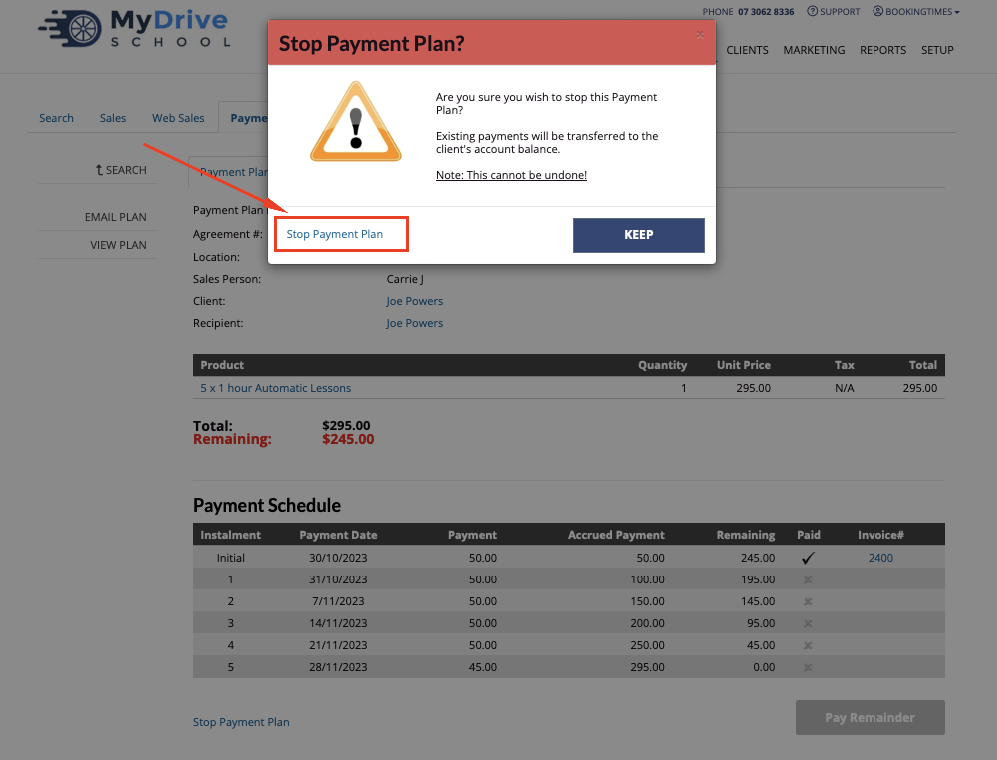
- Any existing payments will be totalled and now appear on the client's account balance with a reference to the payment plan invoice, and also within their Historytab:
- The following image shows that 2 x $50 payments had been made, and then also when the payment plan was stopped