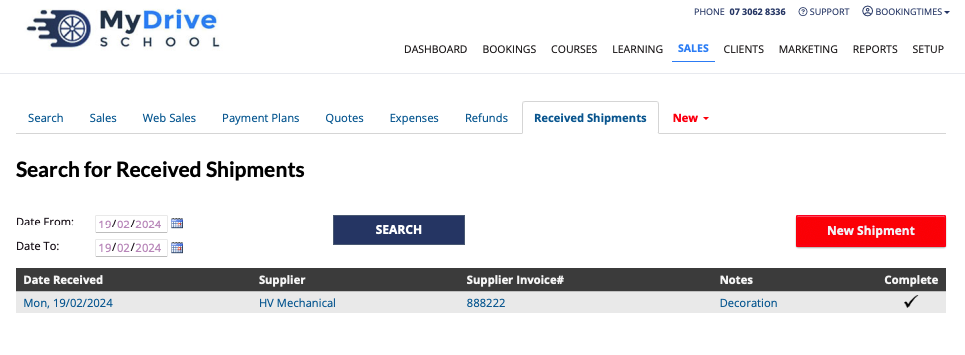
This guide will detail how to use the received shipment functionality to track and update your product quantities that you have on hand via a shipment (vs adding in received products manually without a link to an order) that has come in. This ensures that only available products appear in your online store/shopping cart to be purchased.
Receiving a shipment
Steps
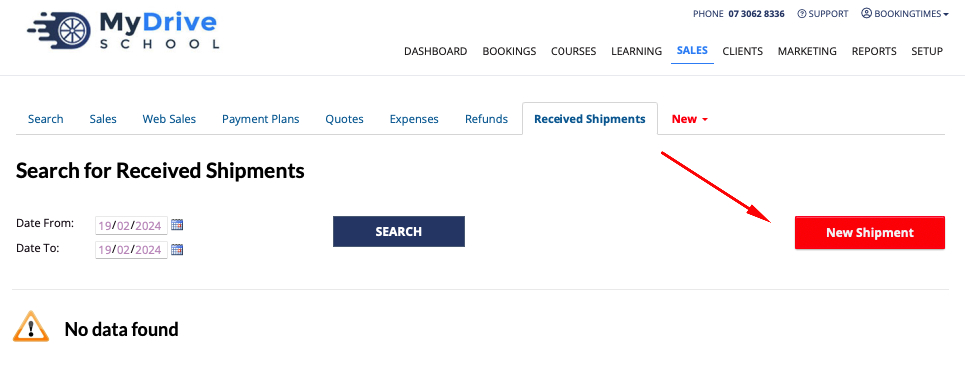
Navigate to the Sales menu > Received Shipments tab
Click New Shipment
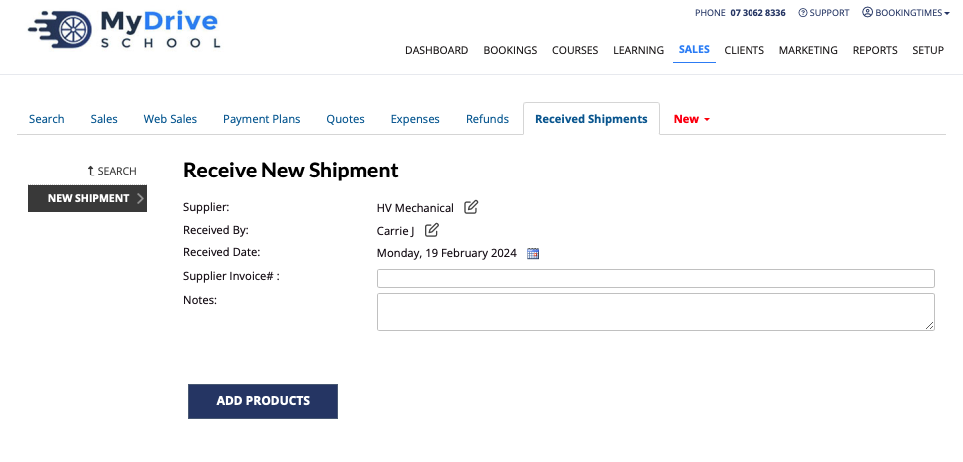
Complete the shipment details and click Add Products
Supplier: search or create an Organisation
Received By: select the relevant staff member
Received Date: select the date the shipment was received
Supplier Invoice#/Notes: Add any invoice # or other notes
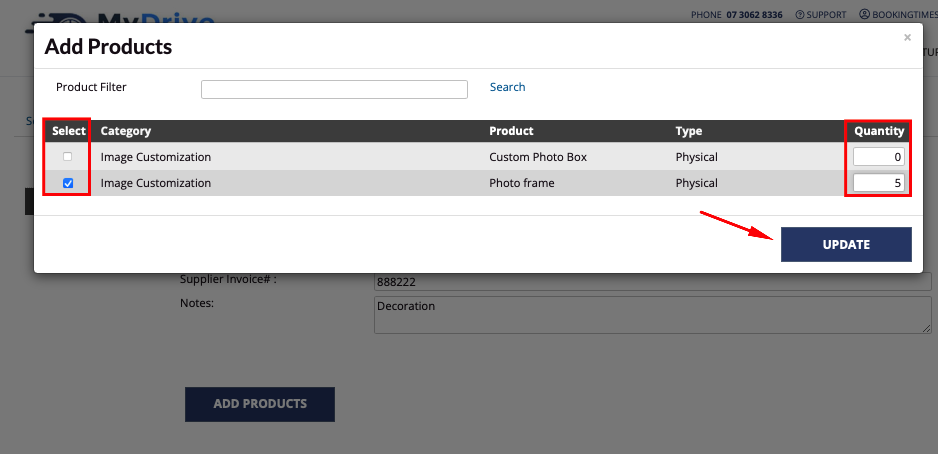
A list of all the Physical products you have in the system will appear. Select the products that you’ve received and enter their quantity, and click Update
To add any new physical products please refer to the article Creating a physical product
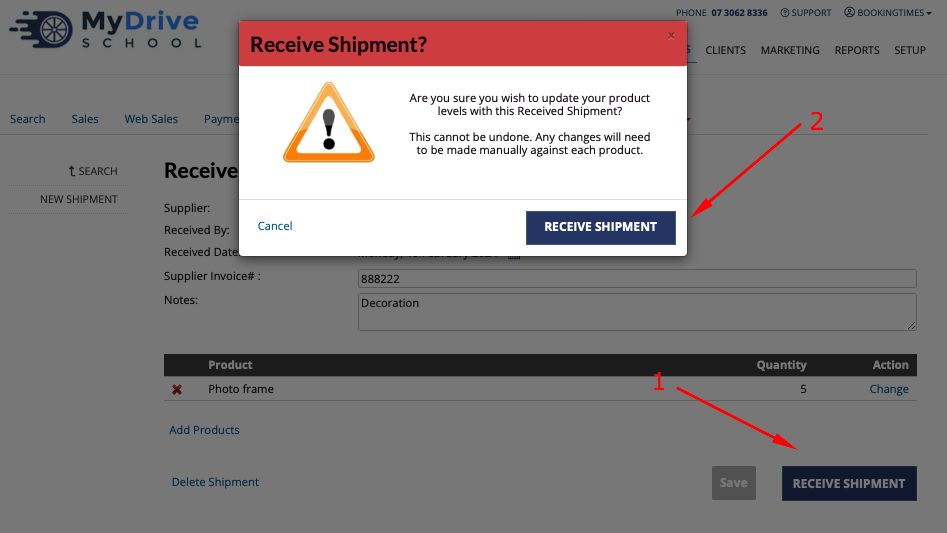
When you’ve completed entering all your received stock, click on Receive Shipment (1), and again click on Receive Shipment (2) on the confirmation pop up.
The completed shipment will now appear in the Sales menu > Received Shipments tab
