If after checking the connection with Tag Assistant and/or Tag Diagnostic in the Google Connection Troubleshooting article, you find there’s still no data shown, the reason and how to fix it might be listed below, depending on if you are using a Google Analytics 4 or a Google Tag Manager connection.
Google Analytics Tag (GA4)
Insufficient time
Google Analytics report take some time. If you have just connected your site to Google, check your data tomorrow. If after two days you still have no data, then your events are not showing up for some other reason. Please check the rest of this list.
Destination doesn’t receive data
If Tag Assistant is showing that your Google tag is on your page, but you still don’t see any data, your Google tag might not be connected to a destination.
In that case, you will be notified when you open the Google tag page. You can choose to connect the destination to an existing Google tag or to create a new Google tag.
If you have the Administrator role, you have the ability to add or remove destinations on your tag. Add destinations to your Google tag to avoid additional re-tagging on your site and reuse your existing tag’s configuration. Adding a destination involves removing it from any other Google tag that has it as a destination.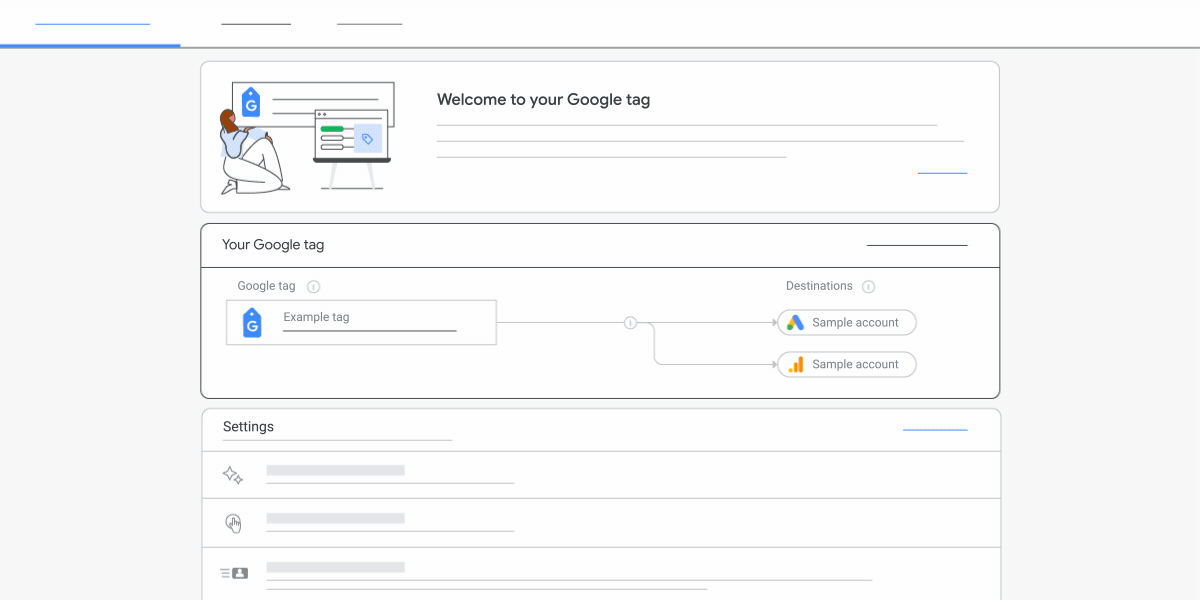
Access your Google tag screen (https://analytics.google.com/analytics/web/?gastartflowid=14075431#)
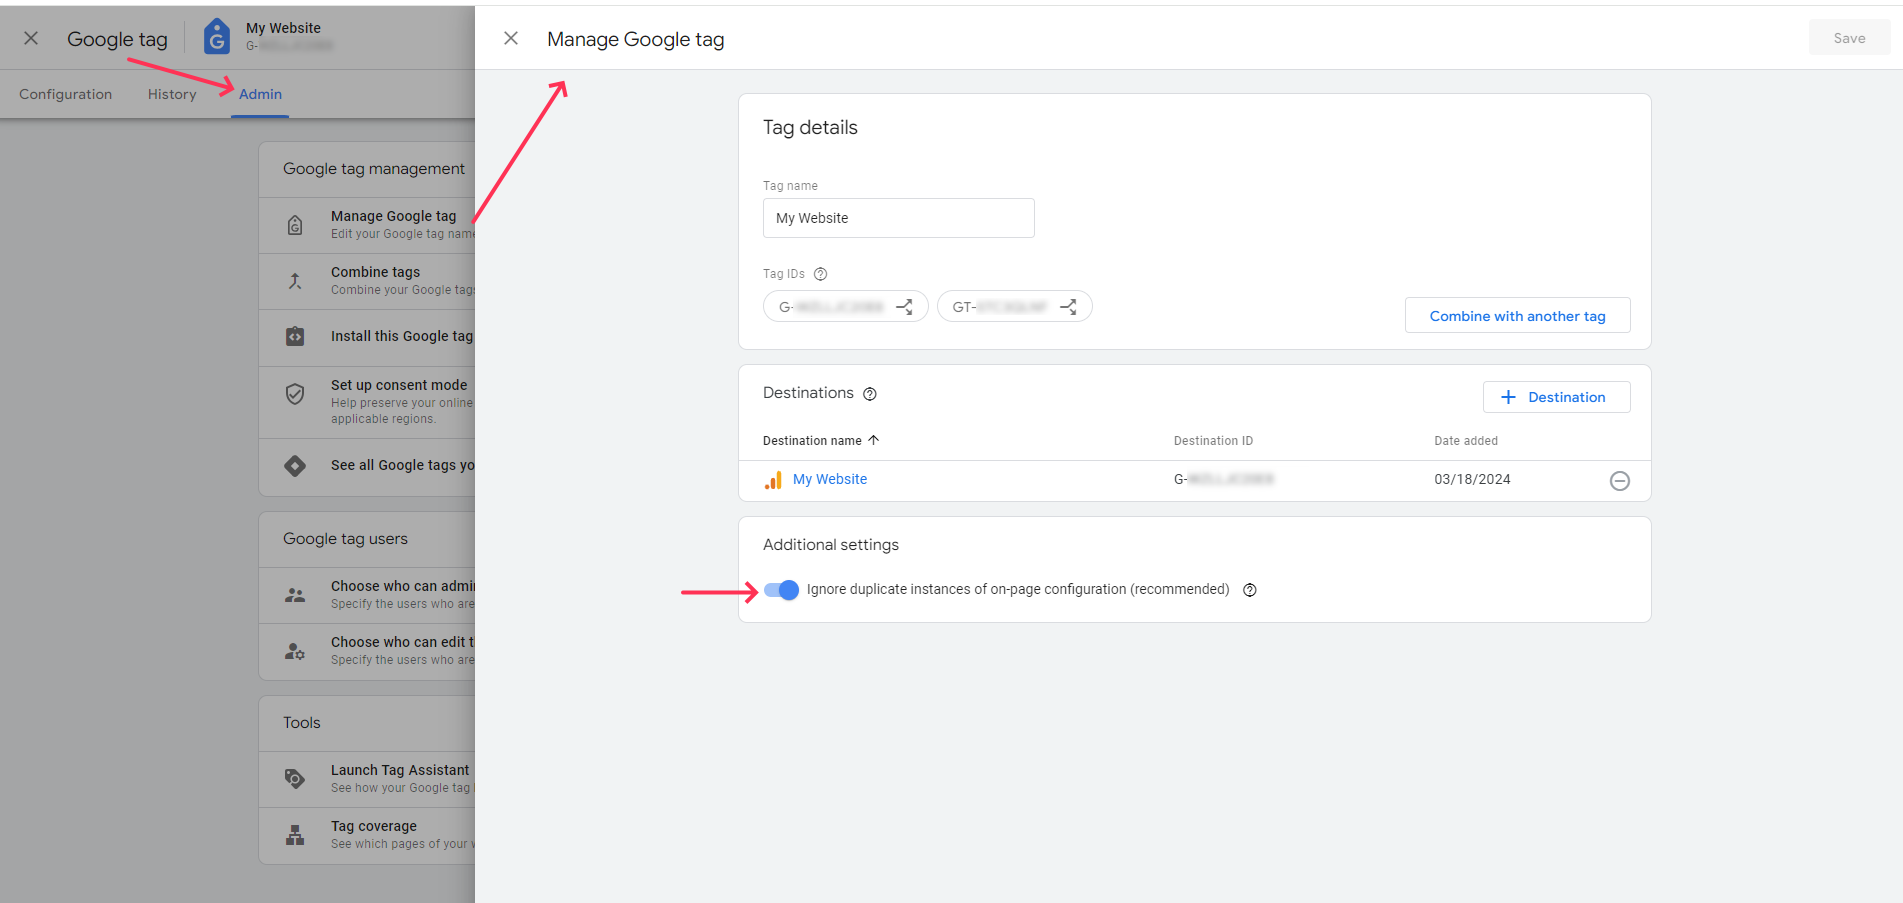
At the top of the page, click the “Admin” tab.
In the “Google tag management” section, click Manage Google tag.
In the “Destinations” section, click +Destination.
Click Choose a destination.
Select a destination to add to your Google tag.
Note: You will only see the destinations for which you have administrator access.
Click the destination you'd like to add.
Review your updates, and click Save.
Next steps: Once you've set up your Google tag, make sure you configure it to send the data you need. (https://support.google.com/analytics/answer/12131703?sjid=10906621601617242828-AP)
Manage automatic event detection
Check your tag is properly configured by selecting which types of events your Google tag should automatically detect for measurement in associated destinations. By default, all event types are turned on.
If you had turned off automatic event detection, no products or accounts that use this Google tag will be able to receive associated data. You may want to consider turning off collection of these events in your destination instead.
By default, all event types are turned on. Click the switch to turn the following event types on/off:
Page views: Detect a page view event each time a page loads. You can't disable this event type.
Page views on browser history change: Detect a page view event each time the website changes the browser history state. This setting is useful for detecting page views in single-page applications.
Scrolls: Detect scroll events each time a visitor gets to the bottom of the page.
Outbound clicks: Detect an outbound click event each time a visitor clicks a link that leads them away from your domain(s). By default, outbound click events will occur for all links leading away from the current domain. Links to domains configured for cross-domain measurement (in the “Configure your domains” setting) will not trigger outbound click events.
Form interactions: Detect a form interaction or form submission event each time a visitor interacts with a form on your site.
Video engagement: Detect video play, video progress, and video complete events as visitors view embedded videos on your site. By default, video events will be automatically detected for YouTube videos embedded in your site with JS API support enabled.
File downloads: Detect a file download event each time a link is clicked with a common document, compressed file, application, video, or audio extension.
Consent
Consumers increasingly expect to control the data they share about themselves, and Google provides tools for you to respect your users’ choices. Websites and apps that use Google Analytics or Google Ads gather and store information about website visitor and app user behavior. Google also lets you upload data from other sources into Google Ads, for example by uploading store sales data.
Consent mode lets you communicate your users’ cookie or app identifier consent status to Google. Tags with consent checks adjust cookie storage behavior. If a user denies consent, tags no longer store cookies but instead send pings to the Google server, as described in Consent mode behavior.
You can check your Consent settings for each Google Tag on Admin > Data Streams > Web stream details.

Google Tag Manager (GTM)
Empty container
After you add the GTM ID to your website (on Website > Setup > Analytics & Tracking on Google Tracking > Google Tag Manager (GTM)), you can use Google Tag Manager to set up and manage all the tags in one place.
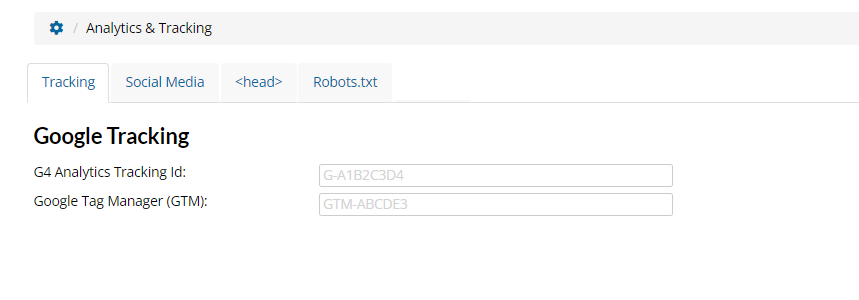
For that, you should check your tags have been properly added to the container.
Steps
Sign in to your Google Account.
Open the Tag Manager container you want to edit.
In the Workspace tab, click Tags (on the left).
In the Tags section, click New (top right).
In the panel, follow these steps:
Replace Untitled Tag with the name of your tag (for example, 'Google tag').
In the Tag Configuration section:
In Choose tag type, select Google Tag.
In Tag ID, enter your Tag ID.
In the Triggering section, select Initialization - All pages trigger.
Click Save.
Next steps
Make sure the tags you've added to your website behave as intended. Then, publish the changes you've made to your website.
Container or changes not Published
When you publish a container, Tag Manager will make your changes active for the specified environment. If you've added or edited tags, triggers, and variables in a workspace, you will need to publish those changes to make those changes operational on your website or mobile app.
To publish your current workspace:
Click Submit at the top right hand side of the screen. The Submit Changes screen will appear, with options to publish the container and save a version of your container.
Select Publish and Create Version if it is not already selected.
Review the Workspace Changes section to see if your configuration appears as you expect.
Enter a Version Name and Version Description.
If you have Tag Manager configured to use multiple environments, use the Publish to Environment section to select which environment you'd like to publish to.
Click Publish.
Every time you change something in the GTM container and test it, you have to publish the container. Only then will these changes go live for your website visitors too.
Log in to your Google Tag Manager container > Overview and look at the Workspace changes.
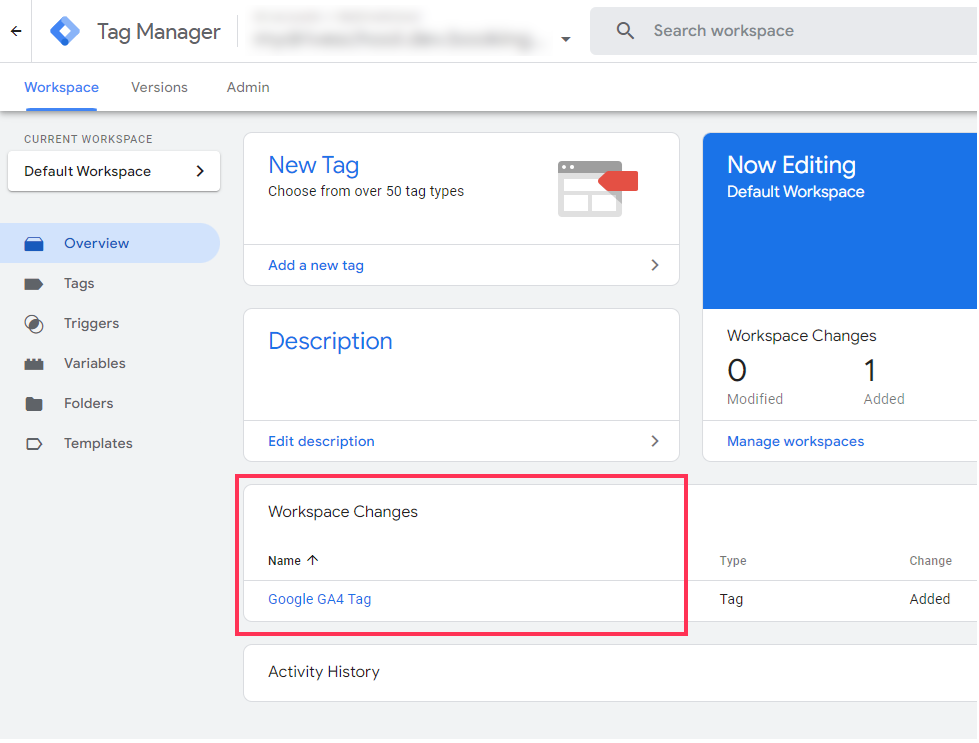
If you see anything there, those changes are not published. If you see a Google tag, this might be why GA4 real-time reports are not working for you. Test that Google Tag Manager setup (with a preview mode) and then publish (by clicking the Submit button in the top-right corner)
Conflicting on-page code
If the same Google tag is configured two or more times on the same page, it may cause duplicate data or mixed settings. This scenario can occur if you accidentally implement the same tag twice or if you combine two Google tags that were previously both installed on the same page. To ignore duplicate instances of on-page config commands, you can enable the corresponding option in the “Manage Google tag” section of the Admin tab: “Ignore duplicate instances of on-page configuration”. To prevent issues, this option will be enabled automatically when you combine two Google tags.
Domain Configuration
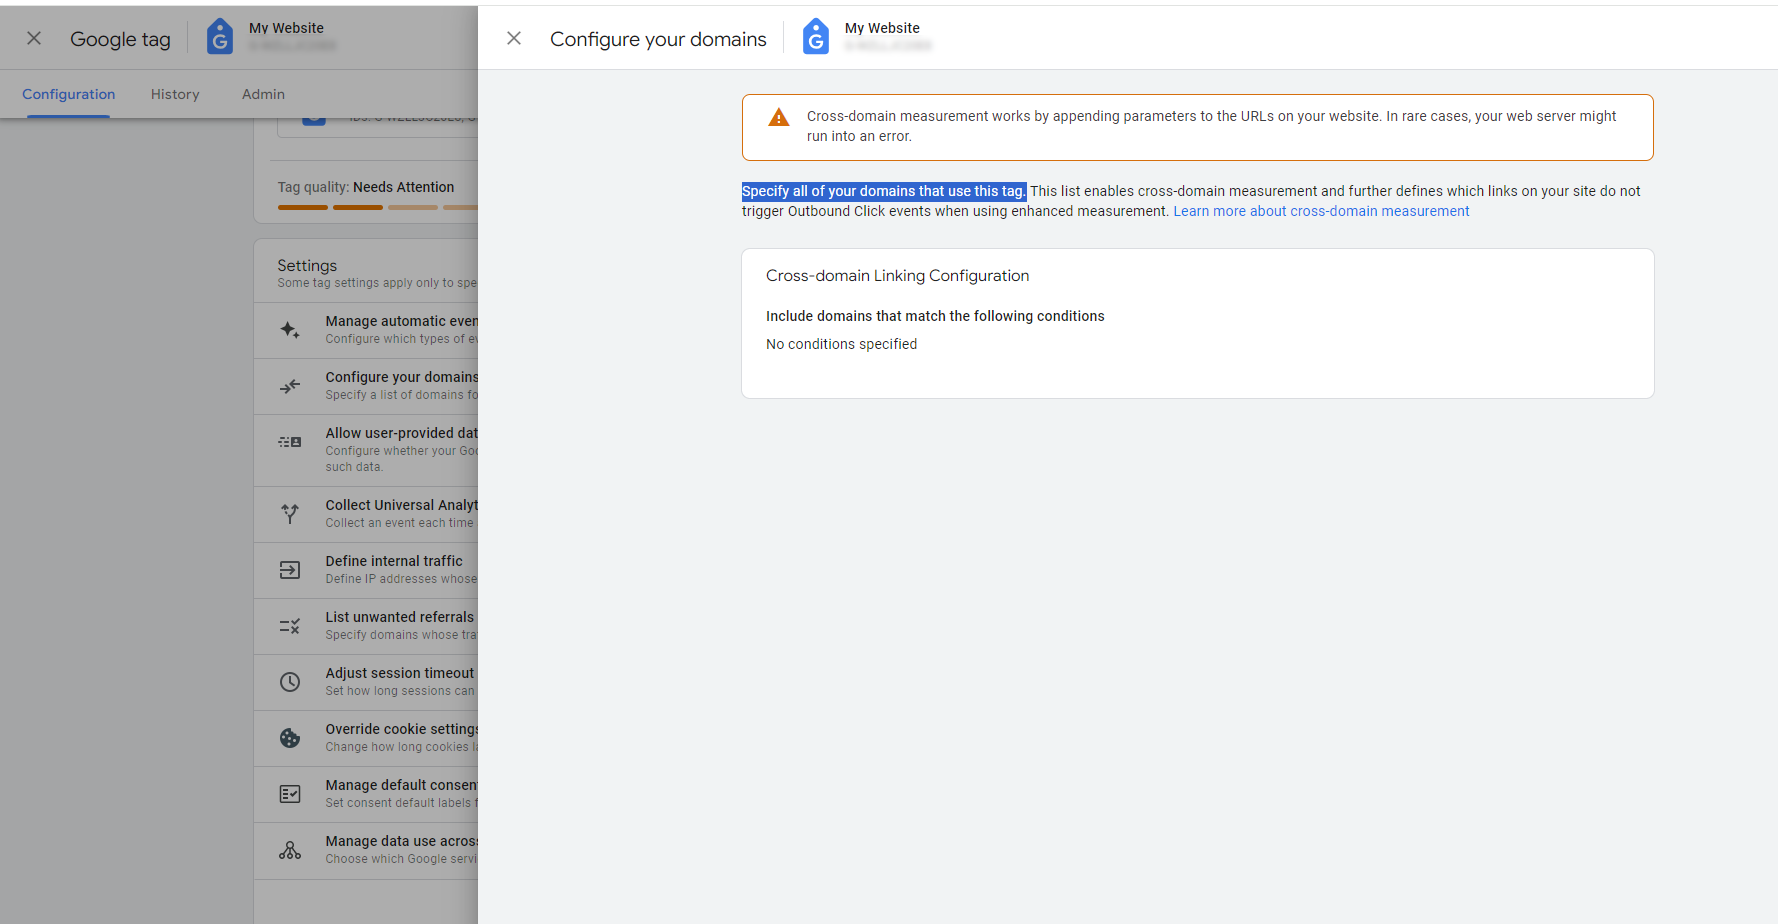
Specify all of your domains that use this tag. This list enables cross-domain measurement and further defines which links on your site do not trigger Outbound Click events when using automatic event detection.
If you use the same Google tag across domains, they are automatically detected and show up in the Recommendations section. To accept a recommendation, click Add.To manually add a domain, click Add condition under Include domains that match the following conditions:
Choose a match type.
Under Domain, enter the identifier for the domain you want to match (e.g., example.com).
Add each domain you want to include in cross-domain measurement.
When you’ve specified all the domains that use this tag, click Save.
The changes you make here could affect other Google tags loaded on the same page.
Consent and Data Use accross Google Services
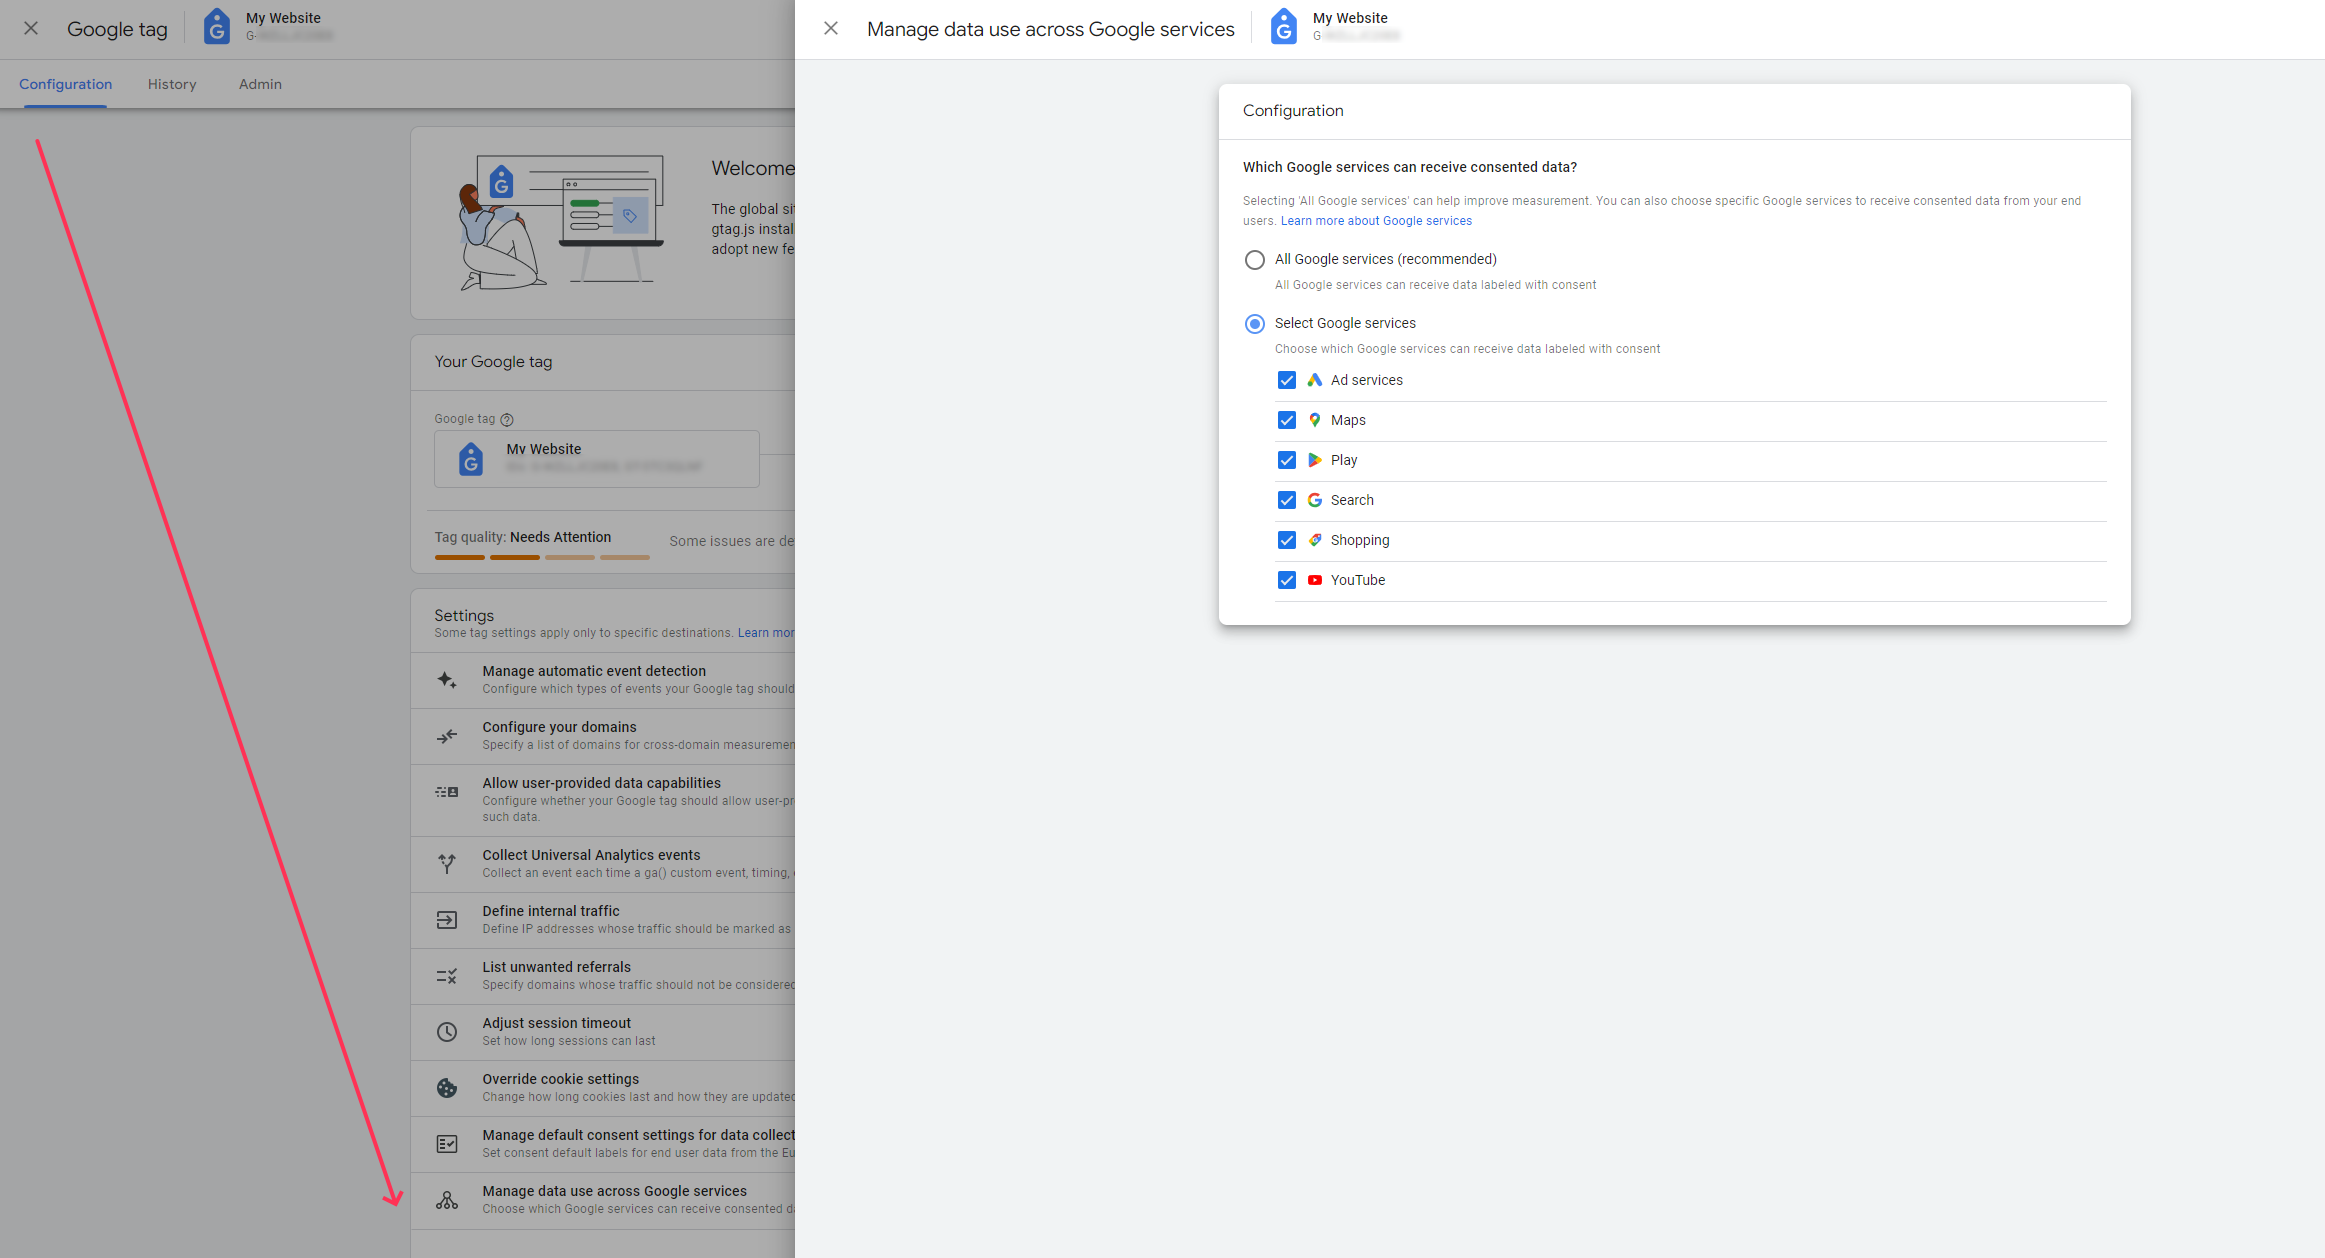
You can decide which Google services can receive consented end-user data. For optimal measurement, make sure that all Google services receive consented end-user data.
If your business requires you to restrict data sharing across Google services, choose Select Google services. Select all Google services that are allowed to receive user-consented data for measurement and personalization.
To find the feature to manage data use across Google services in GA4, follow these steps:
Access Data Stream within GA4.
Click on Configure tag settings.
Scroll down to and click on Show More.
Click on Manage data use across Google services.
This feature allows you to control which Google services you share data with through the Google tag.
Are you still finding issues with your Google connection? Please contact Google Analytics support here.