BookingTimes allows you to create digital Intake Forms. They allow a client to enter any intake information that the business requires, and this will be automatically added to their client profile. They can be attached to a service so the client is prompted to complete it the first time they book (depending on what plan you are on), or they can be added manually by an admin to a client’s account as needed (including emailing the form to the client), or linked within an email template to be sent out.
Intake Forms can be completed:
As a part of the client’s online booking process (see section below).
On your own device at your business location (BookingTimes will log you out for security while the client completes their Intake Form) and then added to the client’s record or booking. ^
Can be emailed to the client, and once completed will be added to the client’s record or booking. ^
Can be linked within an email template which can then emailed to a client, or a group of clients (e.g. all course attendees). ^
^ For the last 3 options, please refer to the Manually adding an Intake Form article.
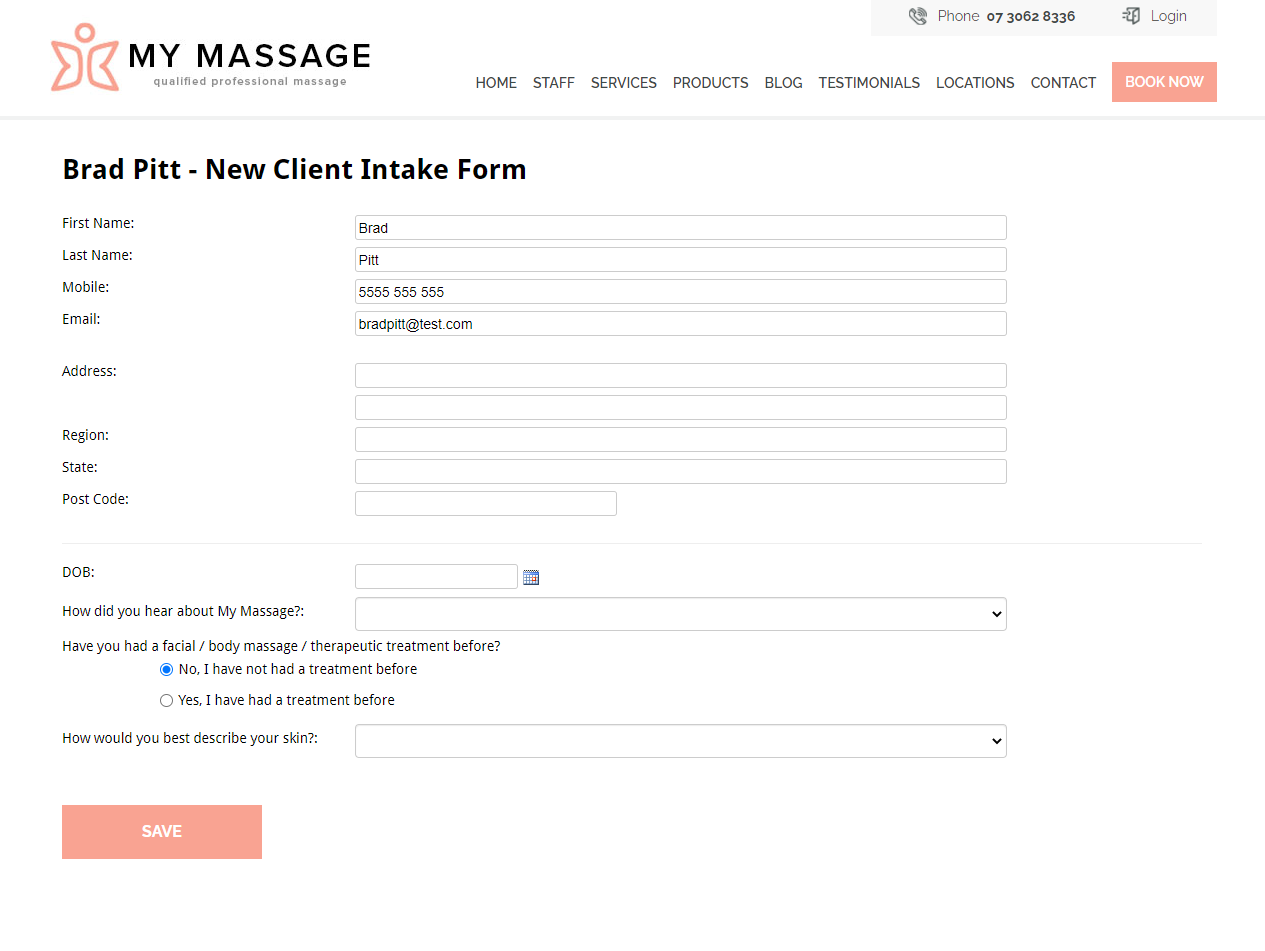
Example intake form
An intake form will also display the main client information at the top of the form (which can be updated during this process and will be reflected on the client’s profile), with the specific intake form fields appearing below:
Intake form as part of the client’s the online booking process
This feature is available on these plans (view pricing)
If an Intake Form is to be attached to a service it means it will automatically prompt the client to complete it after they have completed their online booking process. For this, this next plan is needed. It’s not required if you as an admin wish to add an Intake Form to the client record manually.
When an Intake Form is included as part of the client's online booking process, the flow is as follows:
Client makes a booking
Client pays for booking (if configured for payment to be required)
Intake form displays to client to complete (if configured like this)
Intake form is then saved to the client record
In the Notes tab for admin to view, and optionally appears on the Dashboard. Please refer to View an intake form for more details.
Note
The client will only be prompted to complete this Intake Form on their FIRST booking of this service. On subsequent bookings of the same service, the client will not be prompted to complete this intake form again. If another Intake Form needs to be completed, admins are able to Manually add an intake form.
The client may choose to not complete the Intake form. If this happens, an admin will need to manually resend this form for completion (either in person or via email). Please refer to Manually adding an intake form.
This article will detail how to create an Intake Form, and detail how to allocate it to a service if required.
Creating an intake form
Follow these steps to creating an intake form, including enabling a configuration option that notifies you of when a client completes an Intake Form.
Steps
Navigate to Setup > Client CRM > Intake Forms
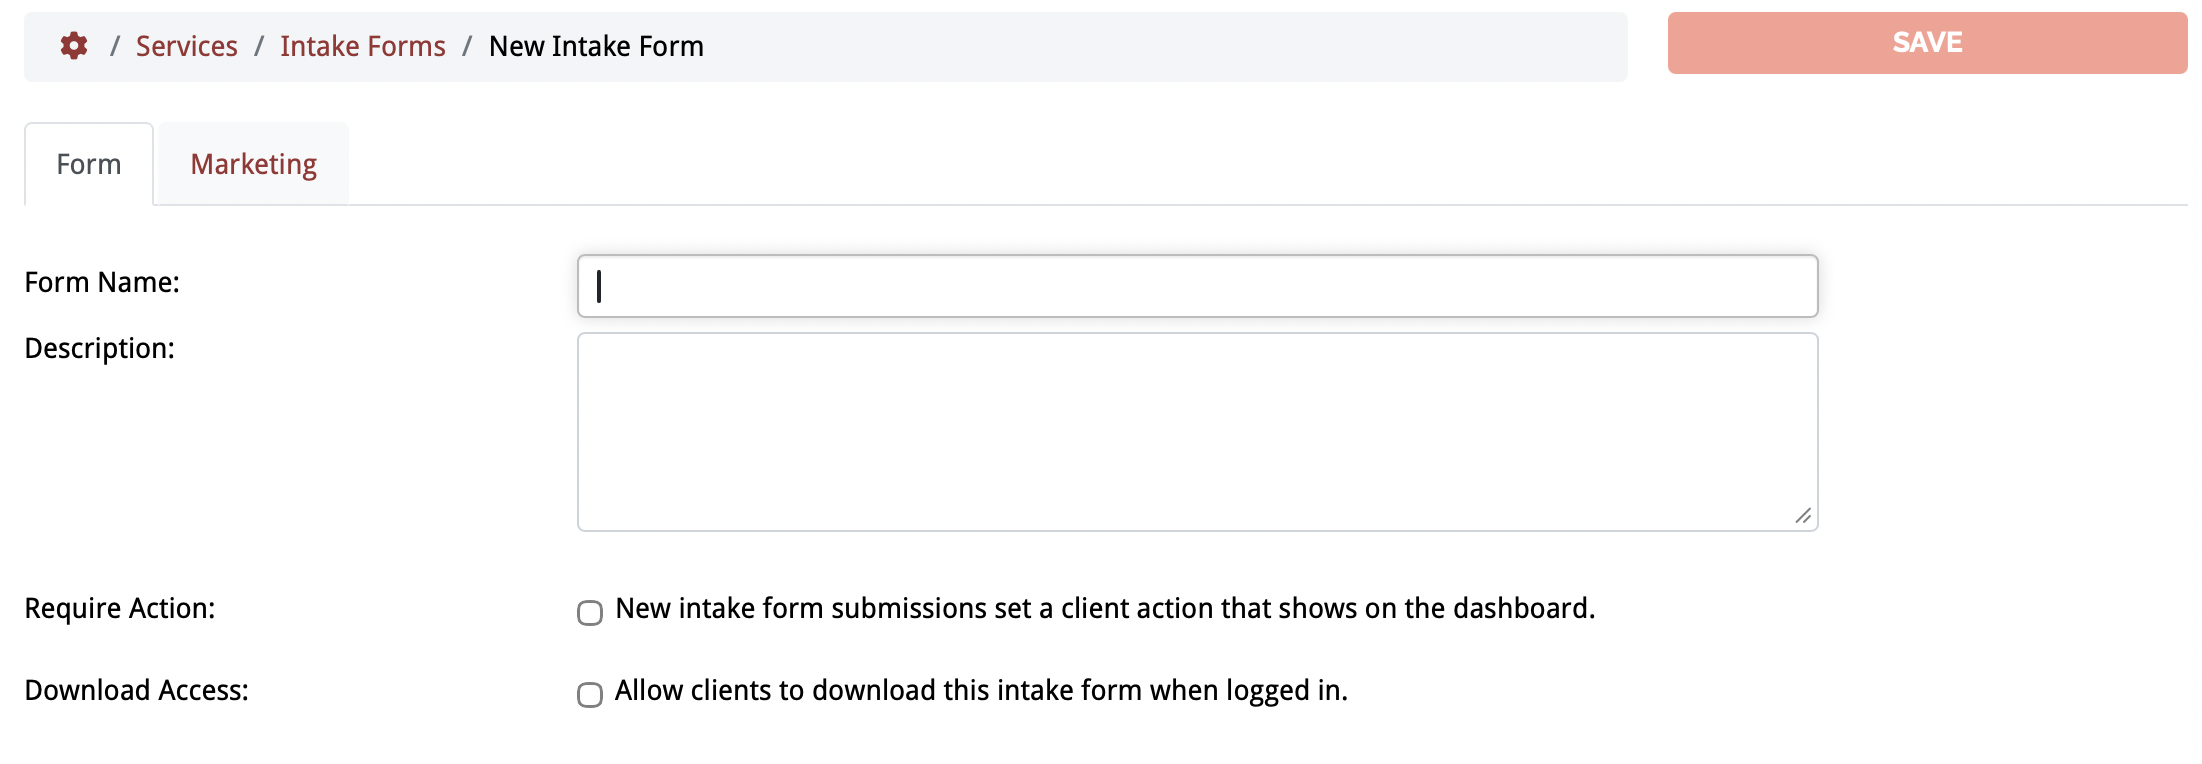
Click Add Intake Form

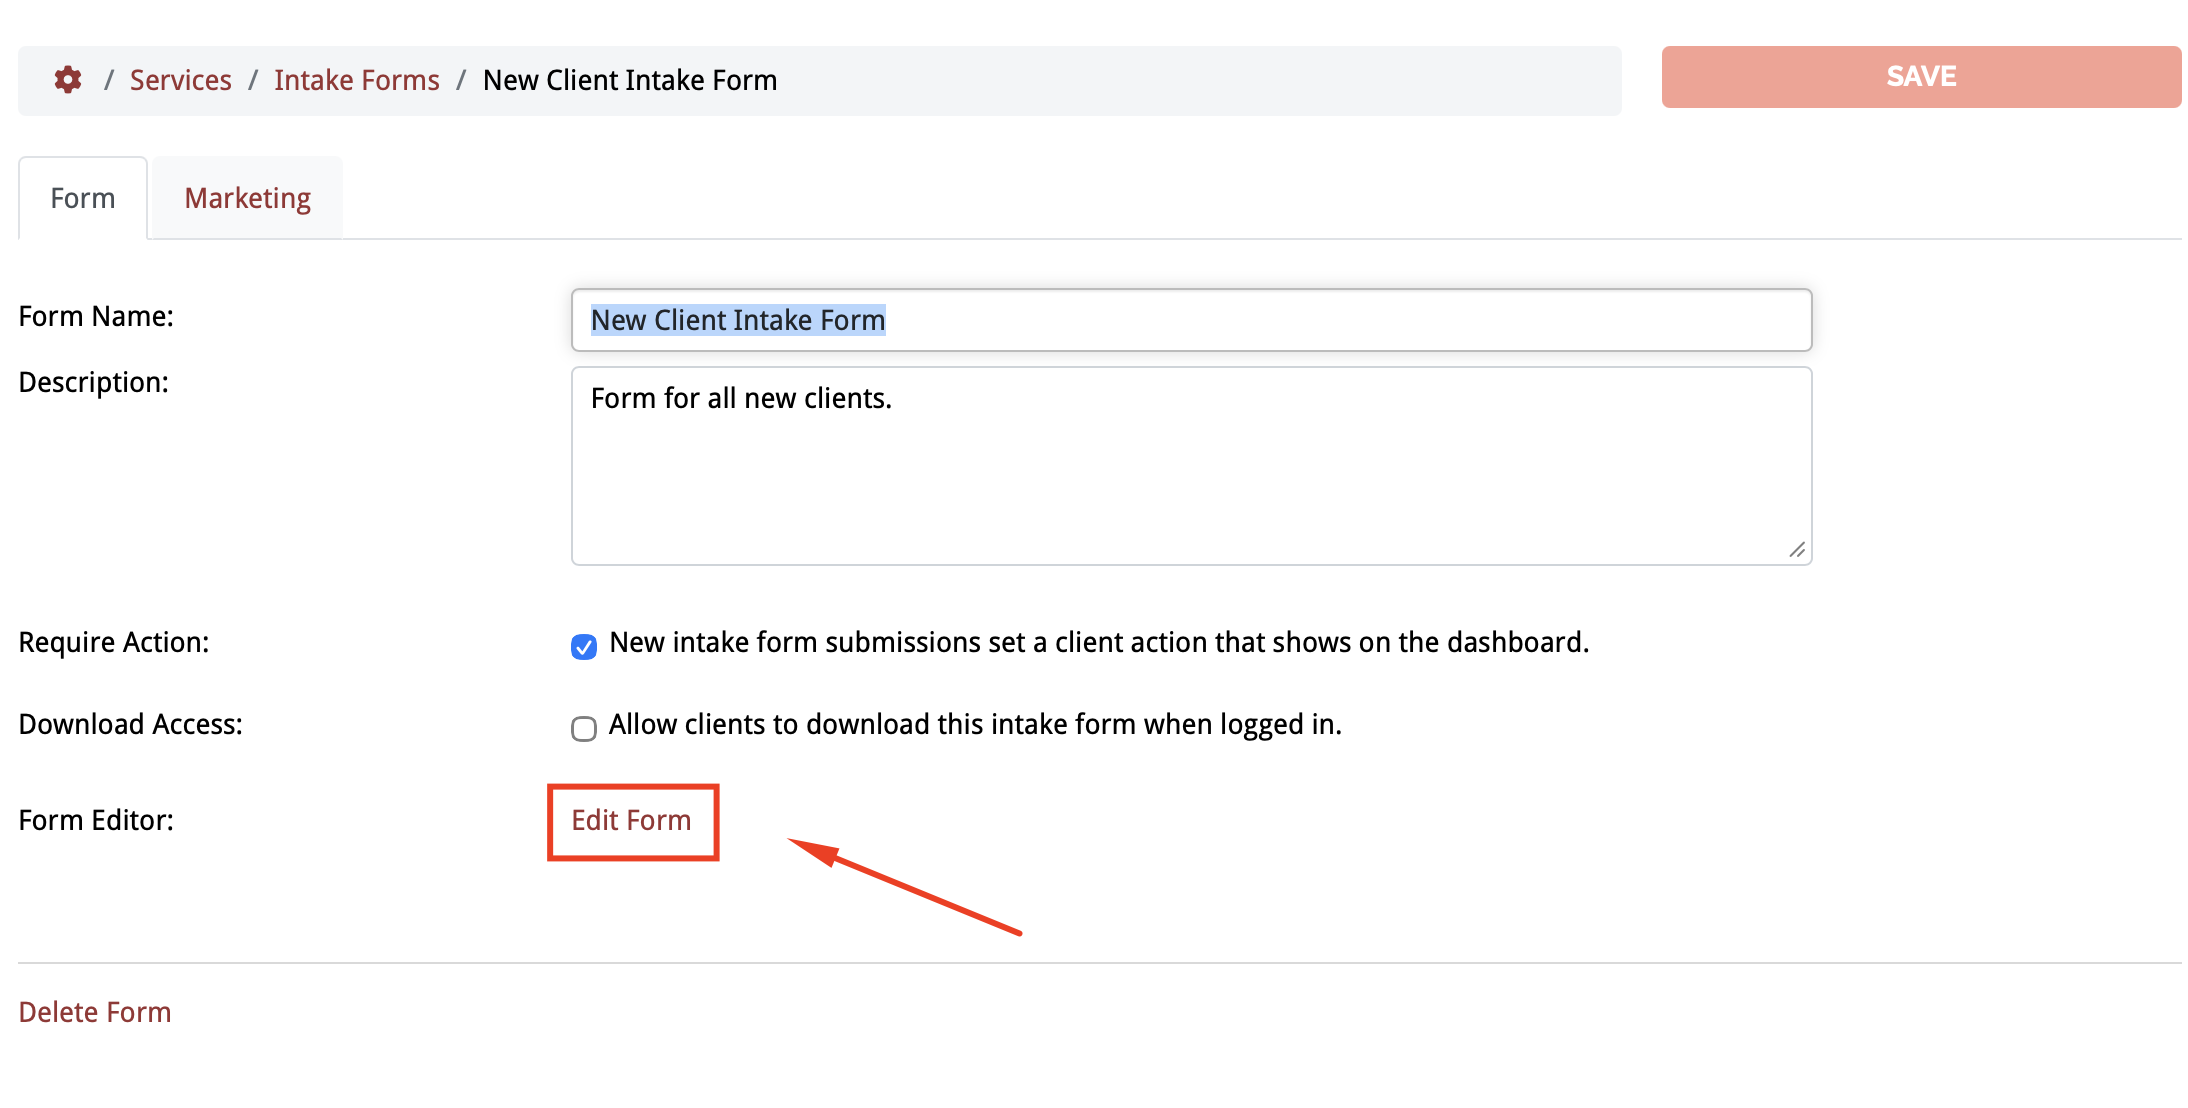
Enter Form Name, Description, and select Require Action (which will raise a client action that shows on the Dashboard on the Actions tab) and Download Access (which allows the client to download this form).
Click Save so then you’ll be able to edit the form in the next step.
Click Edit Form link
Drag and drop fields onto the central panel to add them:
Enter field details on the right, including if this field is mandatory or not.
Drag fields off the form into the left panel to remove them
Click Save

Adding an Intake Form to a service
This feature is available on these plans (view pricing)
Intake Forms can be added to the Online Booking Process to be completed after the booking has been made by the client. This is done by allocating an Intake Form to a service. There is also an option that allows an ‘action’ to be raised on the client record which is then displayed on the Dashboard, when an Intake Form has been completed by a client so you can check their form prior to their booking.
Steps
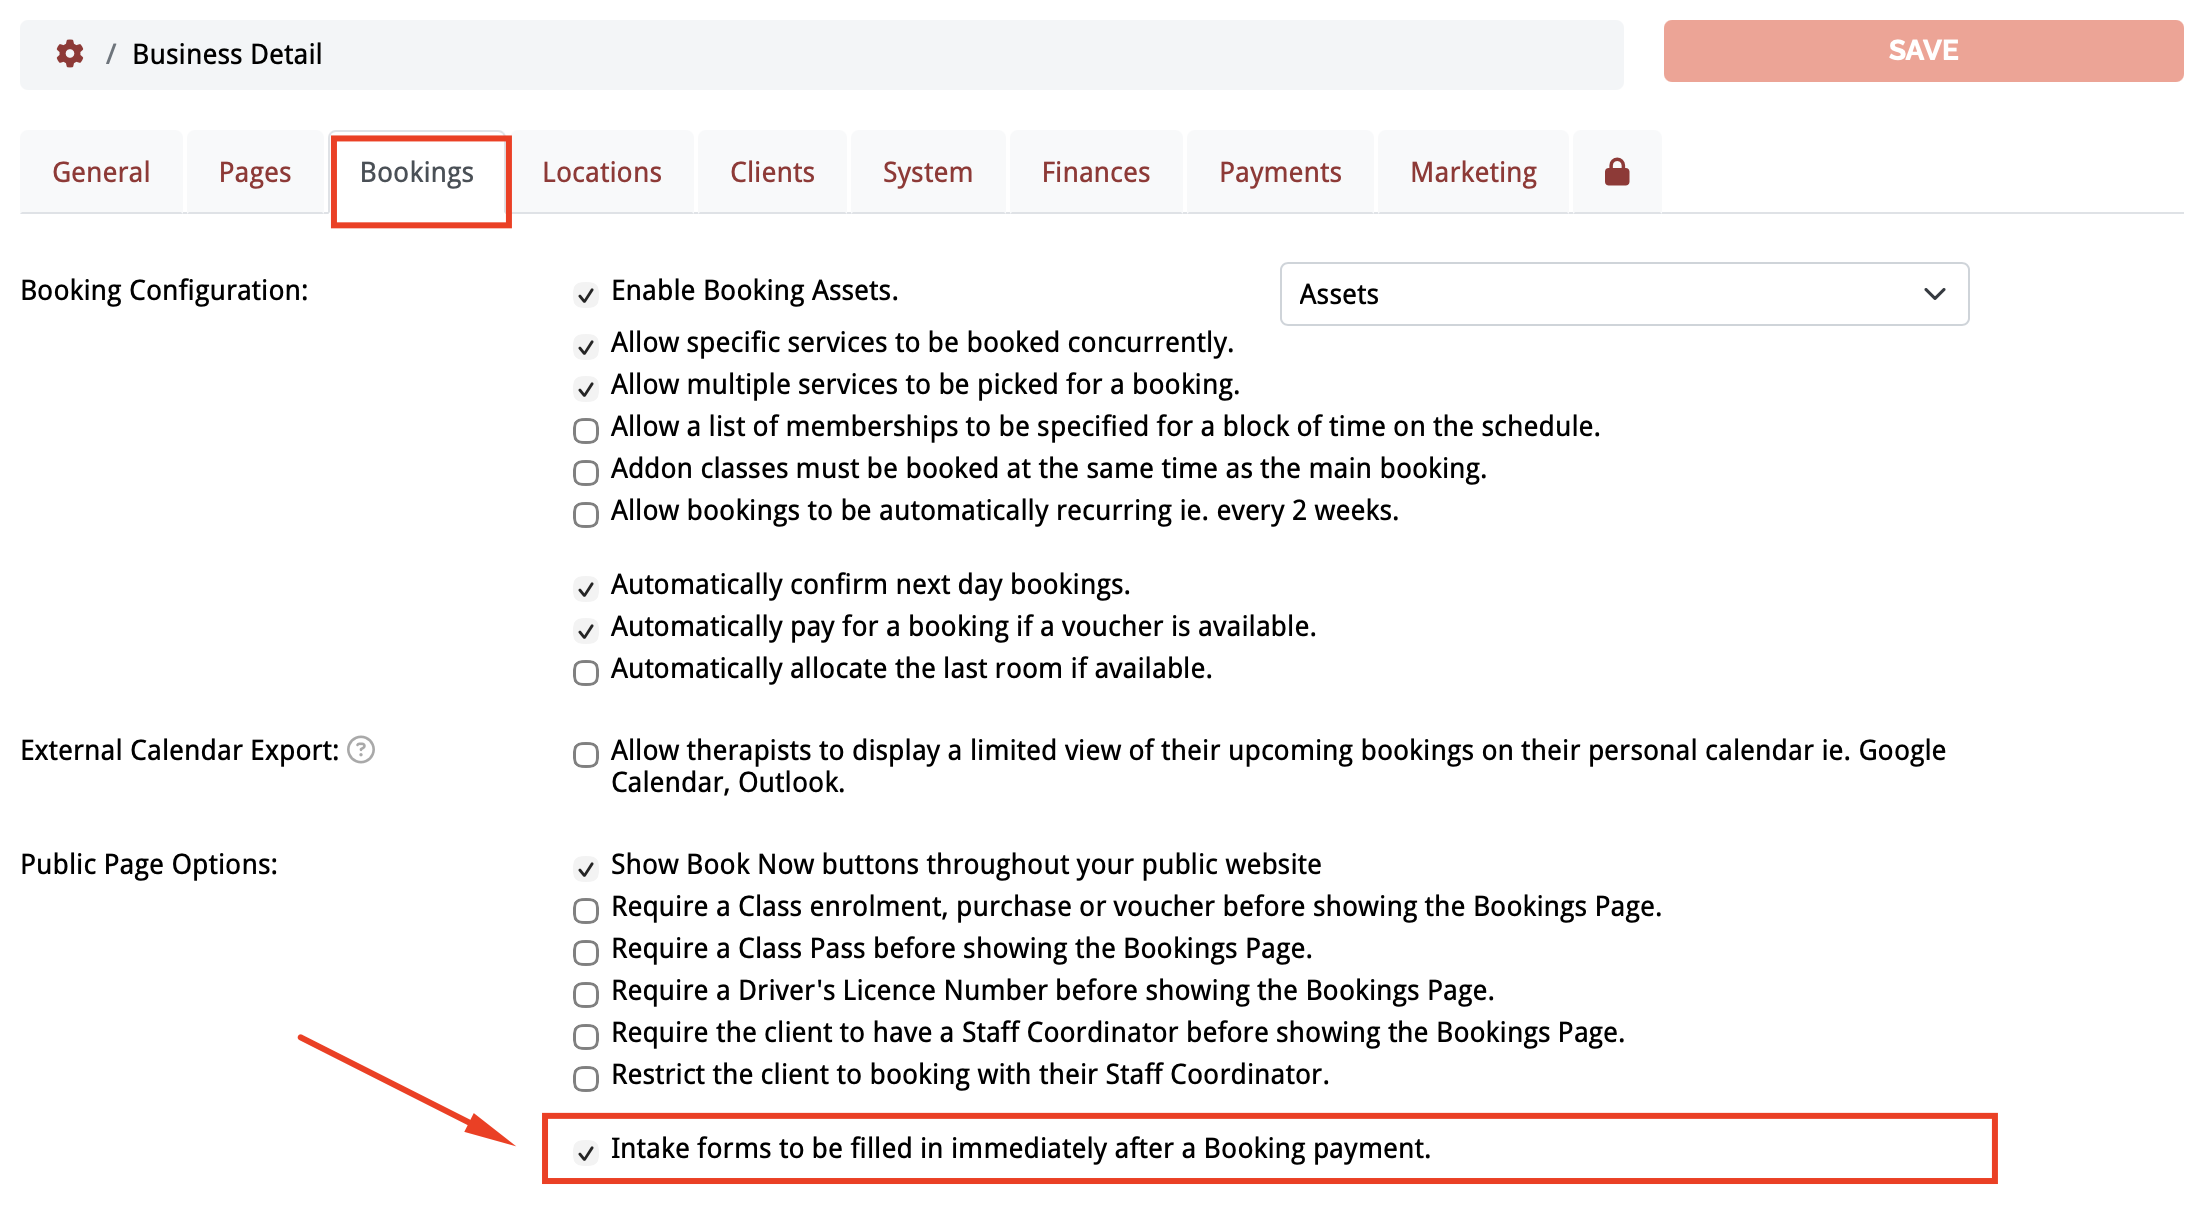
For the intake form to be completed immediately after the client pays for their booking, ensure that this option is turned on:
Navigate to Setup > System Settings > Business Detail > Bookings tab
Check the option Intake forms to be filled in immediately after a Booking payment.
Optional: Check the option to raise an Action Requirement on the client record once client completes an Intake Form.
Click Save
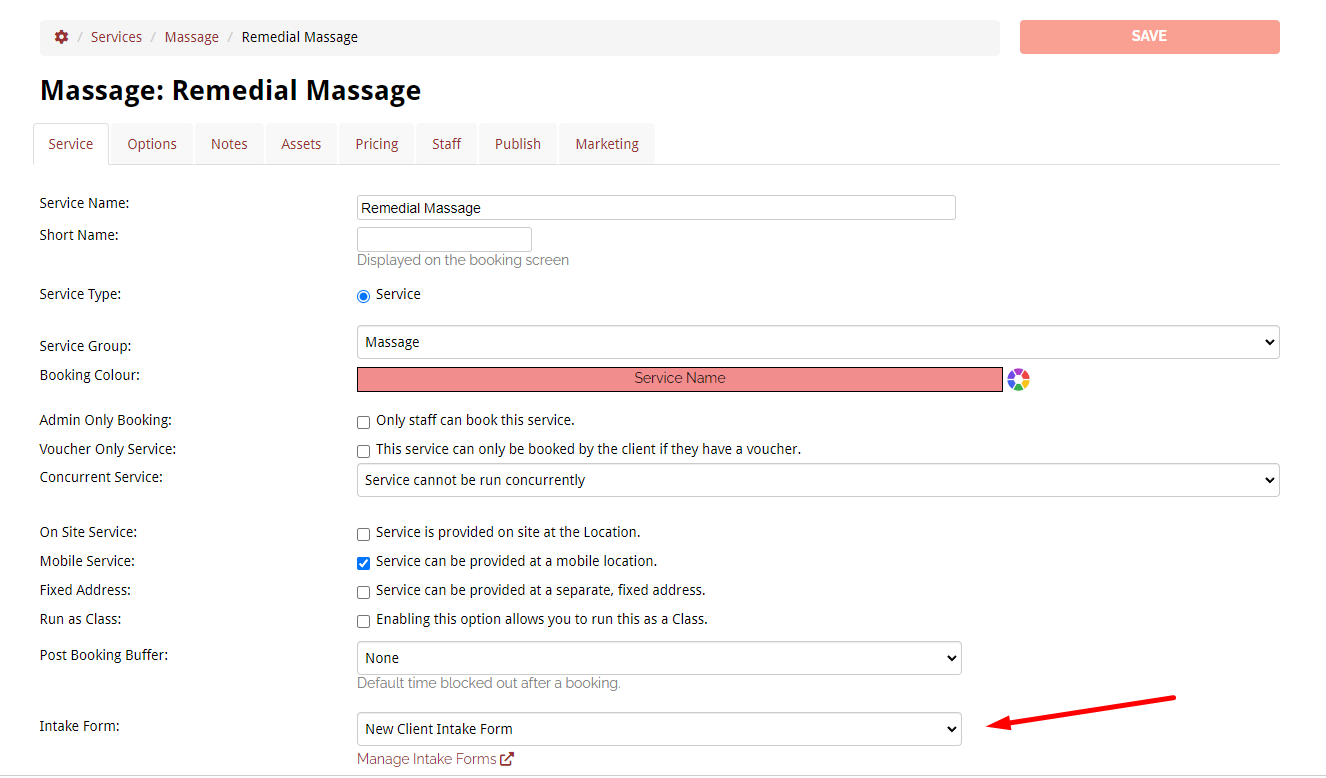
Navigate to Setup > Bookings > Services
Select the relevant service
Under Intake Form, select the relevant Intake Form from the dropdown
Click Save
Client view - completing an intake form
This the client view of when a client has been prompted to complete an Intake Form after booking a service. This view will depend on how the system has been configured. It can either display a button to prompt the client to complete the Intake Form (option A), or have the Intake Form show immediately (option B) shown below.
Steps
Option A - button to complete the Intake Form is displayed after a booking has been made. When clicked it will take the client to a new screen to complete their intake form.

Option B - display Intake Form immediately after booking.


When they complete all required information and click Save, a copy of the Intake Form will be saved against their client record.
Note: if all required information is not entered, the intake form will not be saved. In this case the admin of the system will need to send them the intake form again to complete.

Client view - viewing completed intake forms
If the Intake Form has been configured to allow a client to download it, then a client is able to download a previously completed Intake Form from their profile.
Steps
Go to My Profile > Profile tab > scroll down to Intake Form
