When you first create your website you will have been prompted to create your main business location. You can also choose to then add additional locations if your business services several areas.
Even if you don’t have a physical location (e.g. driving instructors servicing Brisbane and Sydney), as an example think of a location as 2 physical shop fronts. They each have their own staff, own prices, and own opening hours.
Typically the staff members will only work in a single location, however, they can be scheduled across multiple locations too, and this is also covered in this article.
Steps
Navigate to Setup > Bookings > Locations. The location you entered when you first created your website will display.
Click on the existing location to edit those details, or click Add Location to add a new location
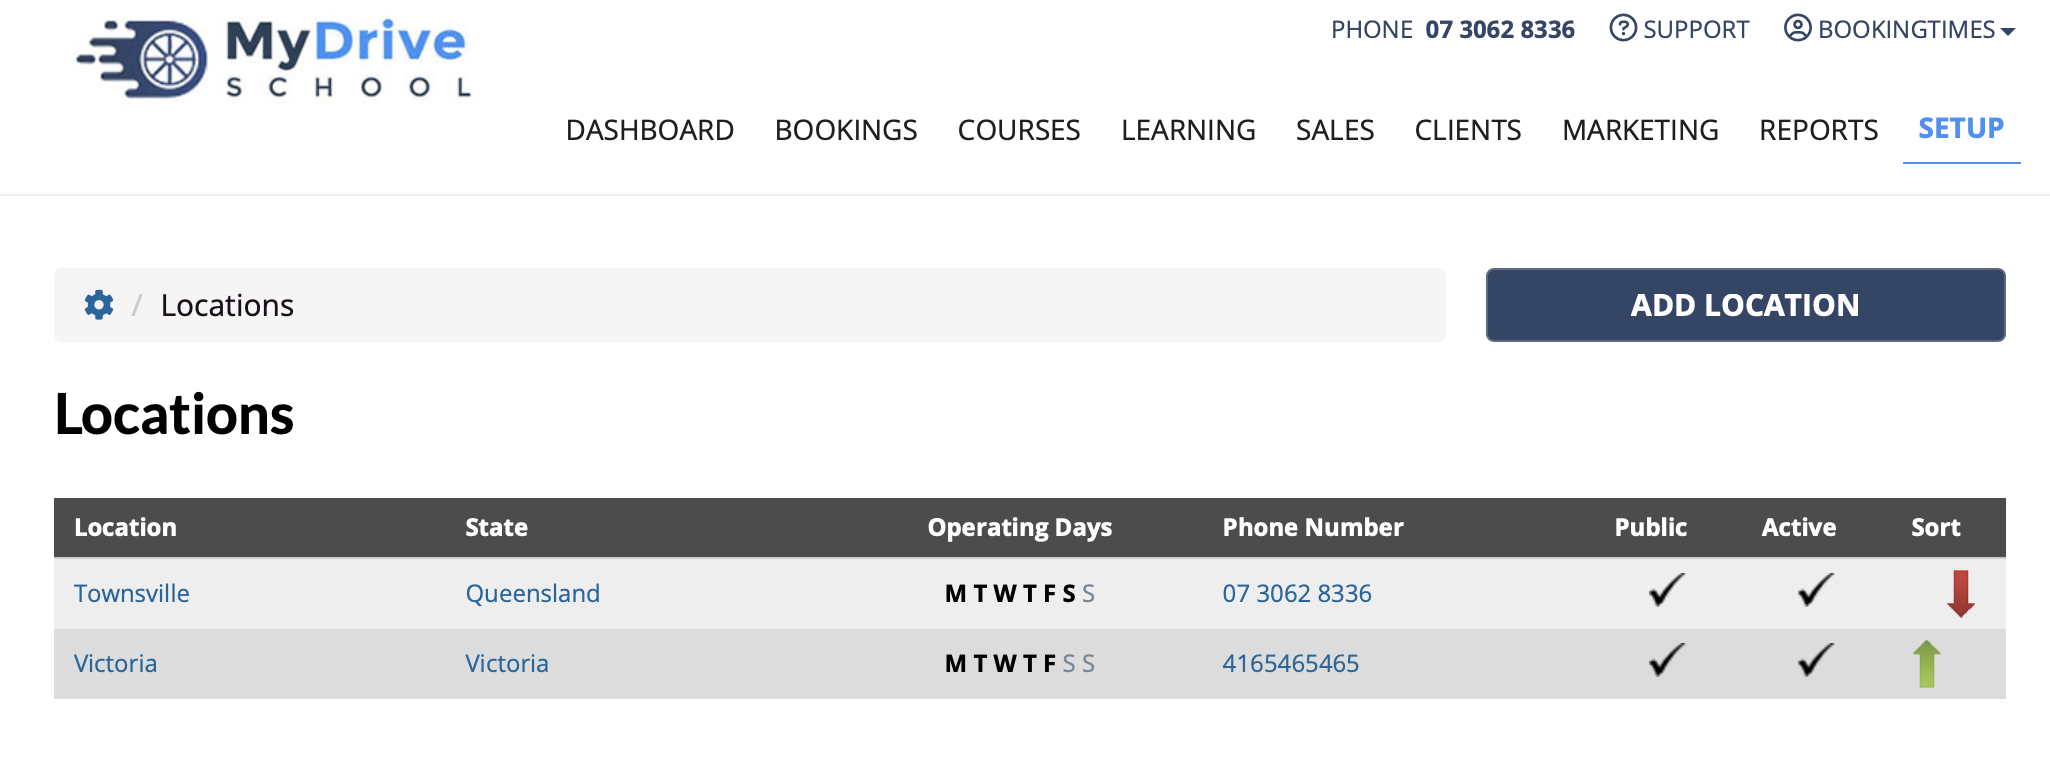
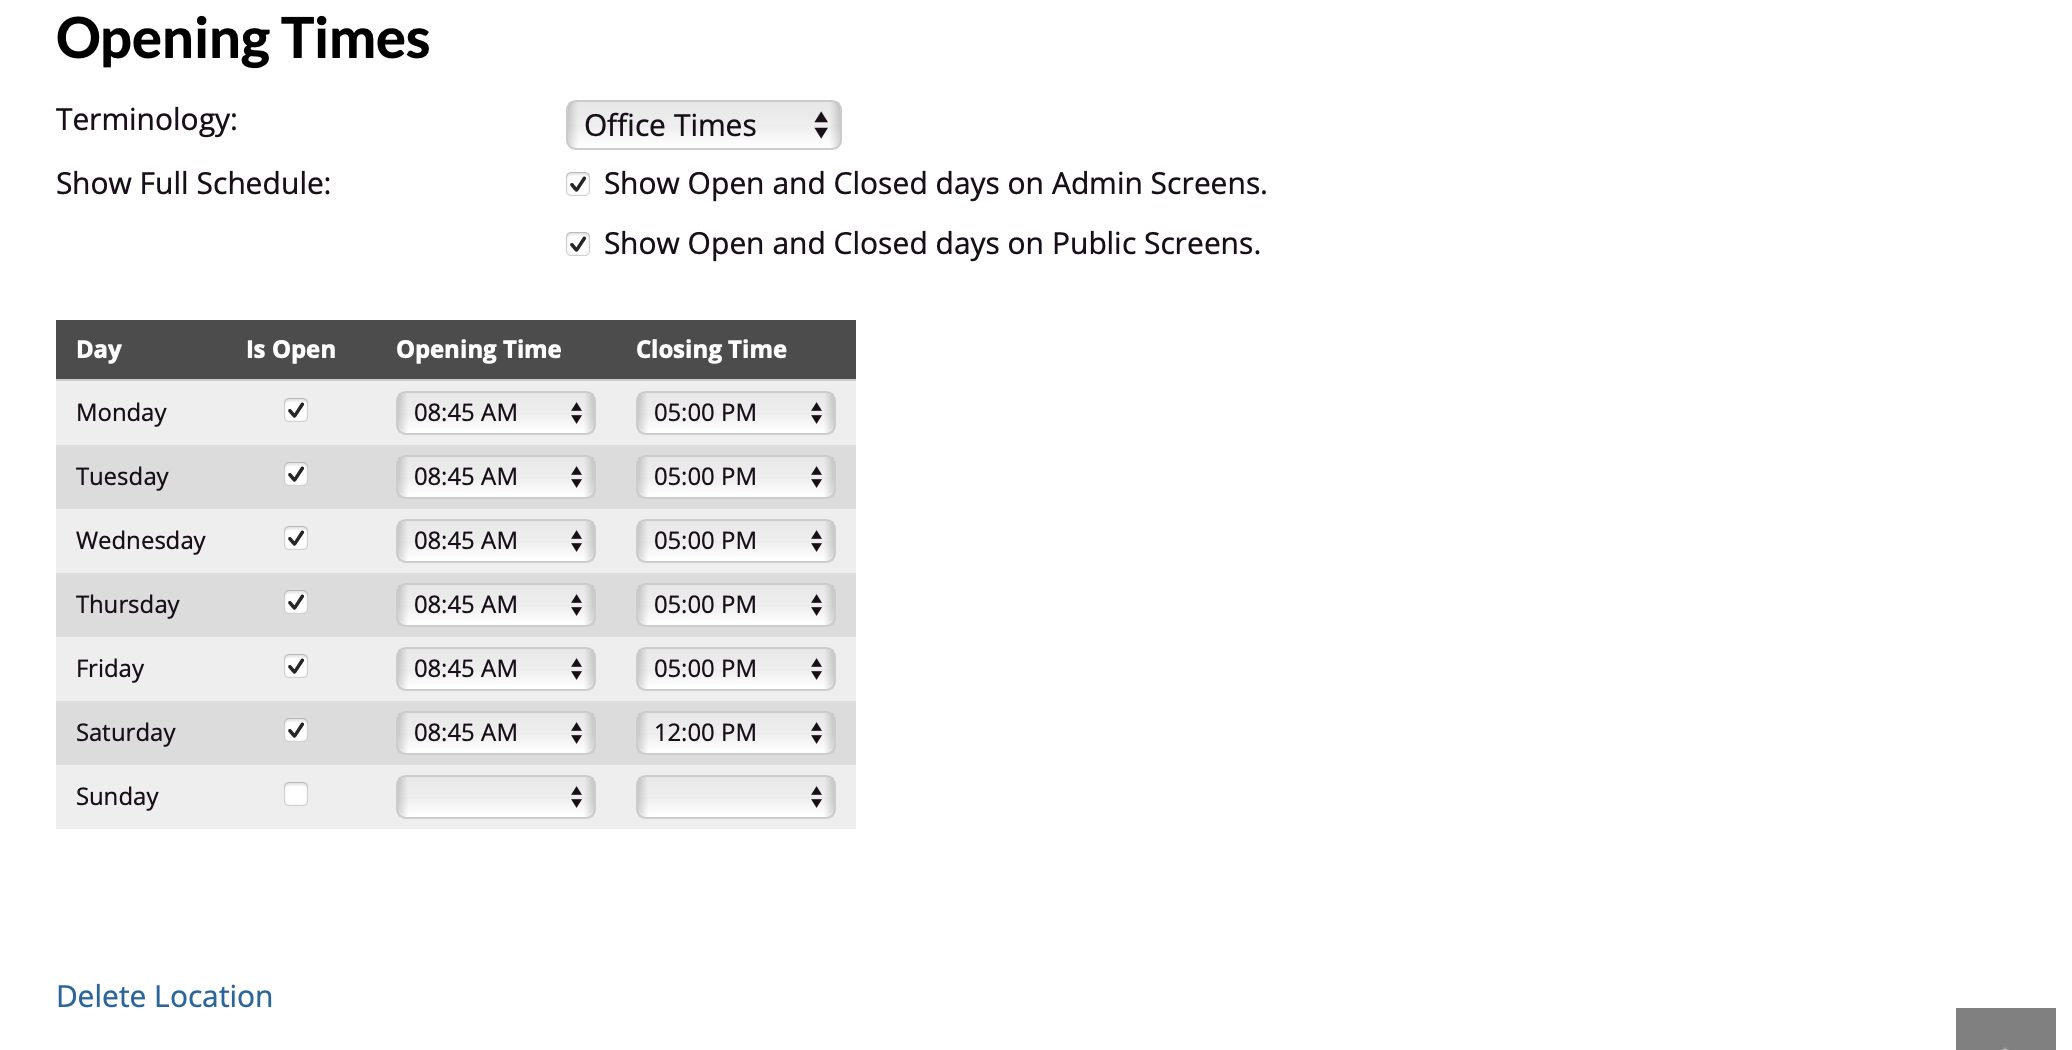
Enter the location details including contact details, address, map, time zone, assets/vehicles (if set up), time zone and opening times. Many of the default settings for options that can be turned on/off are suitable for most businesses.
Note on Email address: Any booking confirmations for this location will come from the email specified under the location (not from the email that is set up under Setup > System Settings >Business Detail > General tab). If you already have another location, it can be the same email.
Note on Google map: You may leave "Google map URL" blank and a default map will display based on the address entered. If you'd like to create your own map, please see: Adding a custom google map.
Note on time zones: Ensure you select the correct time zones for your location/s to avoid the client being sent an incorrect booking reminder time, especially during daylight savings periods.

The business hours listed in location setup will alter the hours displayed on your publicly displayed Locations page.
Please note that what days/times you choose to make available in your schedule overrides these location business hours.
Click Save
Location service pricing
Prices for services and per location are usually first set up when the service is being set up. Please see the Setting up services article for more details.
However, if all the services have already been set up, then the pricing for all the services that are available for a particular location can also be added, viewed, and updated here via the location details under the Pricing tab. This is useful if there is a price update across all services for a particular location only.
Steps
Navigate to Setup > Bookings > Locations
Click on the relevant location
Select the Pricing tab
Adjust any prices and click Save

Adding staff members to a location
Once a location has been created, staff members can now be allocated to a location and what services they will provide there. Once this is set up, you can then open up the availability within the staff member’s schedule/calendar. Please refer to Opening the schedule for details.
Steps
Navigate to Setup > Accounts & Security > Staff & Admins
Select the staff member
Click on the Services tab
Uncheck Show Active Only above the services table
Select all the services within each Location that the staff member provides
Click Save

Staff working across multiple locations
If you have multiple locations (not just suburbs) that staff members work across, you are able to schedule your staff across these multiple locations. You do this by setting up the desired availability in their calendar for each location, remembering that a staff member can only be in 1 location at a time. i.e. that staff member will have a calendar for both locations.
For example we have 2 locations Townsville and Victoria that can be accessed via the left hand menu that shows all your locations:
Jane has availability set in her Townsville location calendar for Monday/Tuesday/Wednesday/Friday
Jane has availability set in her Victoria location calendar for Thursday

Steps
To set availability across multiple locations for a staff member:
Select a location using the left hand menu
Set their availability for that location. Please refer to Opening the schedule for details.
Select another location and repeat the process.
The calendar will clearly show when the staff member has been scheduled in another location so there is no chance of them being scheduled in different locations at the same time.
Location suburb filtering
Under the Suburbs tab (or regions/boroughs whatever terminology you have set up), individual suburbs can be added to each location. Please refer to the Suburbs, Regions, Boroughs article for more details about the configuration options available here.

Location details used across the website
This section explains where the location details are used across the website:
Phone number on website header
The contact phone number that is displayed at the top of your website is the phone number that is added from your main location. i.e. if you have multiple locations, this will be the first one listed at the top according to the displayed sort order.

The main location is the first location listed under Setup > Locations

Phone number and address on invoices and letters
For bookings, the phone number and address that is displayed on any invoices or letters is based on the details that are set up for the location that the booking was made for.
For product purchases etc (where there is no associated location), the phone number and address is based on the details that are set up for your main location.

For this booking, you can see the location’s address based on where the booking is.

Location email address used for booking confirmations
Any booking confirmations for this location will come from the email specified under the location via Setup > Locations > select Location.
(Not from the email that is set up under Setup > System Settings >Business Detail > General tab, though they can be the same)
