This feature is available on these plans (view pricing)
This article covers the creation of checklists. Checklists provide a fillable form which can be checked for every booking, or reused across all bookings for that client. Many checklists can be created and applied to each booking or client, and they can be configured at the system level if they are required to be completed
Checklists items include:
Checklist item name
Item comments
A rating from 0-10, pass/fail, yes/no, satisfaction rating, guidance rating, competent/not competent
A record of when the item was last completed

Creating checklists
Steps
Navigate to Setup > Client CRM > Checklists
Click Add Checklist
Enter Checklist Name, Description, Legend (optional)
Select Checklist Type:
Booking checklist - update the same checklist across bookings; or
Booking checklist - use a new checklist for each booking
Online course assessment (this used within the Learning Management System)
Check Is Client Visible if you want clients to be able to view their own checklists under their My Progress menu (optional)

Click Add Checklist Item button located the bottom right
Enter Item Name, Tooltip (optional), Category (optional)
Select the Type to suit your checklist item:
Rating 1-10
Pass/Fail
Yes/No
Satisfaction Rating
Guidance rating
Competent/Not competent
Enter Default Comment (optional)
Click Save
Repeat this for every new item or "step" you want on your checklist

Checklist item types
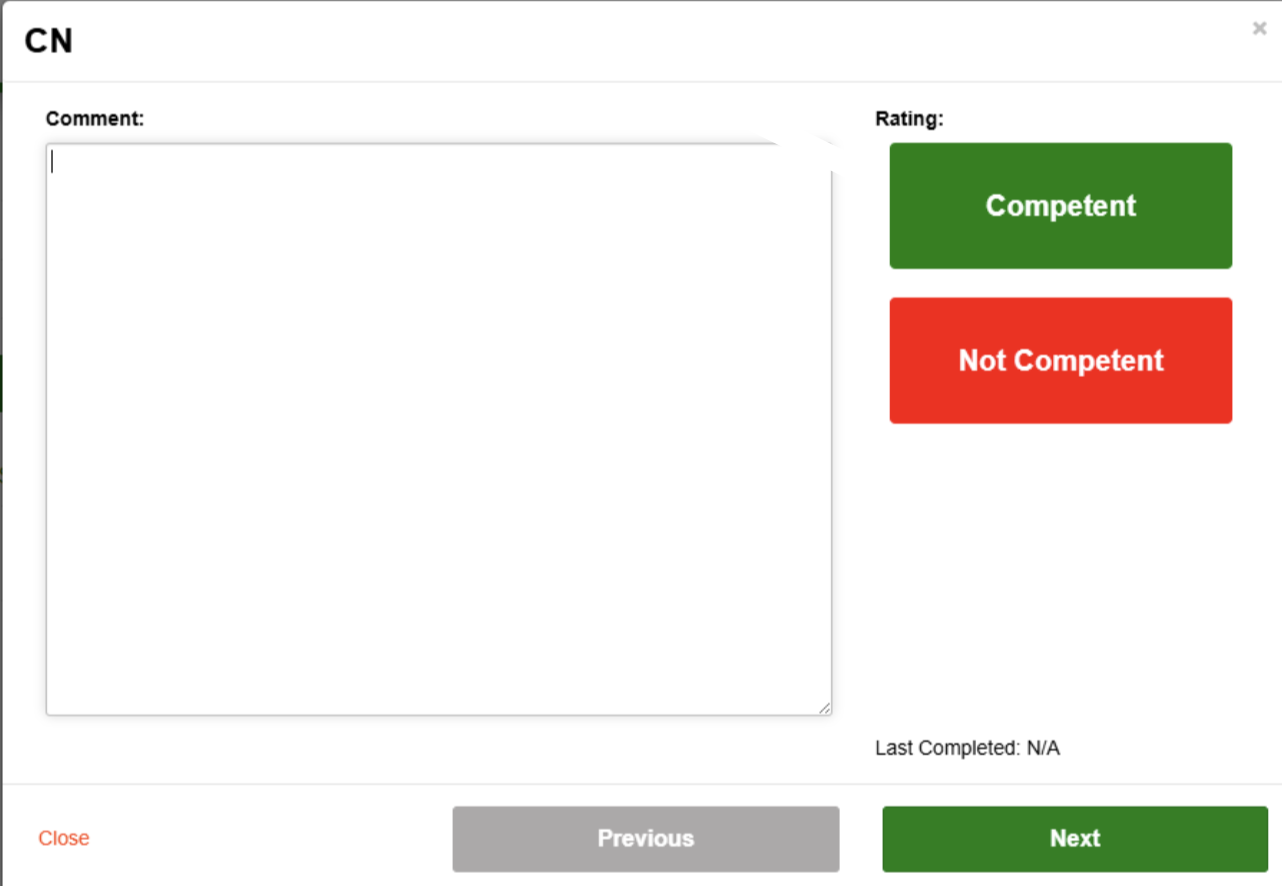
Here is what each of the checklist items look like when they are being completed by the admin/instructors:
Rating 1-10

Pass/Fail

Yes/No

Satisfaction Rating

Guidance rating

Competence rating
Adding checklists to a booking
A checklist can be added to a booking as needed, or it can be configured that a checklist is required to be updated on each booking (refer to section Configuring checklists to be required on a booking below).
Steps
Navigate to Bookings menu
Select the relevant booking
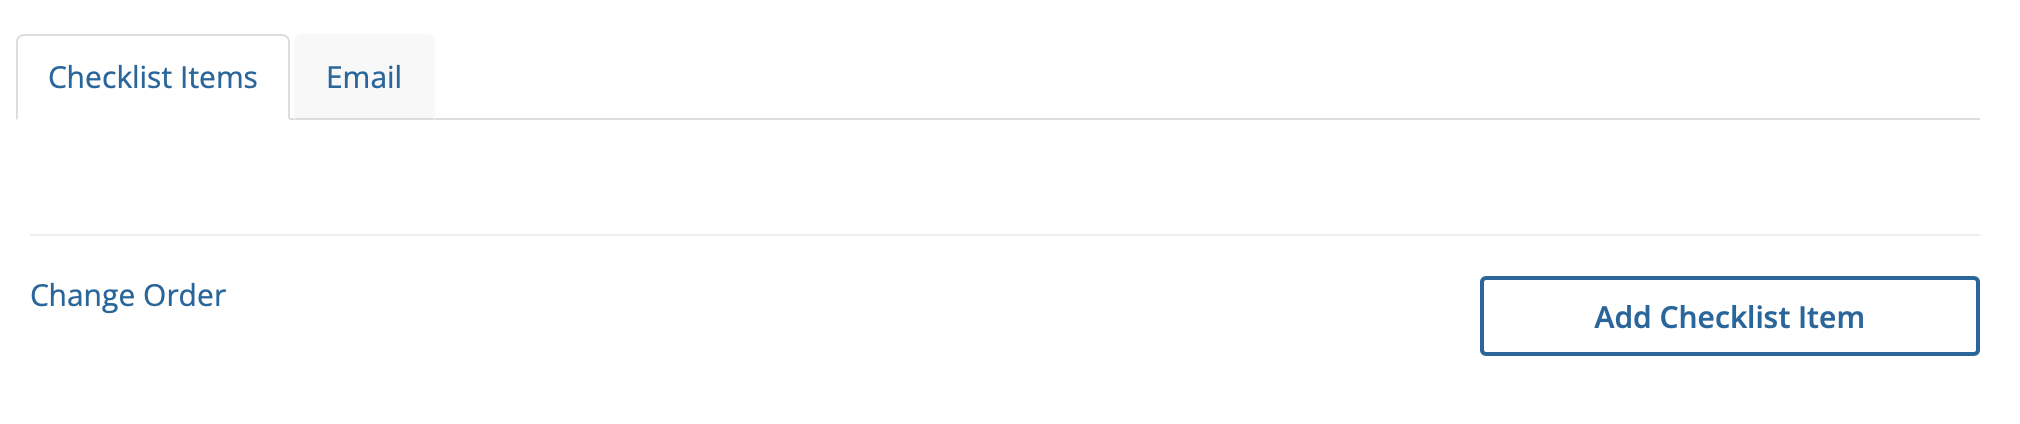
Navigate to the Checklists tab
Select the required checklist from the dropdown (many can be selected and completed)
Click on the Comment and Rating and fill them out
Click on the Last Completed date to set to todays date
Note: The Tally column is the number of times this item has been updated

Configuring checklists to be required on a booking
The system can be configured to require that a checklist is to be updated on each service. If a checklist has not been completed, the booking will appear on the Dashboard in the Checklists tab to show it’s not completed, and any commission report items (if applicable) will also be marked red to show they’re not completed.
Steps
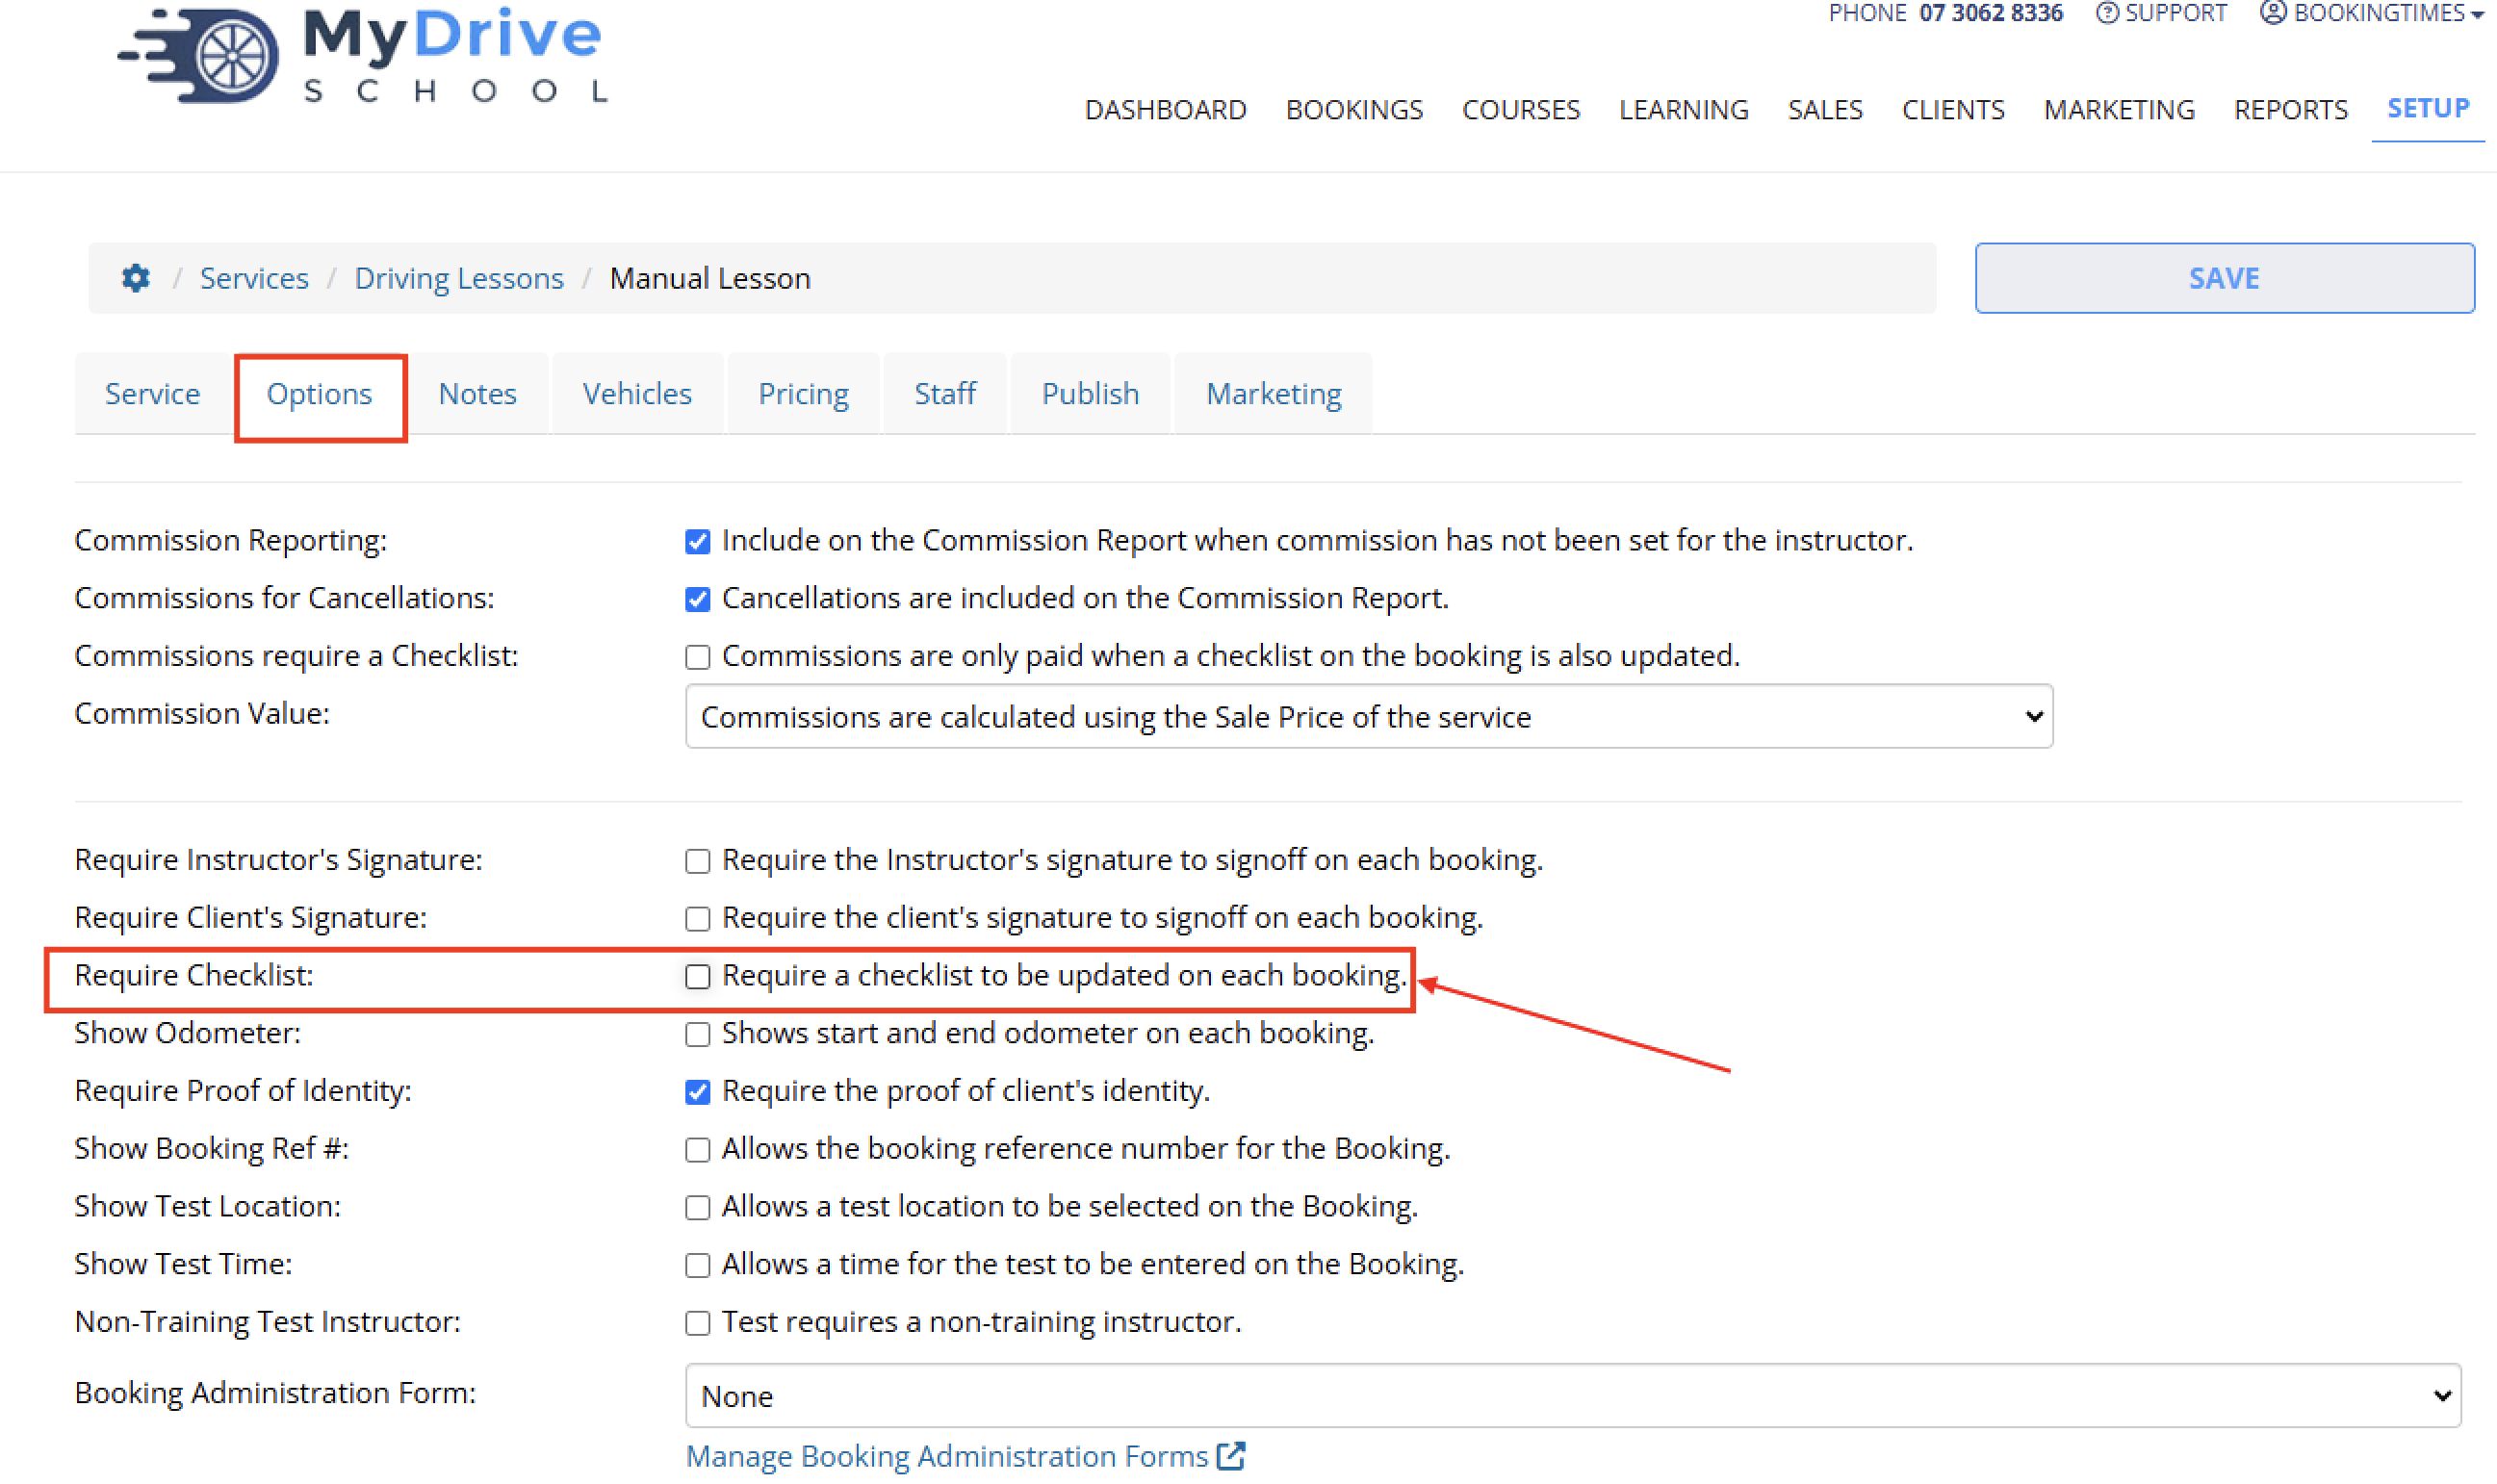
Navigate to Setup > Services > select Service > Options tab
Select Require a checklist to be updated on each booking
If this option has been turned on, a green tick will appear on the calendar view when the staff has made an entry on the checklist for that booking. Please refer to the Understanding booking symbols for more details.

For a checklist to be marked as 'complete' with the above configured, the staff member just needs to update any item on the checklist for the booking (as there is no submit button as such). If this isn't done, then it won't appear as a completed item for the instructor, and it will appear under the Dashboard > Checklists tab, and also highlighted red in the Commission report (if applicable) for that staff member.

