This article will show you how to add a new client as an admin of the system, along with some tips for best practices. There are 2 places where a client can be added, minimal details can be added via the Client Search screen, or full client record details (based on what’s configured for your business) can be entered via a dedicated Add Client screen.
Adding a client via client search
Before adding a new client, it’s good practice and check that they don't already exist in the system by searching for them first. Just add a portion of their first/last name and search. Please refer to the article Searching for a client for more details. If no record is found, then continue the below steps.
Typically the minimum details you want to capture for a client is this, so any booking reminders can be sent:
First Name
Last Name
Mobile
Email
Steps
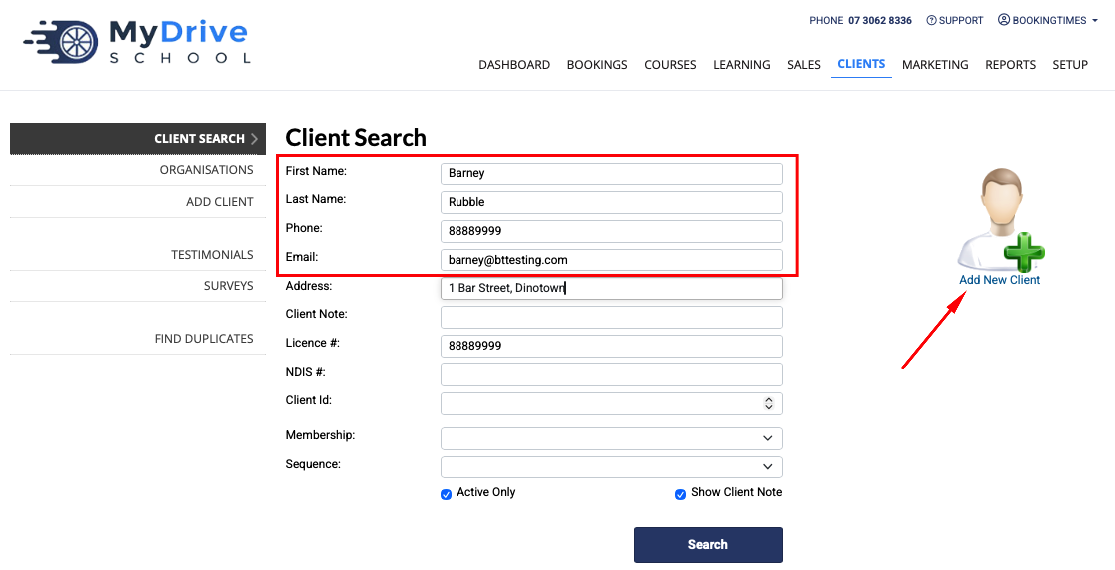
Navigate to the Clients menu
Enter the minimum client details
Click Add New Client image/link
If you only have the First Name and Last Name of a client, the system will allow you as an admin add the client by overriding a warning that appears. Simply click the Add New Client image/link again.
Note: some fields such as Client Id or selecting a Membership or Sequence here will not add that to the client record, this is specific to searching only.
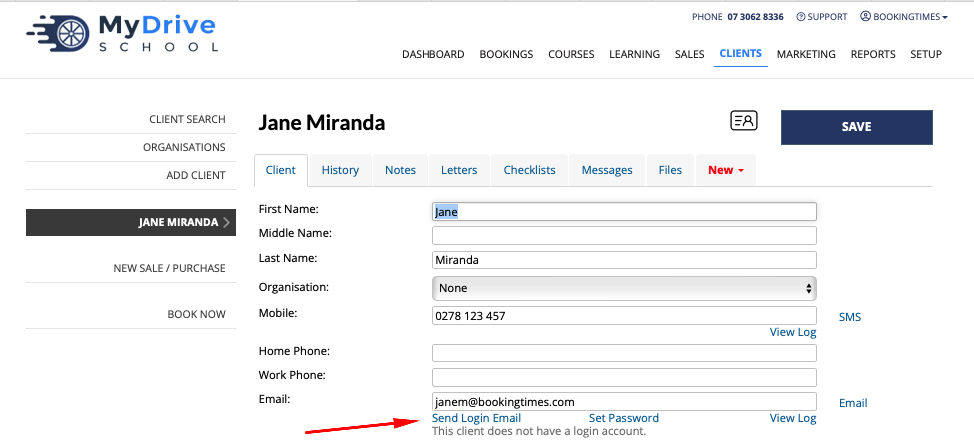
Once the client record is created, ensure that you send them a log in link which will allow them to set up a password and access their account on your BookingTimes website. You do this by clicking the Send Login Email link that appears below their email. Once sent, you can also check the client's Messages tab to confirm they were emailed and that it was delivered to a valid email address.
Note: You could also click the Set Password link and set them a temporary password and provide that to them.
Tip: Avoiding duplicate clients and merging clients
Before adding a new client, check that they don't already exist in the system by searching for them first. Please refer to the article Searching for a client for more details.
If you do have duplicate clients, please see the Managing duplicate client accounts article which outlines how to merge client records.
Tip: Adding minimal client details
If you only have the First and Last name of a client, the system will allow you add the client after the following warning appears to ensure you wish for it to be added. Simply click the Add New Client image/link again.
Note: It's highly encouraged to also capture their mobile phone number and email address as soon as you can so any system automated correspondence and reminders can be sent to them and to assist you with follow ups and ensure the clients show up for any bookings.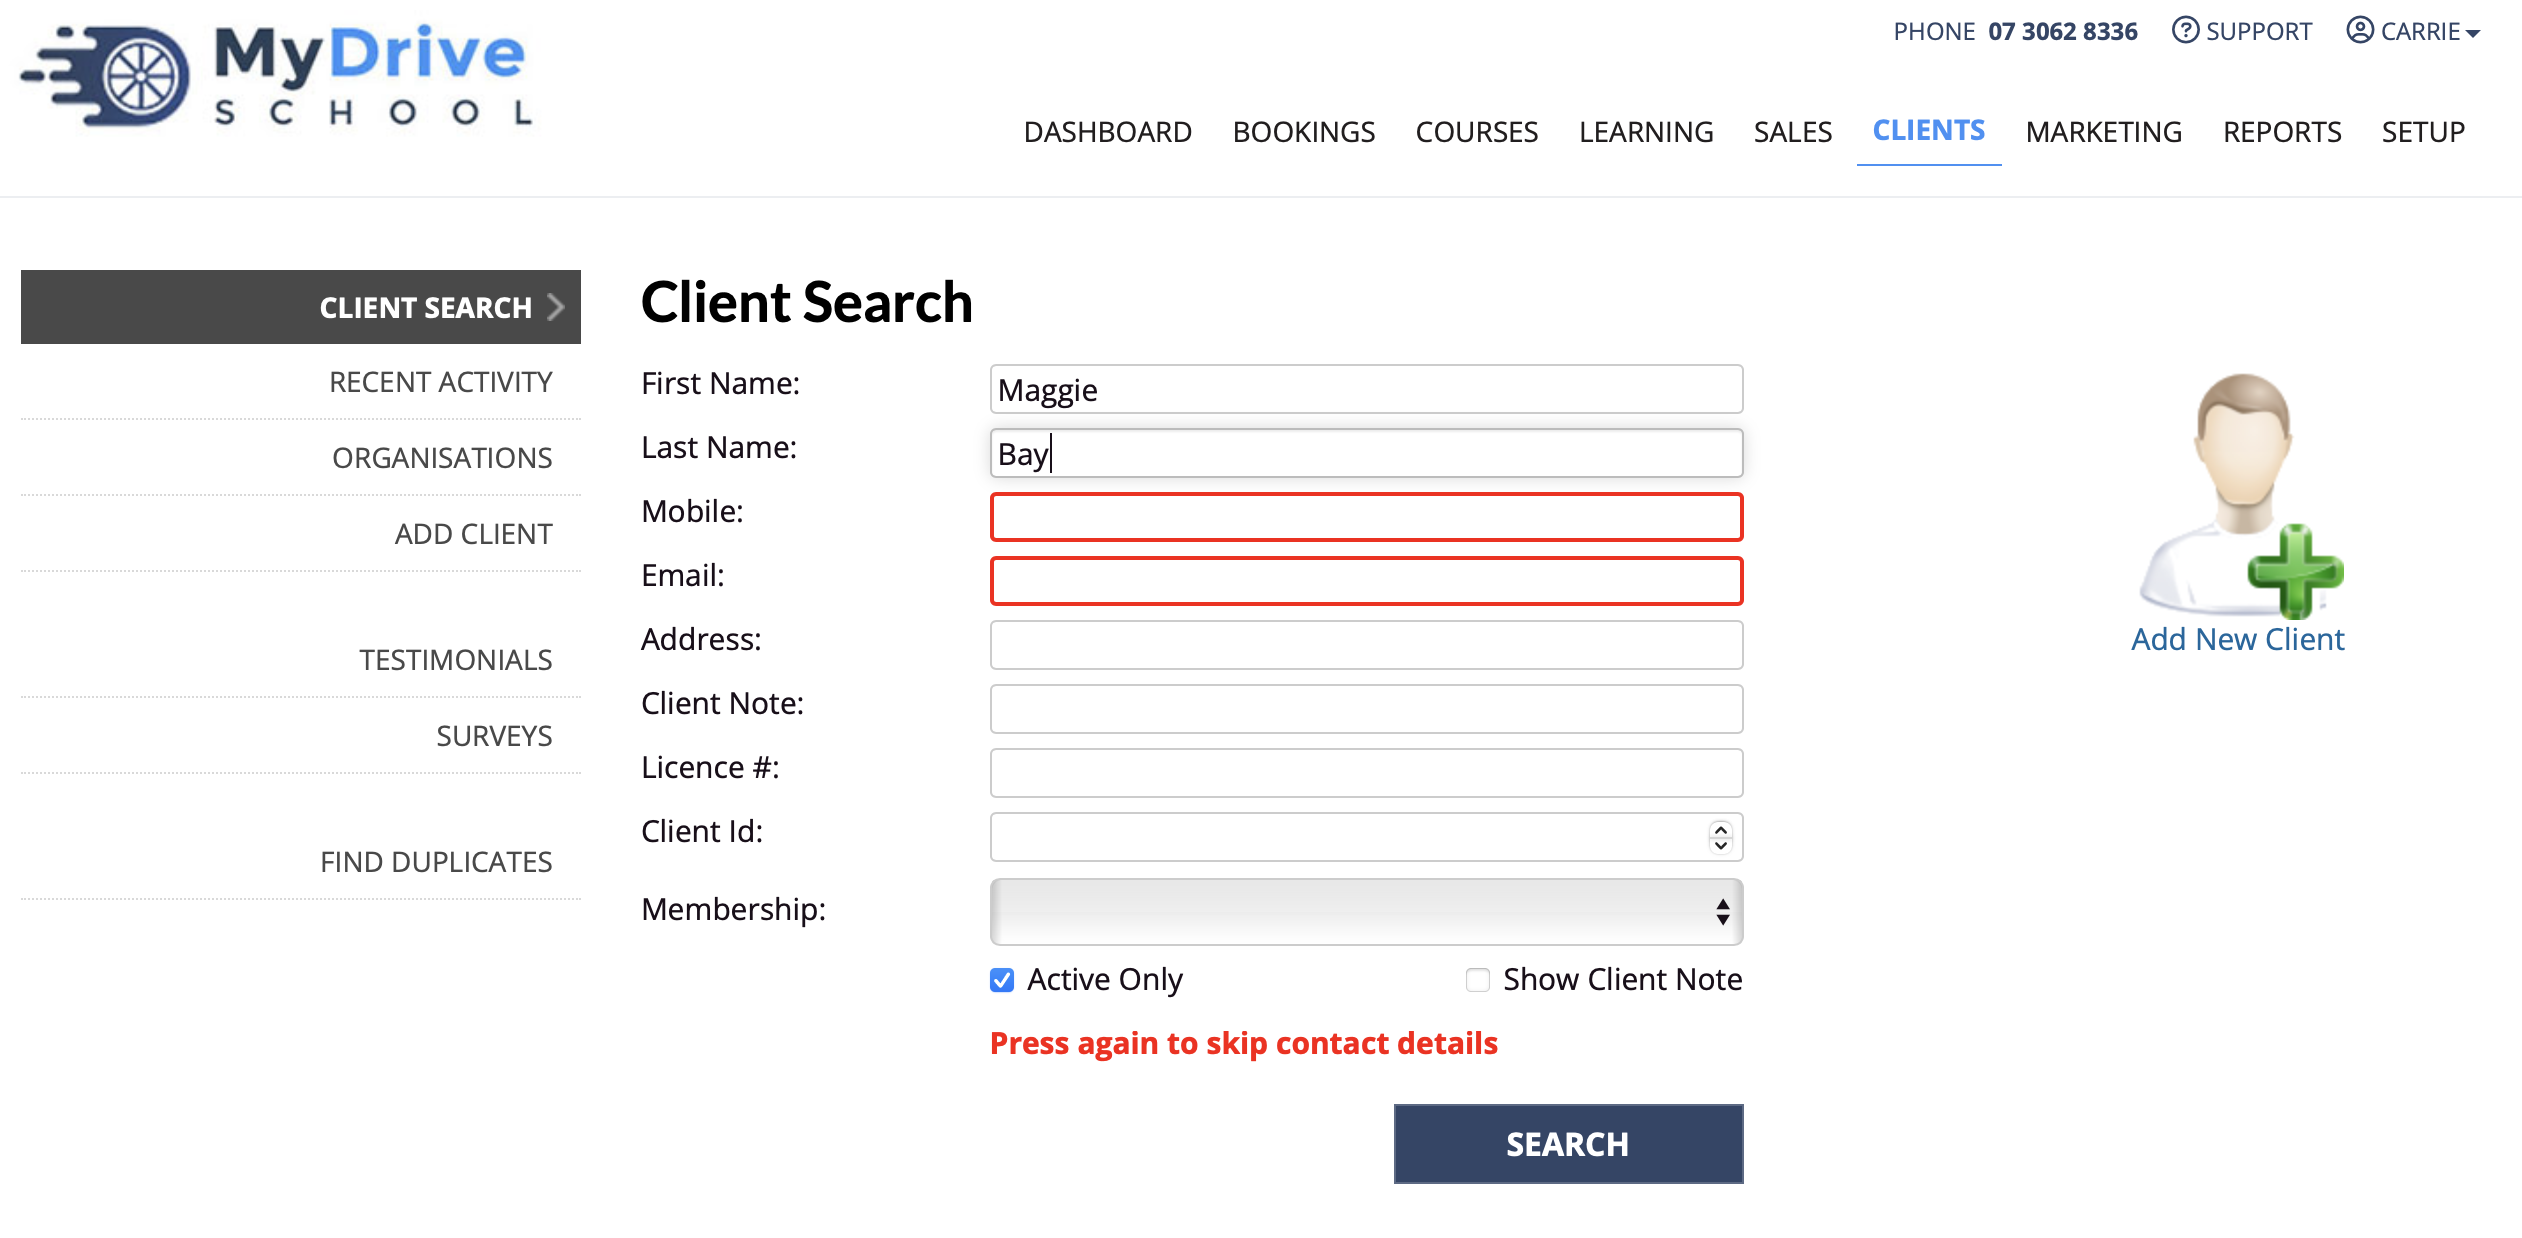
Tip: Adding international country codes
If you're adding an international number against a client, ensure that you add the "+" sign and the "country code" before the number.
For example, if you're in Australia and want to add a UK number, add "+44" first:
+44 12345 6789
Adding a client via add client
Before adding a new client, it’s good practice and check that they don't already exist in the system by searching for them first. Just add a portion of their first/last name and search. Please refer to the article Searching for a client for more details. If no record is found, then continue the below steps.
Steps
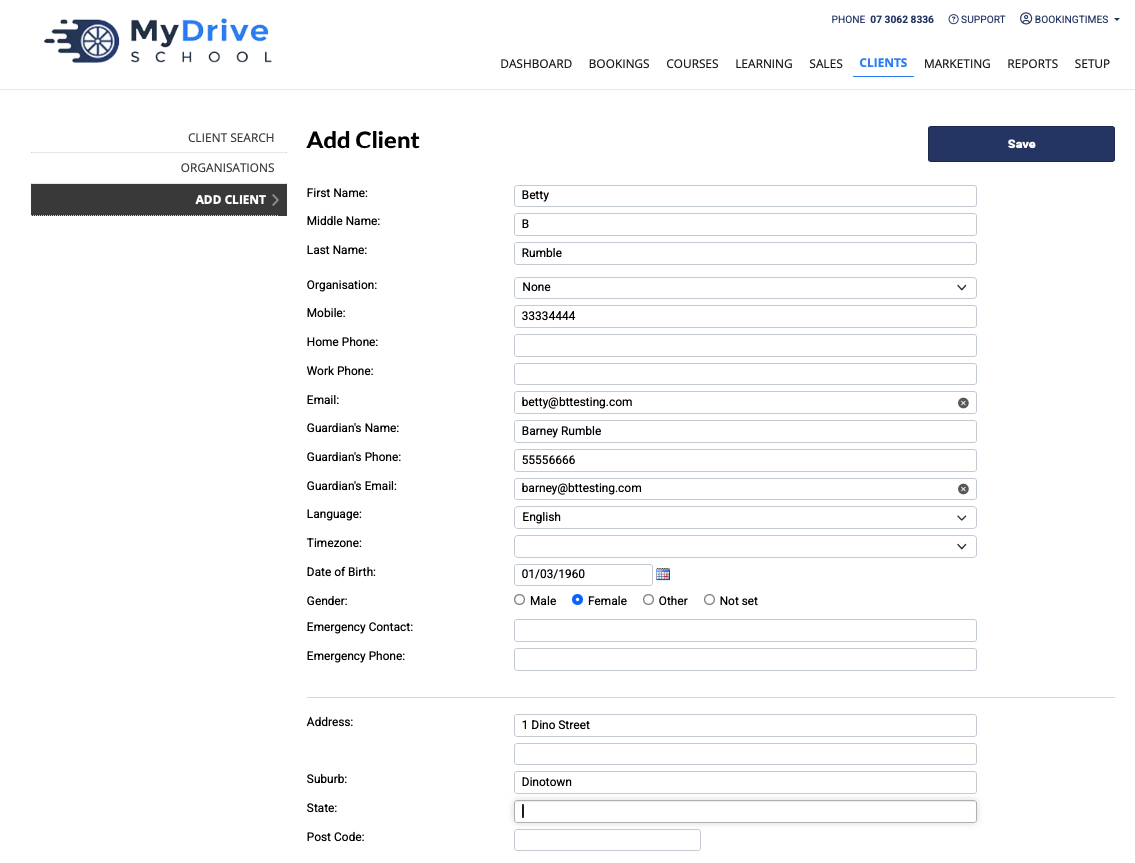
Navigate to the Clients menu, select Add Client in the left hand menu
This will display a blank full client record based on your system configuration, so here you can enter the desired client details
Click Save button when done.
As per above instructions, once created ensure you send them a login link if you wish for them to have access to their account.