POLiPay allows you to get paid using internet banking instead of a credit card. Your BookingTimes website offers POLiPay as a payment method for products & packages. Booking payments are not supported.
Currently POLiPay is only available to Australian & New Zealand businesses.
This article details how to set up POLipay on your website.
Connecting to POLiPay
If you do not already have a POLiPay account, you can apply for one at https://polipayments.com.au
Steps
- Copy your POLiPay merchant code
- Copy your POLiPay authentication code
These are found on your welcome email from POLiPay in the Merchant Agreement PDF attachment. 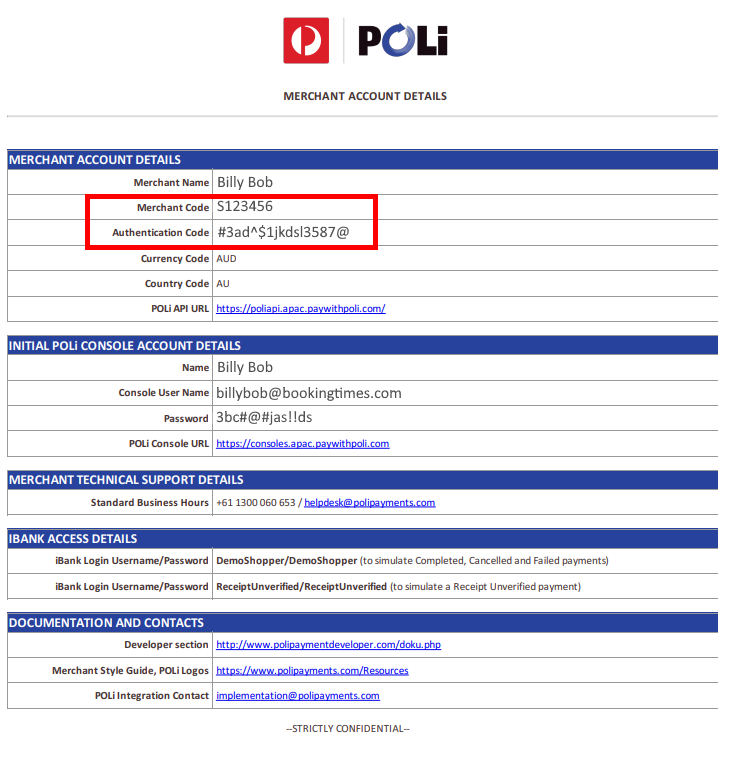
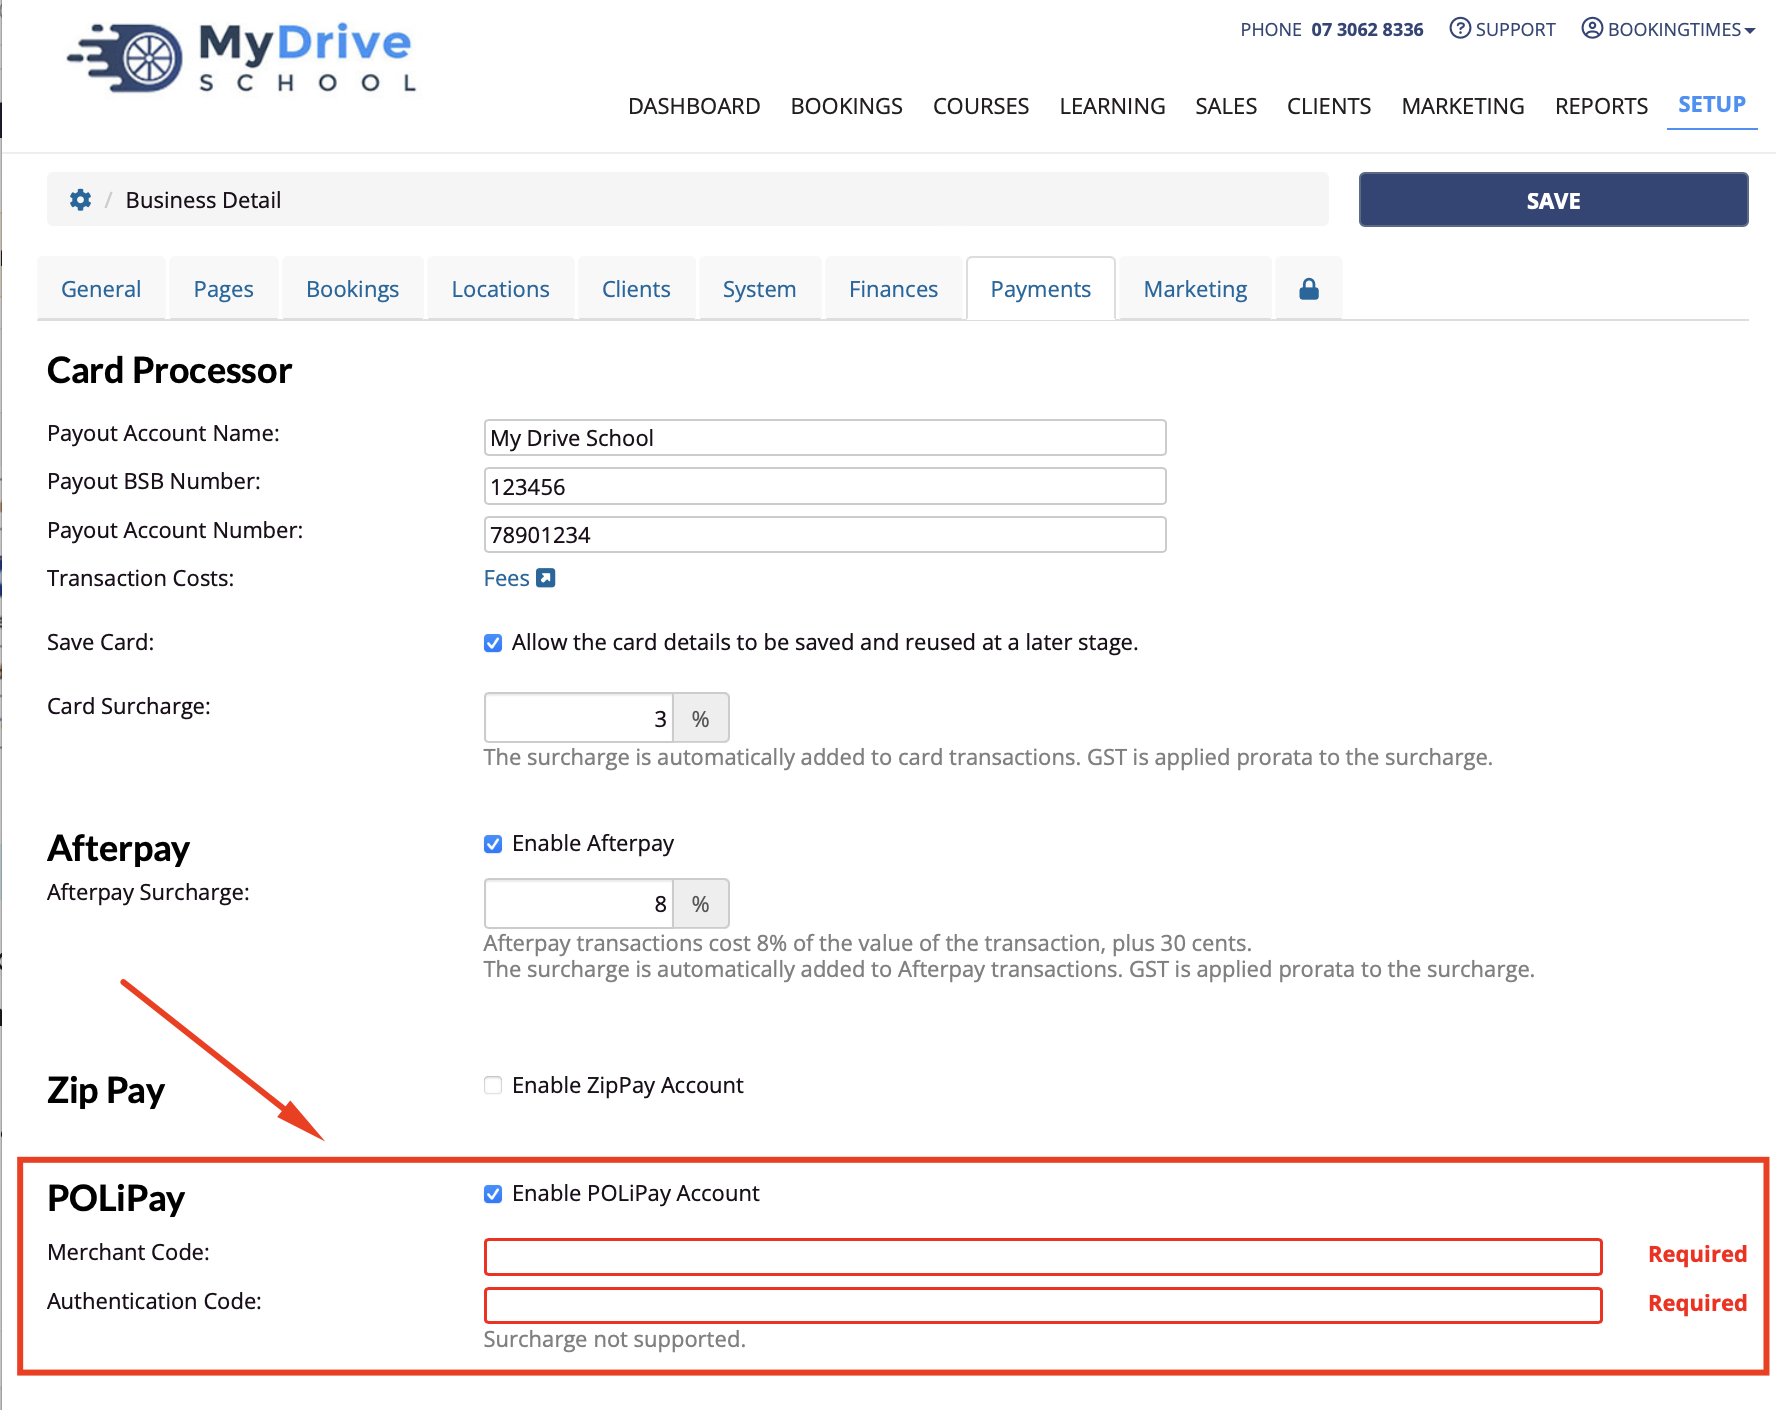
- Navigate to Setup > System Settings > Business Detail
- Click on the Payments tab
- Check POLiPay
- Enter your Merchant and Authentication Codes
- Click Save
Going Live with POLiPay
Steps
Log into your POLiPay account at: https://consoles.apac.paywithpoli.com/Home/Login
Navigate to the Account Details menu
Click the green Ready to Go-Live button
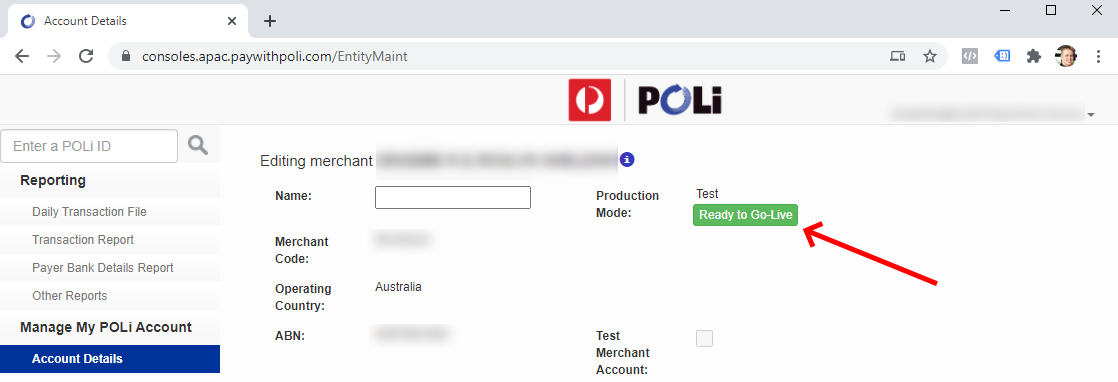
Click Ok
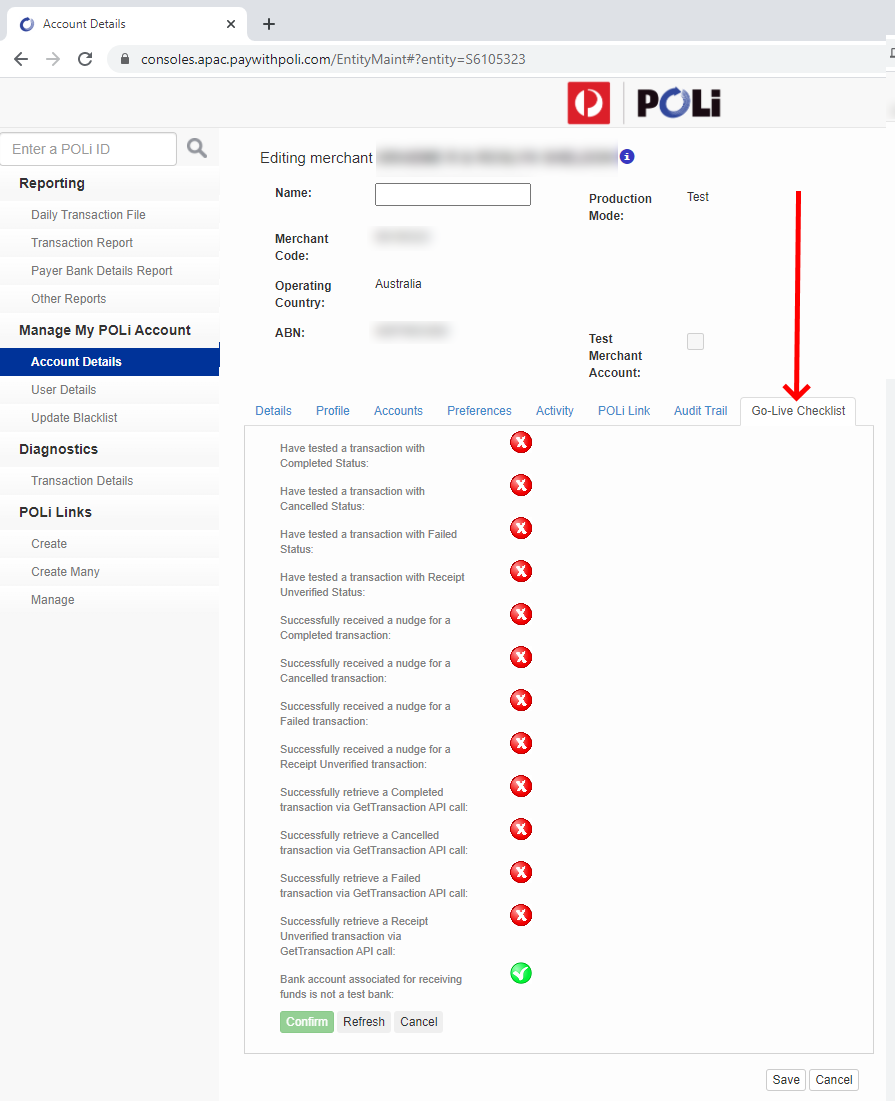
Complete the Go-Live Checklist (See below)
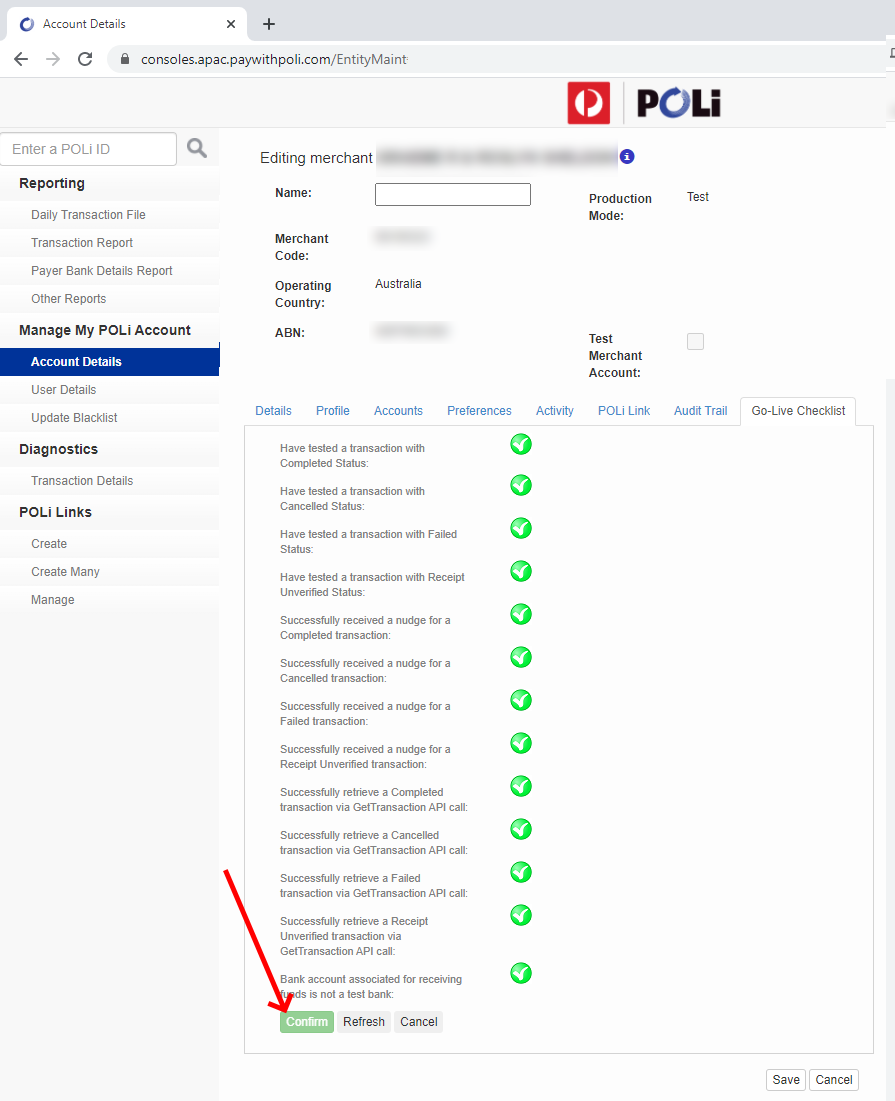
Completing the Go-Live Checklist
POLiPay is now ready for testing and you'll have to run through their tests before they will process real payments. These tests are done by running through them each one on your website.
Steps
You'll need to run through this process a number of times and use different logins to test different POLiPay transaction types, so you may want to use a dummy account to make data cleanup easier.
- Go to your BookingTimes website
- Ensure you are logged out of your website
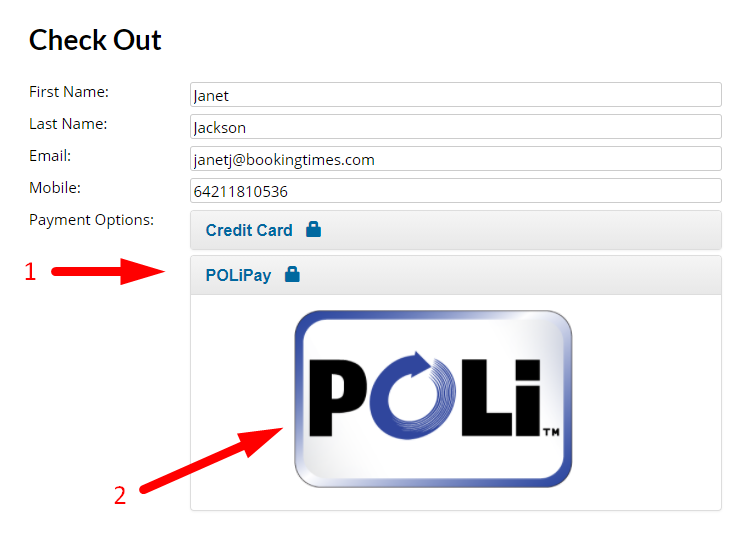
- Click on your Products/Packages page
- Add a product to your shopping cart
- Checkout and select the new POLiPay payment option
- Click on the POLiPay logo
7. Click Continue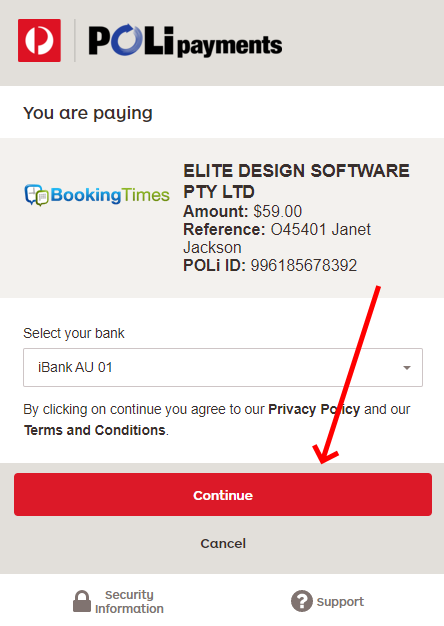
8. At this point, you'll test the POLiPay integration. To do this, you'll need to run through the following tests with the credentials provided below.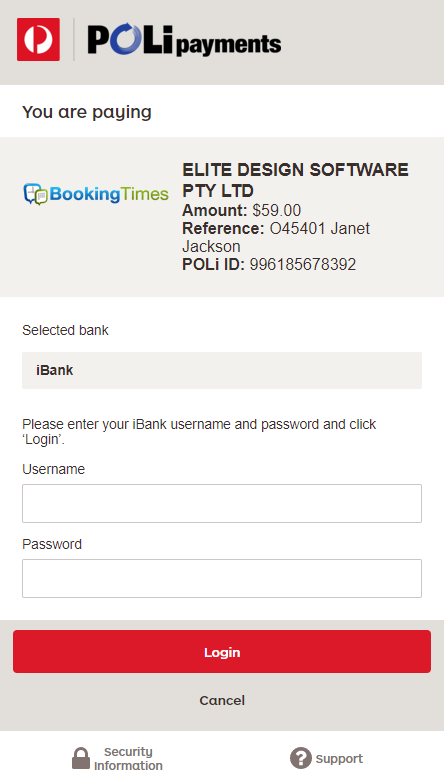
1. Cancelled payment test
Username: DemoShopper
Password: DemoShopper
Proceed up to the final page, the confirmation screen, and press cancel and return to your website.
2. Receipt Unverified payment test
Username: Shopper10
Password: Shopper10
Proceed to the payment and you will see an error, please click return to your site button at the bottom.
3. Failed payment test
Username: DemoShopper
Password: DemoShopper
Proceed up to the account selection page, click on the bank account and choose FAIL transaction account.
4. Completed payment test
Username: DemoShopper
Password: DemoShopper
Proceed through the payment process and successfully return to your websites receipt page.
After each step, refresh the Go-Live Checlist and see which steps still need to be completed. The nudges are sent automatically and handled by your website as part of the testing process.
- When they're all completed, click on the Confirm button to send off a notification to POLiPay.
If you have any questions, please email support@bookingtimes.com