BookingTimes does not have dropdown menus by default. This guide will show you how to add dropdown menus using HTML and CSS.

Important Notes
Generally it is better to use single menu links to avoid the top header from being cluttered. You should keep your most important pages at the top, and consider linking other pages in the footer. Sometimes a drop down menu is still the best option, but use them only when needed.
For user experience, your dropdown menu should generally have no more than 10 items and should not require the users to scroll. You can read more about dropdown menus and user experience here.
Adding HTML code
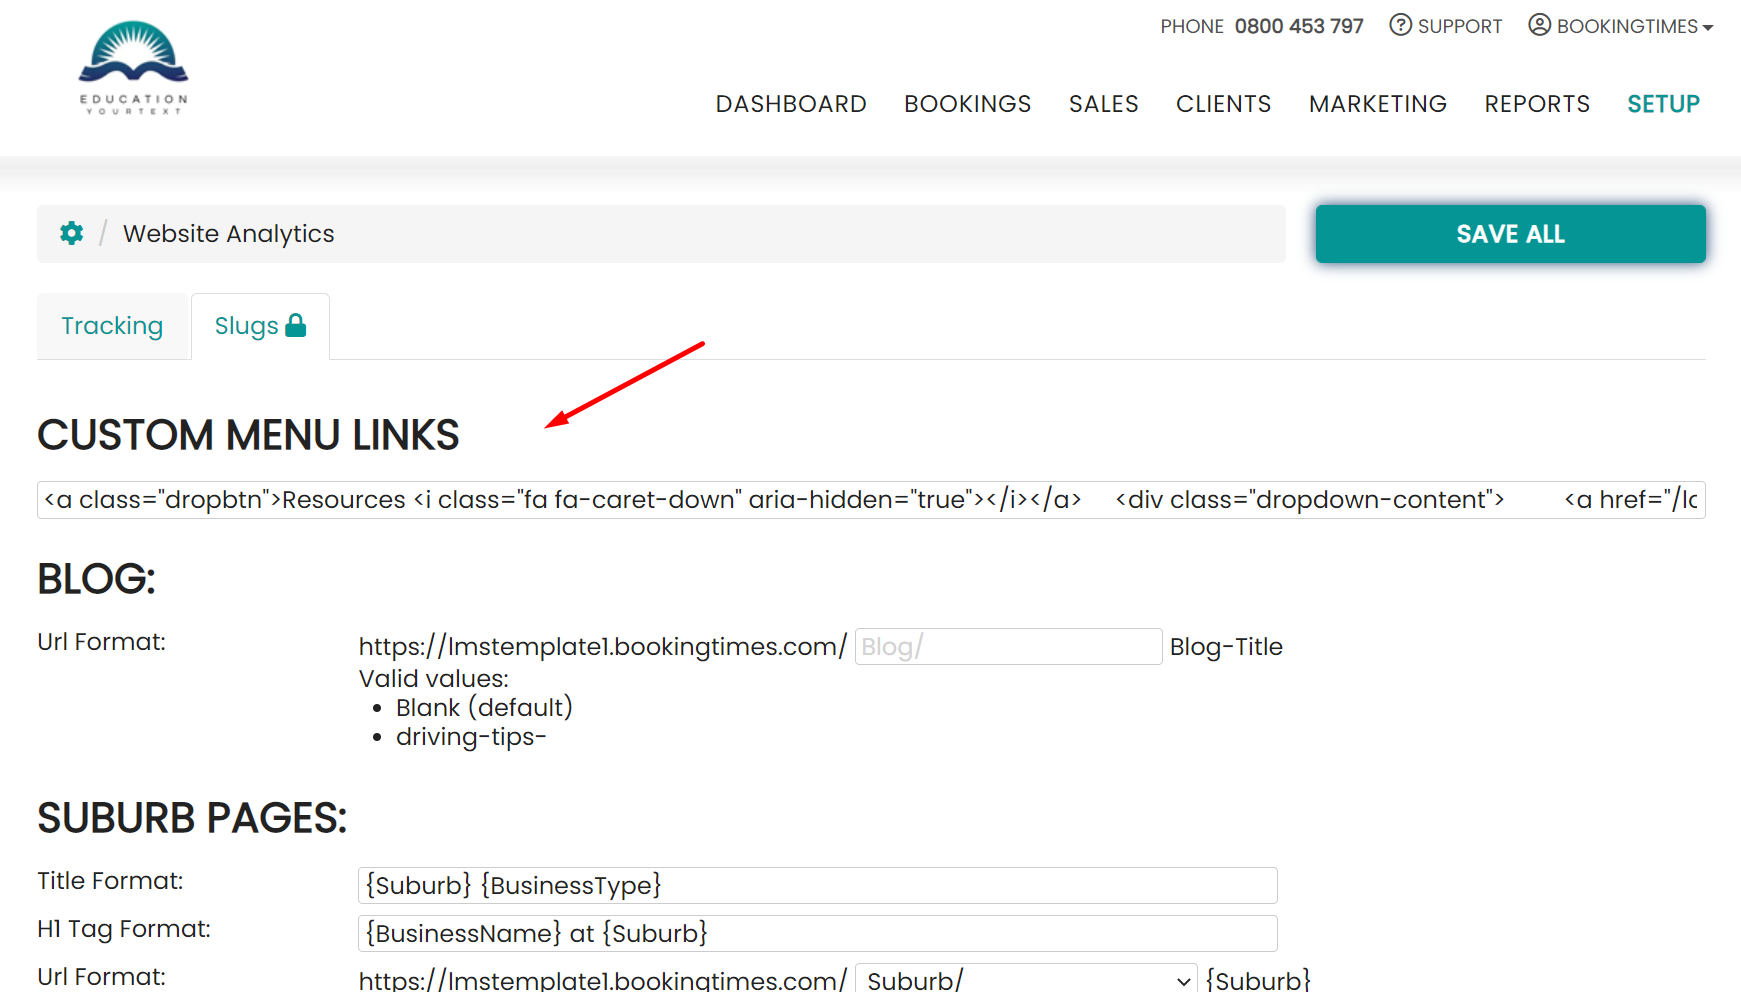
You will need to aded a custom menu link. You can do this on the Analytics & Tracking page
Steps
- Navigate to Setup > Integrations > Analytics and Tracking
- Click on the Slugs tab
- Paste the following code into the Custom Menu Links area

<div class="dropdown">    <a class="dropbtn">Menu Name <i class="fas fa-chevron-down" aria-hidden="true"></i></a>
     <div class="dropdown-content">
         <a href="/">Menu Link 1</a>
         <a href="/">Menu Link 2</a>
         <a href="/">Menu Link 3</a>
         <a href="/">Menu Link 4</a>
      </div> </div>
- Modify the code as needed for the number of links you require
- Click Save All
Add CSS
Add the following CSS to your header, footer or global CSS file and modify as needed to style the drop down menu.
Steps
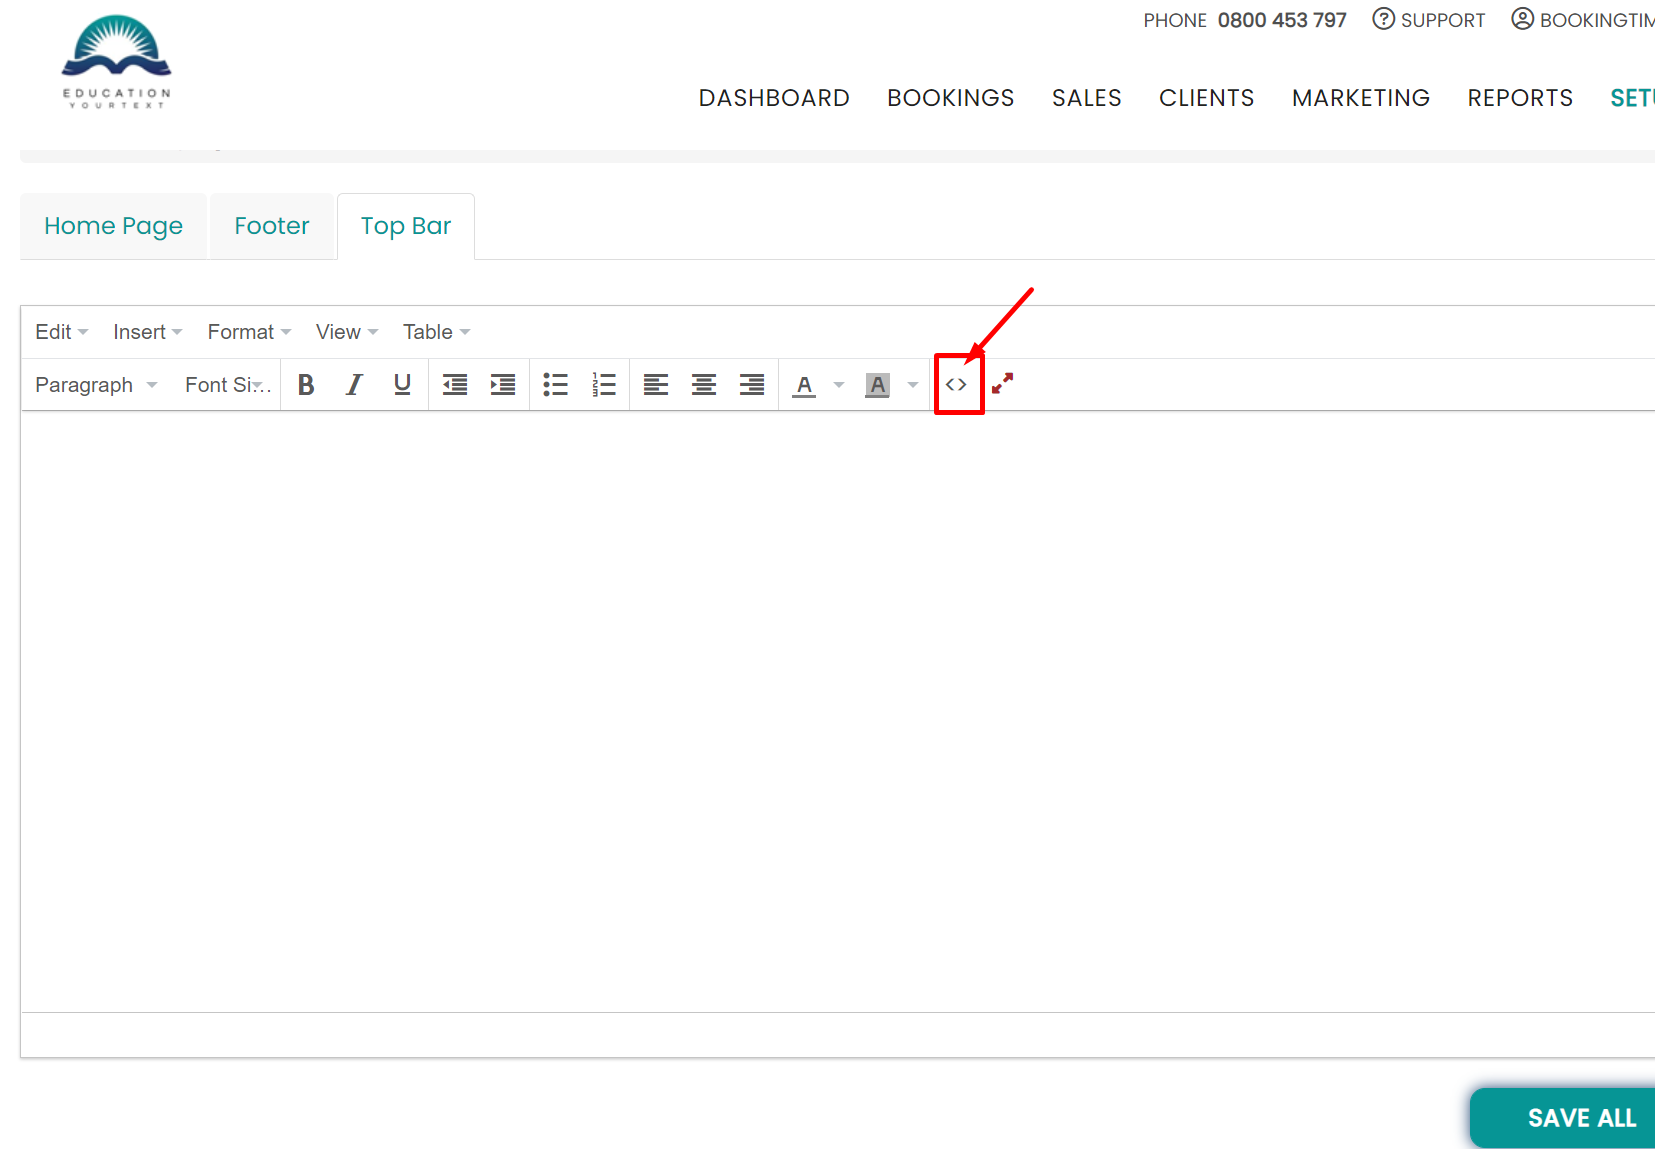
- Navigate to Setup > Website Content > Homepage and Footer
- Click on the Tob Bar tab
- Click on the source code button

- Paste the following CSS code and modify as needed
/*----------------------------------------------------------------------------Dropdown Menu CSS------------------------------------------------------------------------------*/

/* Dropdown Button */
.dropbtn {
    color: #222;
    border: none;
    display: block;
    padding: 8px 10px;
    font-weight: 500;
}

.dropbtn:hover {
    color: #B22222 !important;
}

/* The container <div> - needed to position the dropdown content */
#ctl00_divMenuRow .dropdown {
    position: relative;
    display: inline-block;
    width: unset;
}

/* Dropdown Content (Hidden by Default) */
.dropdown-content {
    display: none;
    position: absolute;
    background-color: #fff;
    min-width: 160px;
    box-shadow: 0px 8px 16px 0px rgba(0,0,0,0.2);
    z-index: 1;
}

/* Links inside the dropdown */
.dropdown-content a {
    color: #000;
    padding: 12px 16px;
    text-decoration: none;
    display: block;
    border-bottom: 1px solid #ccc;
}

.dropdown li {
    display: inline-block;
    position: relative;
    vertical-align: bottom;
    margin-bottom: 0px;
    padding-bottom: 0px;
    margin-top: auto;
    width: 100%;
}

/* Change color of dropdown links on hover */
.dropdown-content a:hover {
    background-color: #B22222;
    color: #fff !important;
}

.dropdown:hover .dropbtn {
    text-decoration: none !important;
}

/* Show the dropdown menu on hover */
.dropdown:hover .dropdown-content {
    display: block;
}


/* Mobile responsiveness */
@media screen and (max-width:767px) {
    #ctl00_divMenuRow .dropdown {
        display: block;
    }

    .dropdown-content {
        position: relative;
        background-color: unset;
        box-shadow: none;
    }

    .dropdown-content a {
        border-bottom: none;
    }

    .dropdown-content a:hover {
        background-color: unset;
    }

    i.fas.fa-chevron-down {
        float: right;
    }

    .dropdown li {
        width: unset;
    }

    .dropdown-content li {
        margin-left: 10px !important;
    }

    .dropbtn {
        font-weight: 400;
    }
}
- Click Save All