BookingTimes has a number of forms prebuilt into the system, including:
- Contact form: located on the system generated contact page
- Client sign up form: located on the account sign up screen
- Intake forms: added to services to be filled out after a Booking is made
Sometimes you may want an extra form the system doesn't support by default, such as: a Job Application Form or an Expression of Interest form. For this, you can create a form on your webpage.
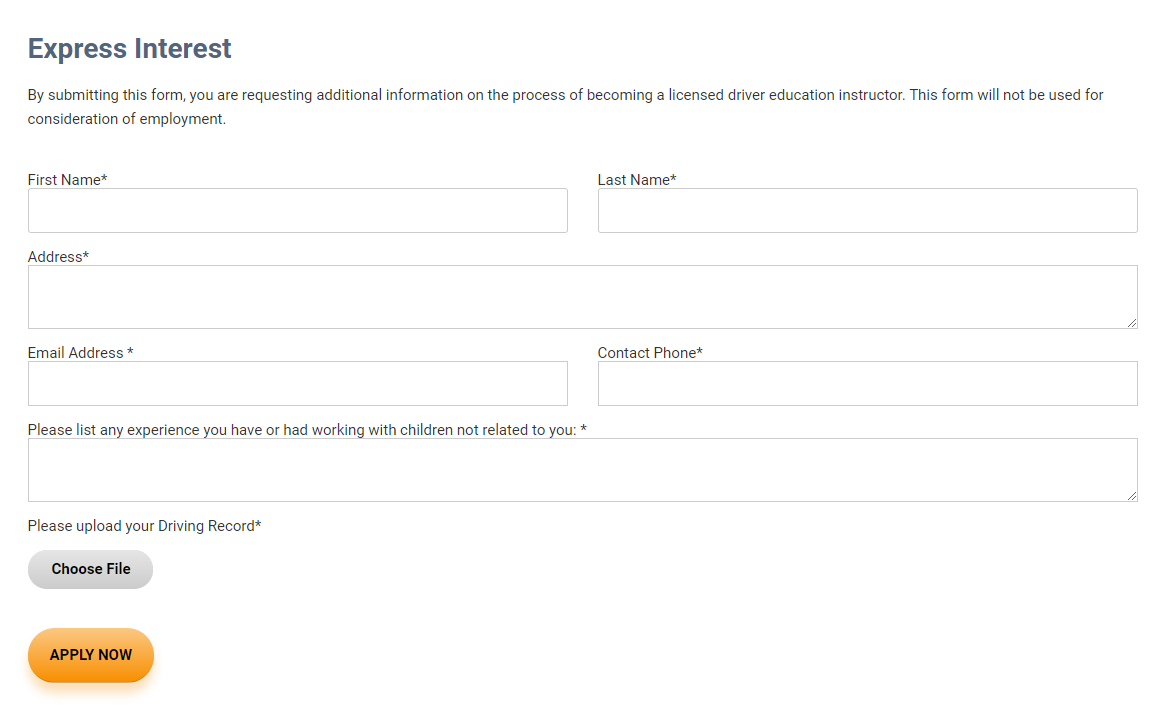 An example custom form for a job application to be a driving instructor
Webpage forms are sent to the business email address when submitted, and can include the standard HTML form fields such as:
- Number
- Text
- File upload
See https://www.w3schools.com/html/html_forms.asp for information about HTML Forms
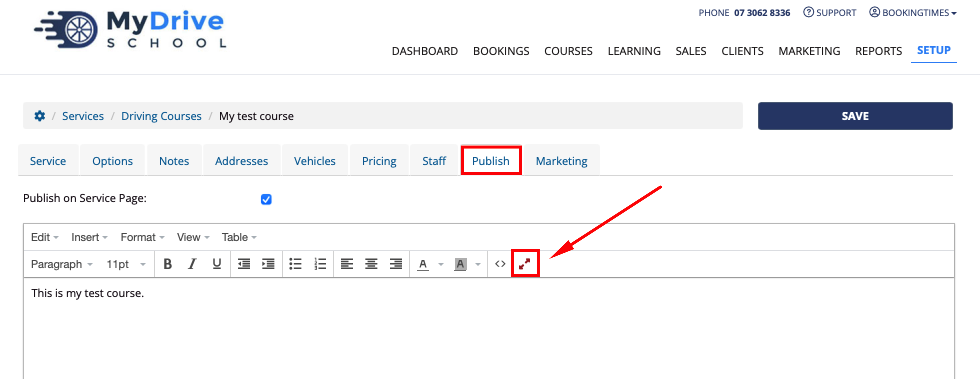
- Navigate to Setup > Services > select the Service
- Go to the Publish tab, click the diagonal red arrows to open the Full Page Editor
- Select Custom Forms from the web snippets dropdown menu
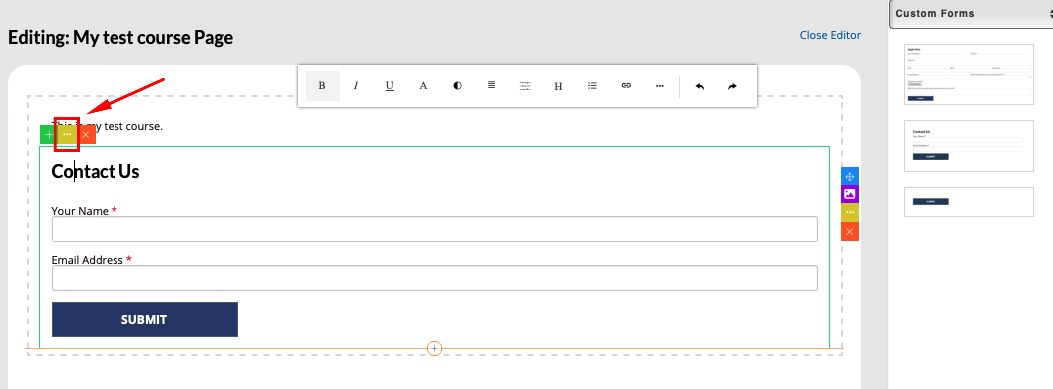
- Select a form that's closest to what you want, and drag it into the content area to the left

- Click on the form in the content area and you will see the various coloured icons to edit. Click on the 3 dots in the yellow box, and select <> HTML
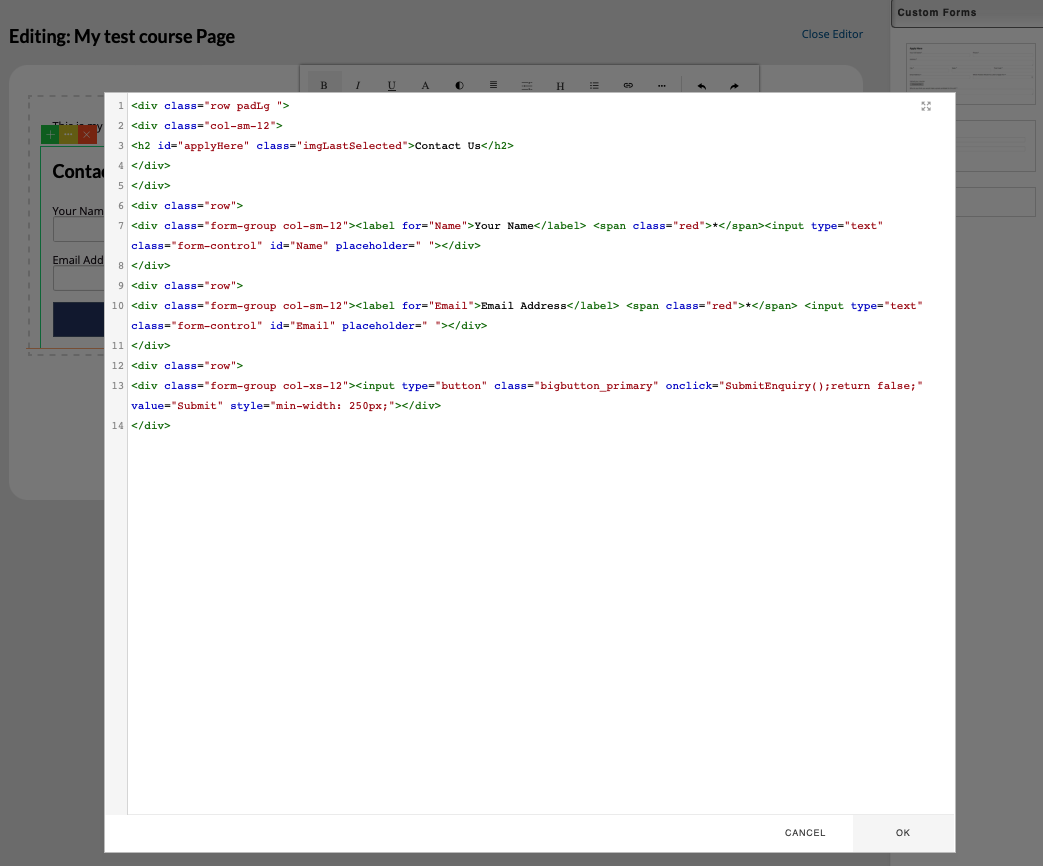
- You will then see the HTML just for this form, and edit this according to any fields you want to add/update by following the instructions further in this article and update the for attribute in the <label> and id attribute in the <input> tags accordingly to ensure they're unique.
- Click OK button, then Close Editor link, and then Save button back in the service.
To create a custom form, you must use the basic HTML form structure, add a couple of class names, as well as a special bit of JavaScript which makes the submit button work.
Form fields
The HTML for the example job application form fields would look like so:
<div class="row ">
<div class="col-md-12">

<div class="form-group"><label>First Name<span class="red-mark">*</span></label> <input type="text" class="form-control " id="FirstName" placeholder=" "></div>

<div class="form-group"><label>Last Name<span class="red-mark">*</span></label> <input type="text" class="form-control " id="FamilyName" placeholder=" "></div>

<div class="form-group"><label for="Address">Address<span class="red-mark">*</span></label> <textarea id="Address" class="form-control " placeholder=" "></textarea></div>

<div class="form-group"><label>Email Address <span class="red-mark">*</span></label> <input type="email" class="form-control " id="Email" placeholder=" " maxlength="50"></div>

<div class="form-group"><label>Contact Phone<span class="red-mark">*</span></label> <input type="tel" class="form-control " id="Phone" placeholder=" "></div>

<div class="form-group"><label for="Experience">Please list any experience you have or had working with children not related to you: <span class="red-mark">*</span></label> <textarea id="Experience" class="form-control " placeholder=" "></textarea></div>

<div class="form-group">
<label for="dropFile">Please upload your Driving Record<span class="red-mark">*</span></label>
<div class="input-group image-preview"><div id="dropFile" class="btn-style image-preview-input"><span class="image-preview-input-title">Choose File</span>
 <input type="file" accept=".doc,.docx,application/msword,application/vnd.openxmlformats-officedocument.wordprocessingml.document,.pdf" name="input-file-preview"></div></div>
</div>

<div class="form-group"><input type="button" style="height: 55px;" class="" onclick="SubmitEnquiry();return false;" value="APPLY NOW"></div>

</div>
</div>
Ensure you have the following items added to each required field:
- <span class="red-mark">*</span> -- This displays red if the input is left blank. Leave it off for inputs which aren't required
Submit button
For the form to work, the submit button must have the onclick event:
onclick="SubmitEnquiry();return false;" -- This sends the form inputs to the business email
File upload button
If you would like a file upload, ensure you have added the field:
<div class="form-group col-sm-12">
<label for="dropFile">Please upload your Driving Record<span class="red-mark">*</span></label>
<div class="input-group image-preview">
<div id="dropFile" class="btn-style image-preview-input"><span class="image-preview-input-title">Choose File</span> <input type="file" accept=".doc,.docx,application/msword,application/vnd.openxmlformats-officedocument.wordprocessingml.document,.pdf" name="input-file-preview"></div>
</div>
</div>
You may remove this field if you do not want a file upload section.
Testing the form
To test the form, you will need to set your testing email address as the business email and then submit the form. If you have configured it correctly, the form should come through to your email address.
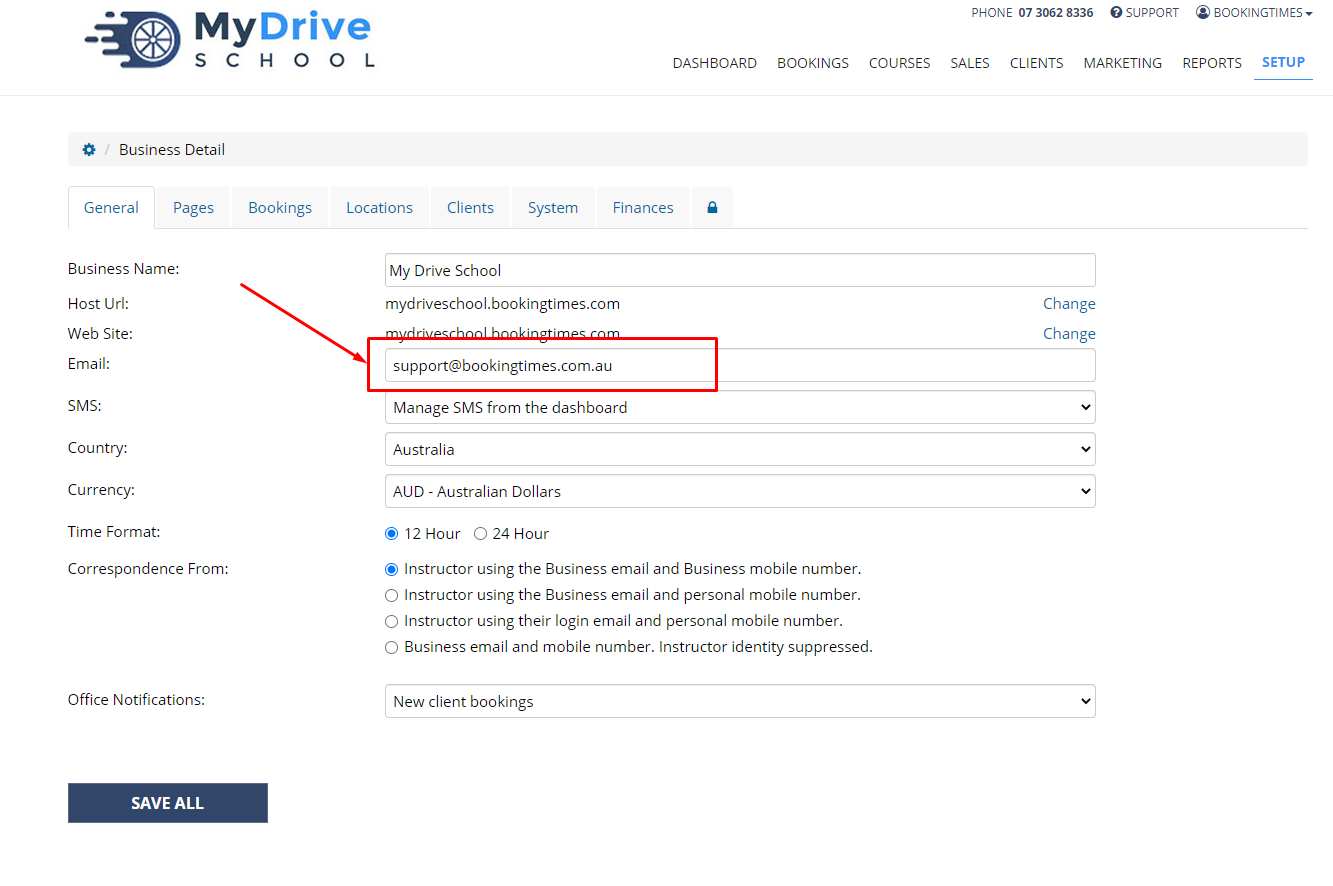
To set the business email, navigate to Setup > System Settings > Business Detail
Change the email under the email section and click Save:
Radio buttons

Radio buttons need a bit of extra code to work on the webpage forms. You must include a label with a lblid property to group the radio buttons, as well as include the same lblid property on each of the radio buttons that belong to the same label or question. For example, the code for the radio buttons pictured above would be:
<div class="form-group col-sm-12">
    <label id="lblSize">Size<span class="red-mark">*</span></label>
    <input type="radio" id="size_small" name="size_small" value="Small" lblid="lblSize" /> <span for="size_small">Small</span>
    <input type="radio" id="size_medium" name="size_medium" value="Medium" lblid="lblSize" /> <span for="size_medium">Medium</span>
    <input type="radio" id="size_large" name="size_large" value="Large" lblid="lblSize" /> <span for="size_large">Large</span>
</div>
Check boxes
The following code should be used to code checkboxes.

<div class="form-group col-sm-12">
    <label id="lblInterests" class="bold-label">Interests</label>
    <input type="checkbox" id="illustration" name="choose_interests" value="Illustration" />
    <label for="illustration">Illustration</label>
    <input type="checkbox" id="photography" name="choose_interests" value="Photography" />
    <label for="photography">Photography</label>
    <input type="checkbox" id="uiux" name="choose_interests" value="UI_UX" />
    <label for="uiux">UI/UX</label>
</div>