This article will demonstrate how to write blog articles and publish them to your website. Blog articles are a way of connecting you to the relevant audience online. Search engines are always looking at your website to see if the content is being updated, so it's a good opportunity to show what your business is about, engage your customers, and improve your search engine rankings!
Writing a blog article
Steps
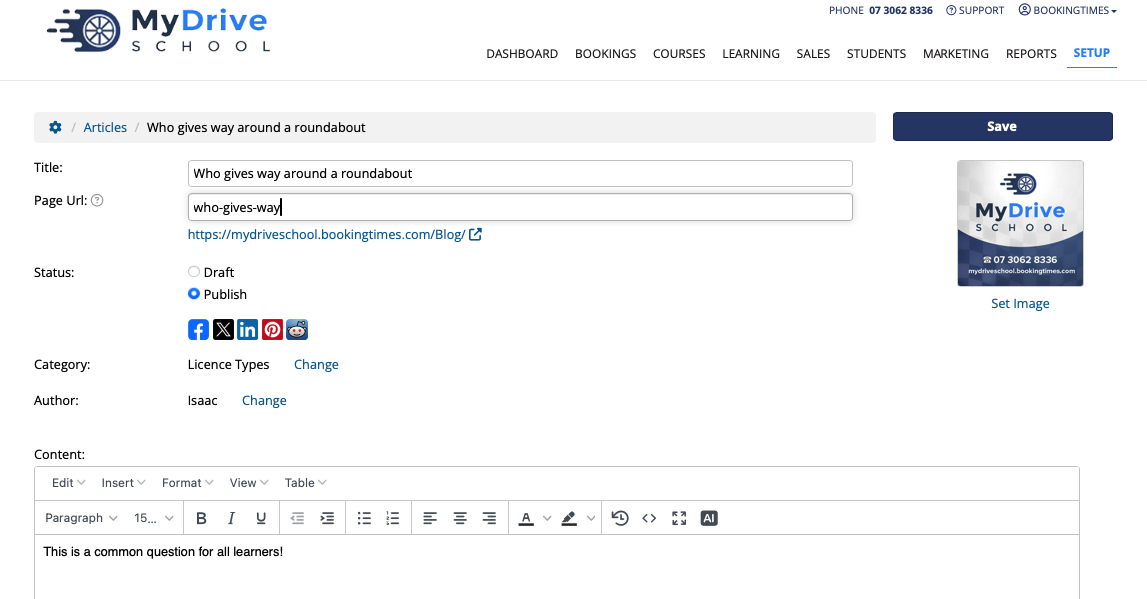
Navigate to Setup > Website Content > Blog & Articles
Click Add New Article button
Complete the following fields:
Set a Title
Set a Page Url (no spaces). This is the unique URL for the blog article.
If this is updated after it’s been published, it will prompt you to add a permanent redirect (or you can also add 301 and 302 redirects from Setup > Domain > Url Redirects).
Set Status to Draft or Publish when ready to be publicly displayed
Under Category, select Change link to set a category
Under Author, select Change link to change the author
Add and edit article content in the Content text area using the built-in editor
Click Save
Tip for editing articles
You can click the 4 diagonal arrow icon in the text editor to open the drag n drop editor. This will give you special text and image blocks you can drag onto the page
Tip for article writing
Remember to drop in a few keywords like your location or service into your blog posts
Displaying your blog on your website
Blog articles are not located on your website menu by default, so you must enable this page in the website header.
Steps
Navigate to Setup > System Settings > Business Detail
Select the Pages tab
Under Client Web Pages, check Articles
Customize the name of your articles tab (e.g. blog) by selecting from the dropdown list (optional)
Click Save All

Article menu heading not appearing
Please note if you've enabled the above setting but it's not showing up in the title heading menu, ensure that you have at least 1 article that is set to published.