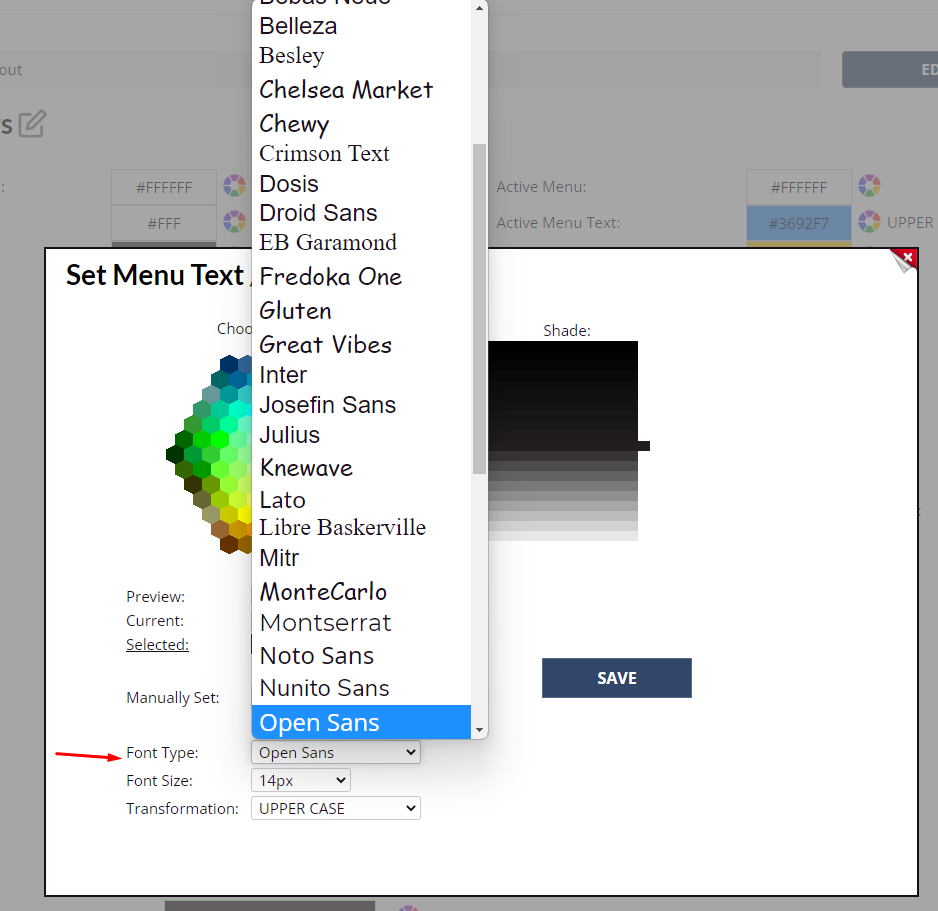
When you add new fonts or font styling to a website, you should try and set as much of the font styling under the General Layout page first, before you code the styling with CSS. This means that any user of the website can change font styling on the General Layout page in future without needing to go into the CSS code.
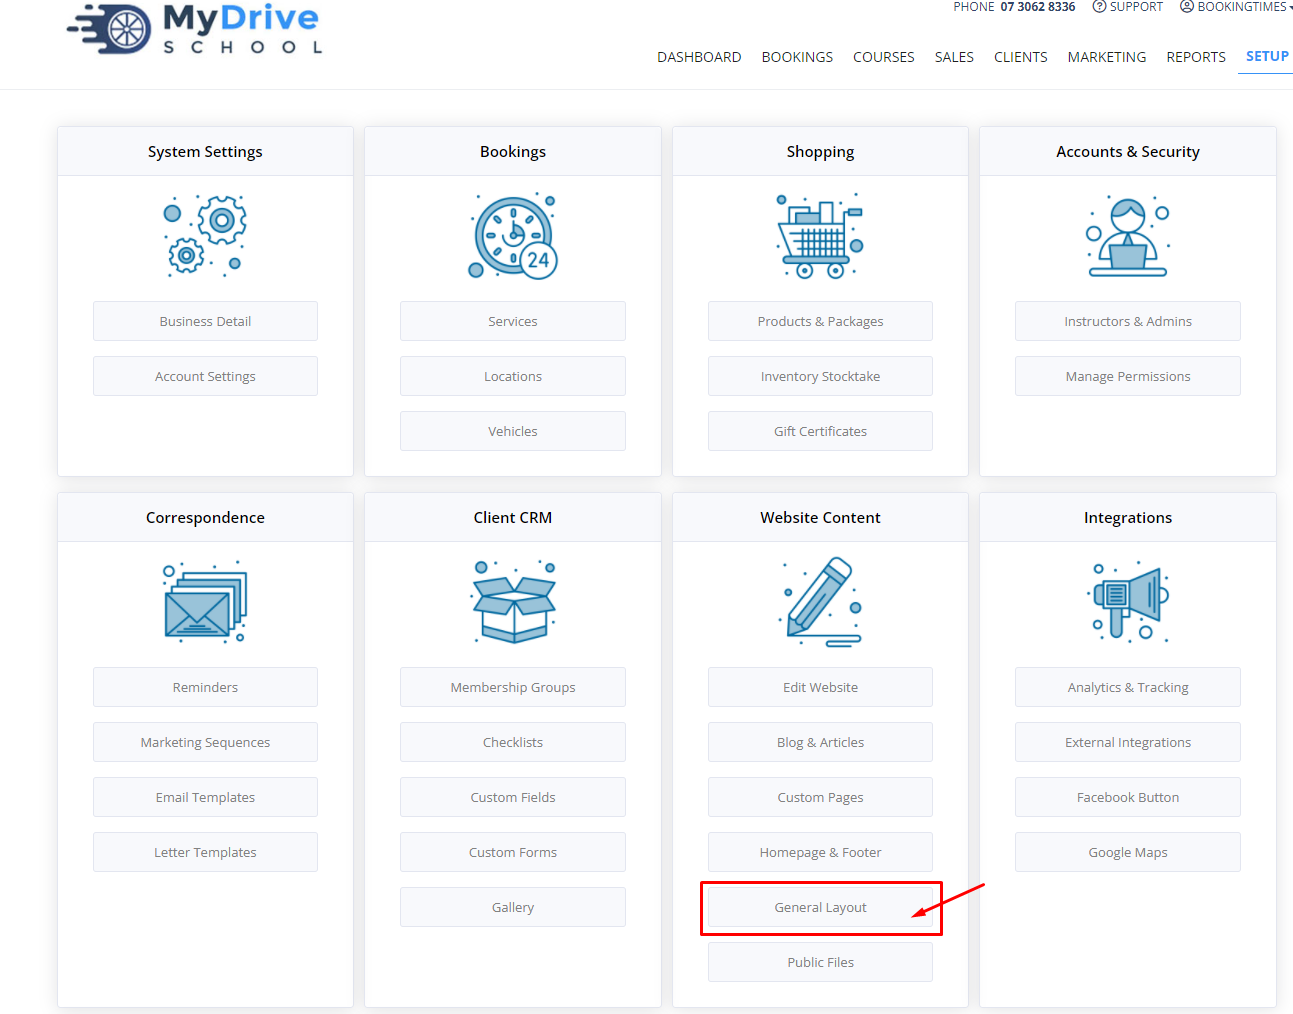
To change the font styling, navigate to Setup > Website Content > General Layout
Set the font style by clicking on the rainbow wheel icon:
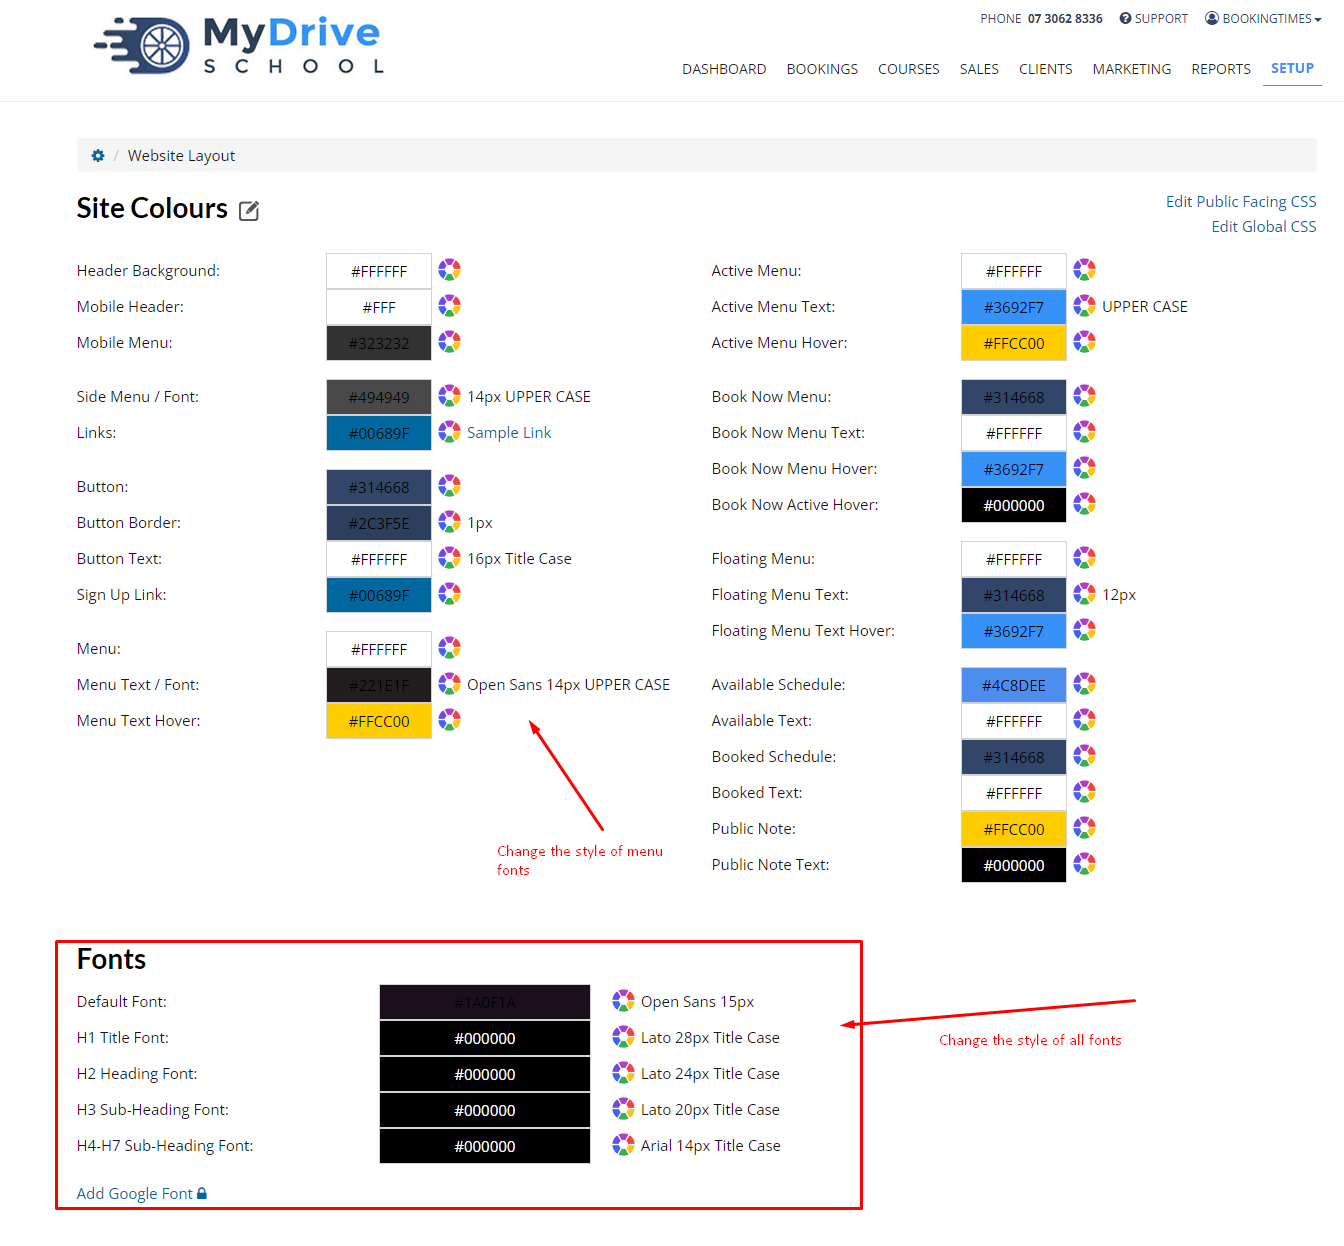 General Layout Page
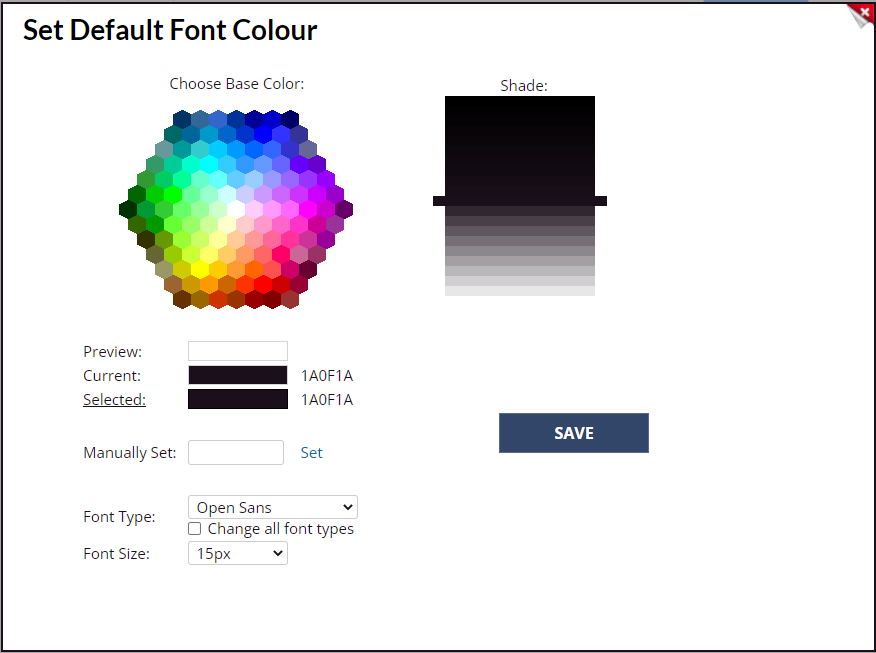
Set the style, color and size on the following screen. You can set:
- Font family (from google fonts. Don't use any fonts which do not come from the google fonts repository. If you need to add a new google font that isn't alread there, please see the instructions at the bottom of this guide.)
- Font size
- Font style (Uppercase, Title Case etc)
- Font color
Note: Any font settings applied on the general layout page will apply to the entire site, including the public pages, such as the homepage, and the back end pages. You should ensure any settings you apply here also look good on the back end screens as they also contain a variety of h1, h2, p etc. tags.
You will often still need to style the website fonts in the CSS file, for example:
- You want large h1 tags on the homepage, which are too big for the rest of the pages (you would set the base h1 size here, and then apply extra CSS to the h1 tags on the homepage only)
- You want a special color and style on a specific heading, but don't want it on the rest of the website.
You should try and use as many of the global CSS font styles as possible, and then apply any extra CSS needed on top.
Make sure to test your website using the General Layout settings and see how the website responds.
Adding a new Google font
You can view google fonts at: https://fonts.google.com/
Currently BookingTimes only supports google fonts. You can add a new google font by following the steps below:
Steps
- Go to Setup > Website Content > General Layout
- Under the Fonts section click Add Google Font
-

4. Enter the font name, secondary font i.e is it a serif or sans serif font and the google id and font weights.
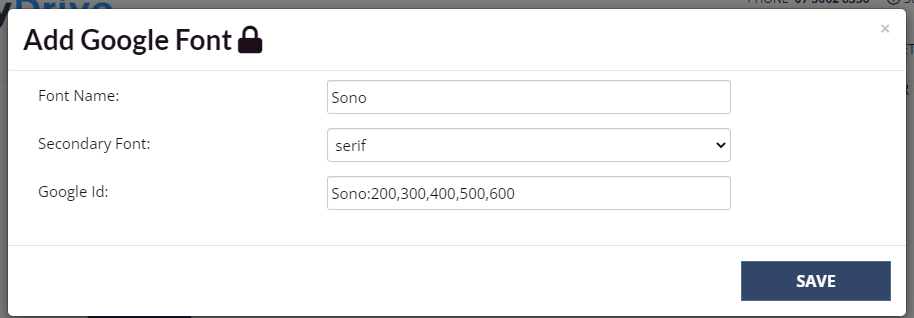
5. Click Save
6. Your font should now appear in the dropdown list of fonts when you click on the color wheel: