Once you've configured your BookingTimes website and added all your staff and their schedules, services and products, you may want to import all your current clients and allocate any partially used bundled prepaid vouchers for them.
The following steps outline the process to follow to easily import your data, so you can get back to business and experience the benefits of the new system.
Import clients
Input all your current clients into the system:
Enter manually through the system (see Adding a client article), or
Supply an appropriately structured file (e.g. spreadsheet) to the BookingTimes support team via support@bookingtimes.com for them to import.
At a minimum try to ensure you have the following details so any booking reminders/newsletters are able to be sent to them immediately and they are able to log into the system:
First name
Last name
Mobile number
Email
Other details that can be included:
Address details, split into:
Address
Suburb/City/Neighborhood
State
Post code/zip code
Home phone
Work phone
Guardian details, split into:
Name
Phone
Email (can automatically be cc’d in on correspondence - see Guardian details article)
Emergency contact details, split into:
Contact name
Phone
Date of birth
Driver’s licence details, split into:
Licence number
Expiry date
Allocating remaining prepaid vouchers for clients
If the client has any existing prepaid vouchers remaining for services or products, these may wish to be entered against the client so they can be redeemed for future services. e.g. A client bought a bundle of 10 services and used 2 of them for bookings in the past, so now they have 8 remaining that will need to be reflected in the new system for future bookings.
There are two options you can choose here depending on whether you'd like to start fresh with the new system, or you want the money for the previous purchases to show up in the financial records:
Add any remaining purchased vouchers manually: won't show any money in the records; or
Create a product sale for the full prepaid vouchers, and edit these to remove any used vouchers from the package.
Note: Some of the above changes can only be made if you have the correct permissions set up. See Security & permissions article for more details.
Option 1: Add any remaining purchased vouchers manually
When you add any remaining purchased vouchers manually, this won't show any incoming money in the records, only the remaining liability of the vouchers.
Search for the client via the Client menu
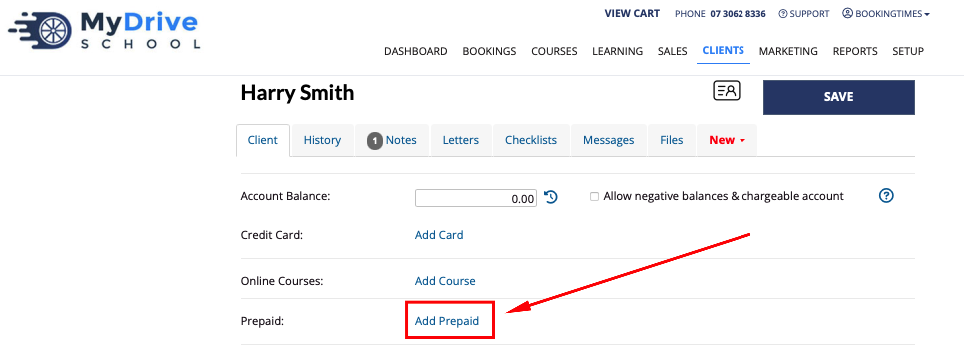
Click on the Add Prepaid/Voucher link on the client record

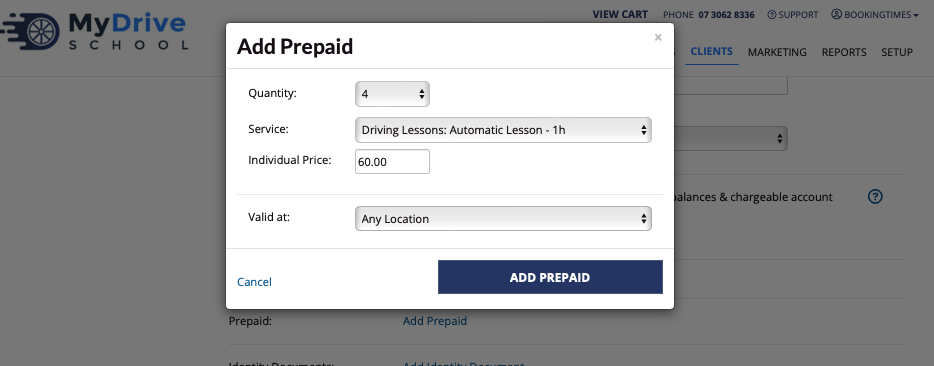
Add any remaining prepaid vouchers (follow these steps for any different prepaid vouchers required):
Select the Quantity of prepaid vouchers to add
Select the Service that the prepaid voucher was for
Set the Individual Price (e.g. if it was a discounted bundle then set the correct price)
Click Add prepaid button

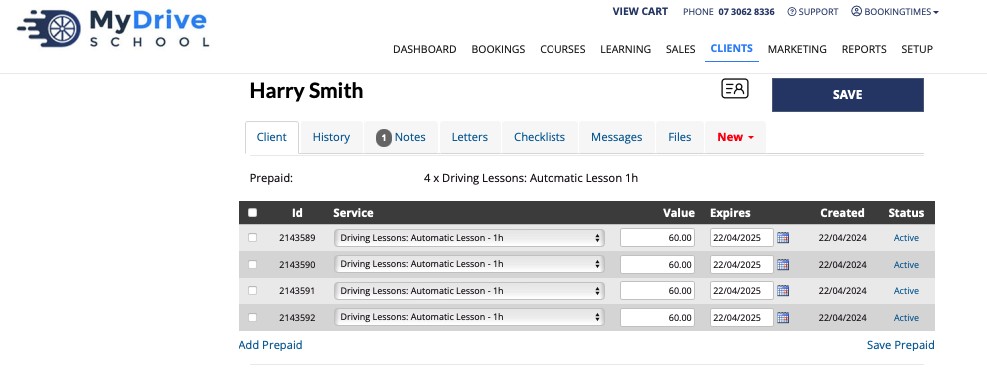
The prepaid vouchers are now on the client’s account. Click View Prepaid/Vouchers link on their record to view them all.
You may also edit any here if required, and click Save Prepaid at the bottom of the table.

Option 2: Add a product sale
Create a product sale for the full prepaid vouchers, and edit these to remove any used vouchers from the package.
Add a product sale (and mark as paid otherwise the prepaid vouchers won’t appear on their account yet) for the client for any remaining prepaid vouchers (see Creating a product sale article)
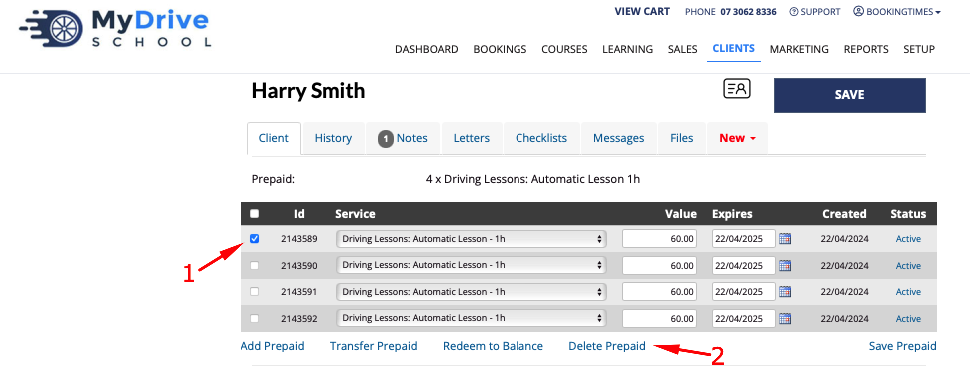
Go to the client’s account and click View Prepaid/Vouchers link on their record
Select the prepaid vouchers you wish to remove, and click Delete Prepaid/Voucher link at the bottom of the table (and confirm the delete)
