---
title: "Creating HTML forms"
slug: "creating-html-forms"
updated: 2024-06-19T02:44:54Z
published: 2024-06-19T02:44:54Z
canonical: "support.bookingtimes.com/creating-html-forms"
---
> ## Documentation Index
> Fetch the complete documentation index at: https://support.bookingtimes.com/llms.txt
> Use this file to discover all available pages before exploring further.
# Creating HTML forms
BookingTimes has a number of forms prebuilt into the system, including:
- Contact form: located on the system generated contact page
- [Client sign up form](/v2/docs/account-sign-up-form): located on the account sign up screen
- [Intake forms](/v2/docs/creating-an-intake-form): added to services to be filled out after a Booking is made
Sometimes you may want an extra form the system doesn't support by default, such as: a Job Application Form or an Expression of Interest form. For this, you can create a form on your webpage.
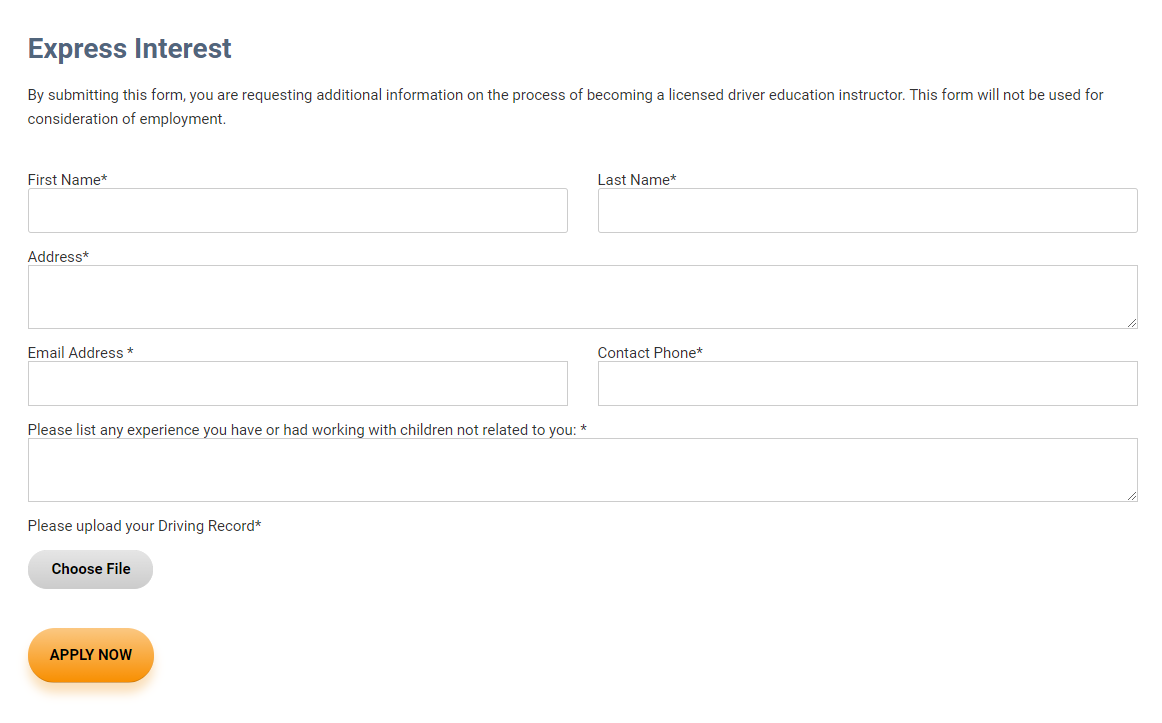An example custom form for a job application to be a driving instructor
Webpage forms are sent to the business email address when submitted, and can include the standard HTML form fields such as:
- Number
- Email
- Text
- File upload
Tip
See [https://www.w3schools.com/html/html_forms.asp](https://www.w3schools.com/html/html_forms.asp) for information about HTML Forms
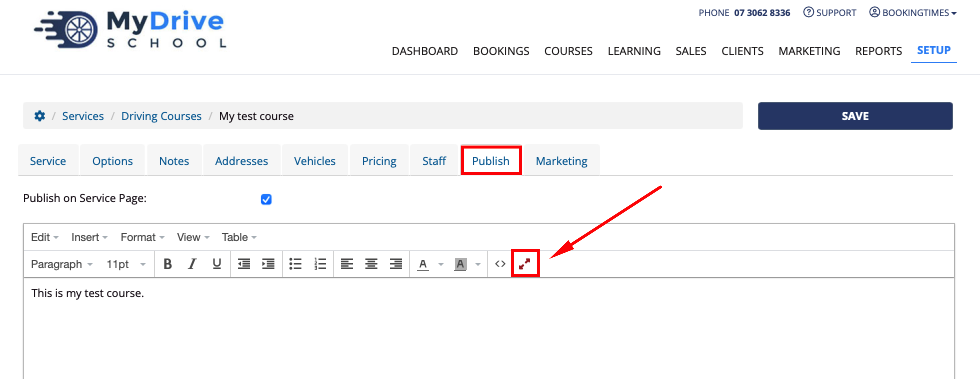
Using the Full Page Editor and web snippetsDepending where you want to add the form, it could be done via the **Full Page Editor** that's built into the system and you can use/edit the predefined **Custom Forms** web snippets. For example, you want to add a custom form for a service:
1. Navigate to **Setup > Services >** select the **Service**
2. Go to the **Publish** tab, click the diagonal red arrows to open the **Full Page Editor**
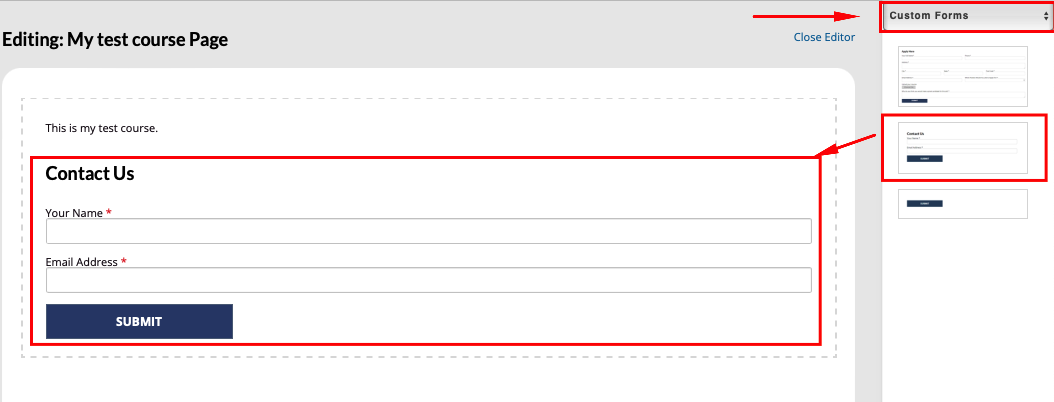
1. Select **Custom Form**s from the web snippets dropdown menu
2. Select a form that's closest to what you want, and drag it into the content area to the left
1. Click on the form in the content area and you will see the various coloured icons to edit. Click on the 3 dots in the yellow box, and select <> **HTML**
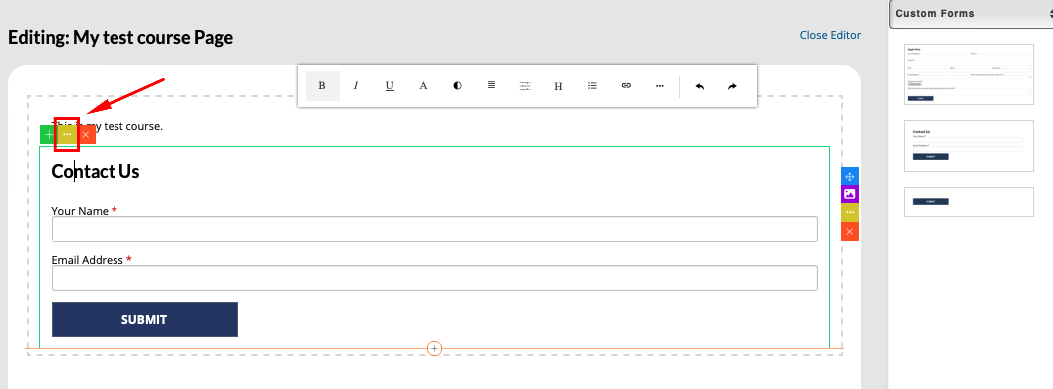
1. You will then see the HTML just for this form, and edit this according to any fields you want to add/update by following the instructions further in this article and update the **for** attribute in the