This article outlines the certificate layout that is used for certificates that can be attached to service/classroom courses and online courses. As a course is completed and certificate is generated, it inserts the appropriate data into these based on the client who completed it and the course details,
Because of this automatic population of data, these certificates require a very specific layout. Your system will have a default certificate already attached which you can choose to use, however if you choose to create your own certificate design then please take note of the following details to ensure that you data will be visible within your custom design.
Certificate layout and data
Certificate dimensions
The layout needs to be 794 pixels x 1123 pixels at 94 dpi.
You can use this layout template file to help align your certificate.
The certificate layout is as follows, each blue box showing where the system will automatically insert data:
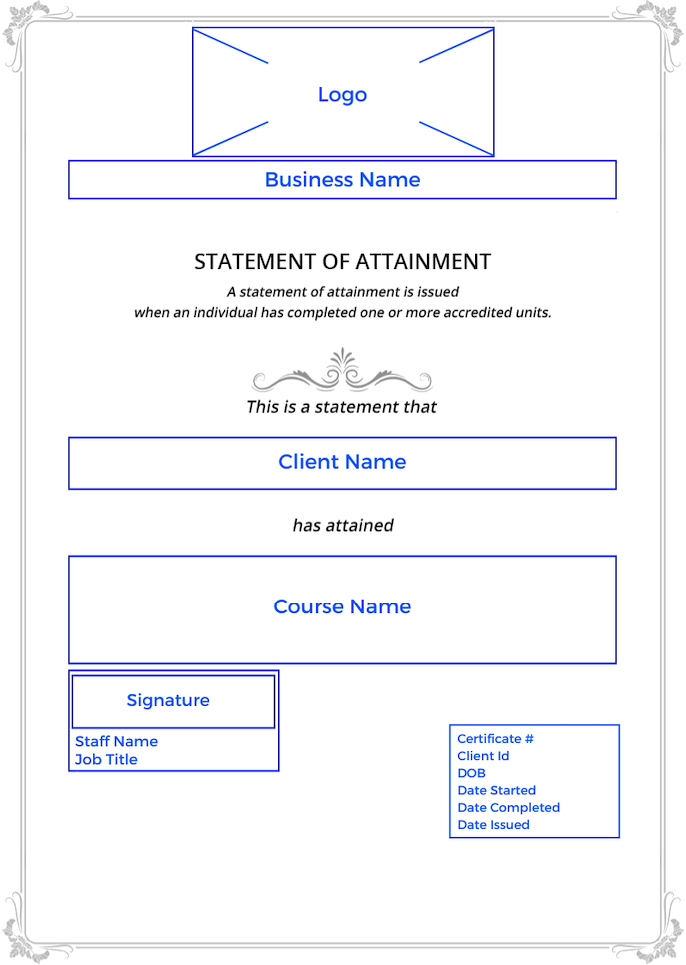
Certificate data
The data on the certificate is populated as follows:
Logo, Business Name and Client Name are populated based on the business details and the client that has passed the course.
The Course Name is populated based on what is set up:
In a service under Setup > Services > select the Service > Options tab > Course Codes.
In an online course under Setup > Online courses > select the online course > Name.
If a Course Code has been set up, this will also be displayed.
Signature is populated based on Setup > Staff & Admins > select the Staff Member > Options tab > Signature.
Staff Name and Job Title details are populated based on the staff member that ran the course, or the business owner depending what you set up for the certificate definition.
Certificate # is automatically generated.
Client Id, DOB (if selected) are populated based on the client that completed this course.
Date Started and Date Completed (if selected) are populated based on the course details.
Date Issued is automatically populated based on the day that the course was passed.
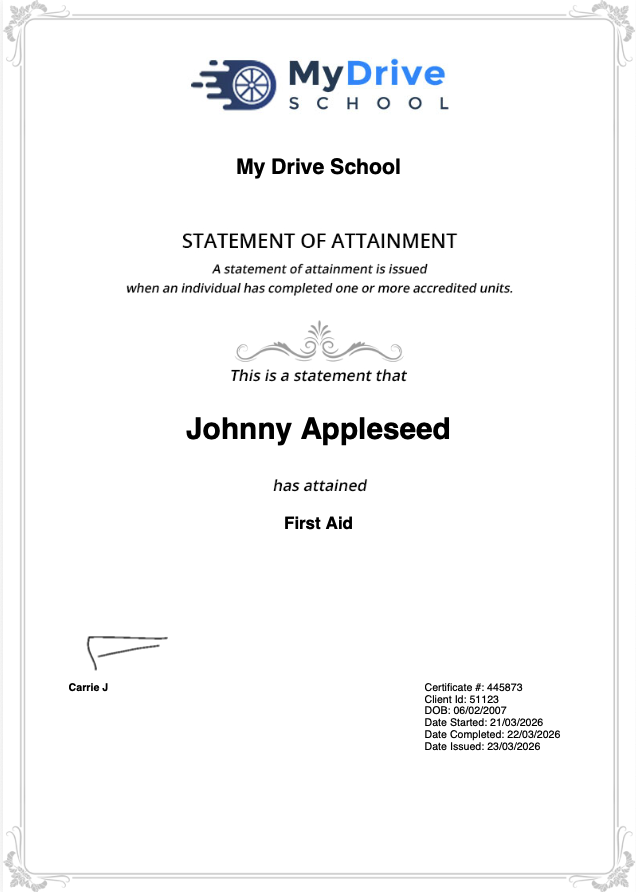
For example: