This article is for those who do not have an existing Service Area Map or would like to create a new Service Area Map from scratch.
If you do have an existing map you can follow the article Editing your service area map.
Checking if you have a map
Steps
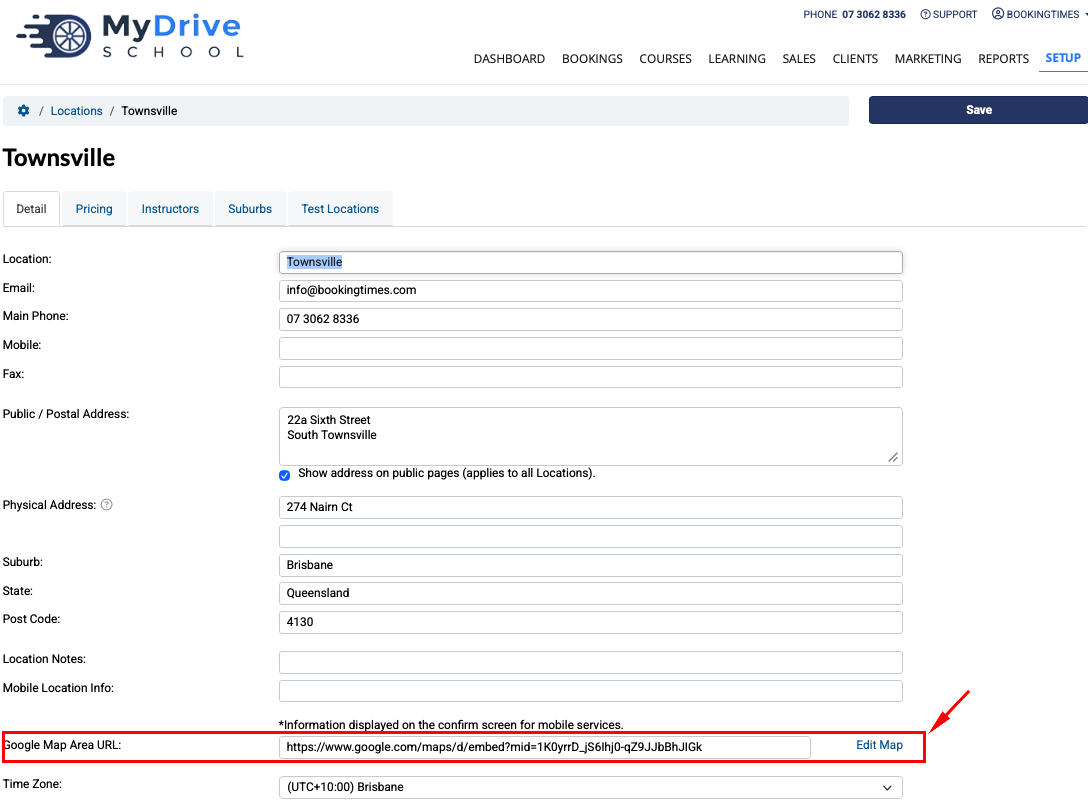
Navigate to Setup > Bookings > Locations > select a location
Check Google Area Map URL field. If this field has a URL you have an existing map and an Edit Map link appears - see Editing your service area map.. If not you will see a Create Map link to be navigated out to Google to create your map.
Create a map in Google MyMaps
Creating and Editing
You can find official guides on how to create and edit maps and map layers in the Google Maps help articles. We will cover the basic process in this article.
Google Account
You must have a Google Account to edit a Google Map. You can set one up for free here: Google Account Creation
Steps
Go to Google MyMaps (or click the arrow icon next to the "Google Area Map URL" field), and create a new map by clicking the red ‘Create a new map’ button at the top:
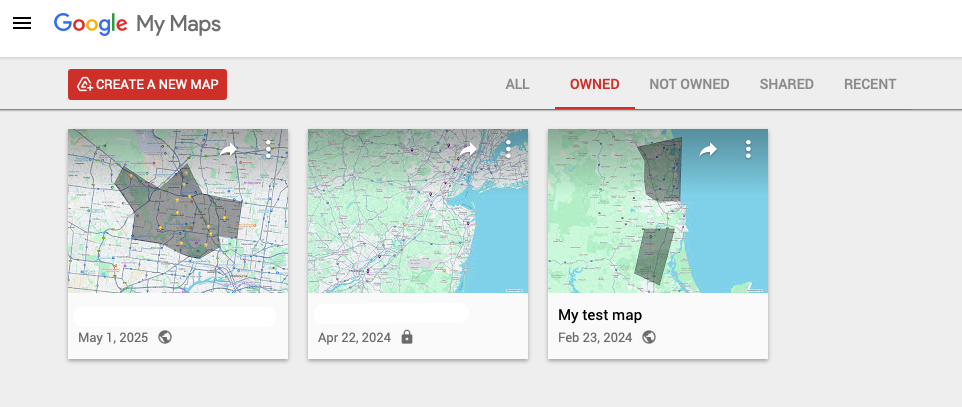
Or an ‘add’ icon down the bottom right (depends on if you’ve edited a map previously)

Enter a Map Title and Description to get started. It will create an initial ‘Untitled layer’ to get started which is where you will draw the outline of the service area on. You can also rename this layer to be your business name + “Service Area” if you wish.

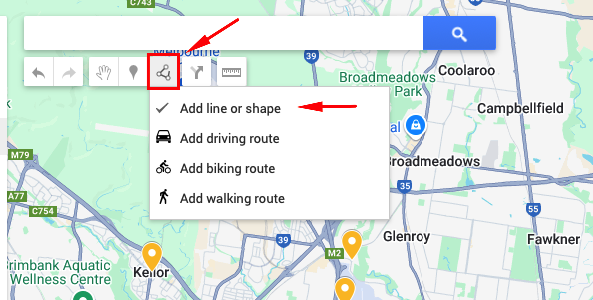
Add a Service Area overlay by adding a new layer to your map. Click on the Draw icon and select ‘Add line or shape’
TIP: ensure this is within its own layer. If you’ve dropped any pins or other items to the layer, the polygon you draw may not save.
Click points on the map to create a polygon representing your service area. Name the polygon accordingly (e.g Service areas)
.png)
Making your map Public in Google MyMaps
Once you are happy with your Service Area, your map must be made public so you can share it on your site.
Steps
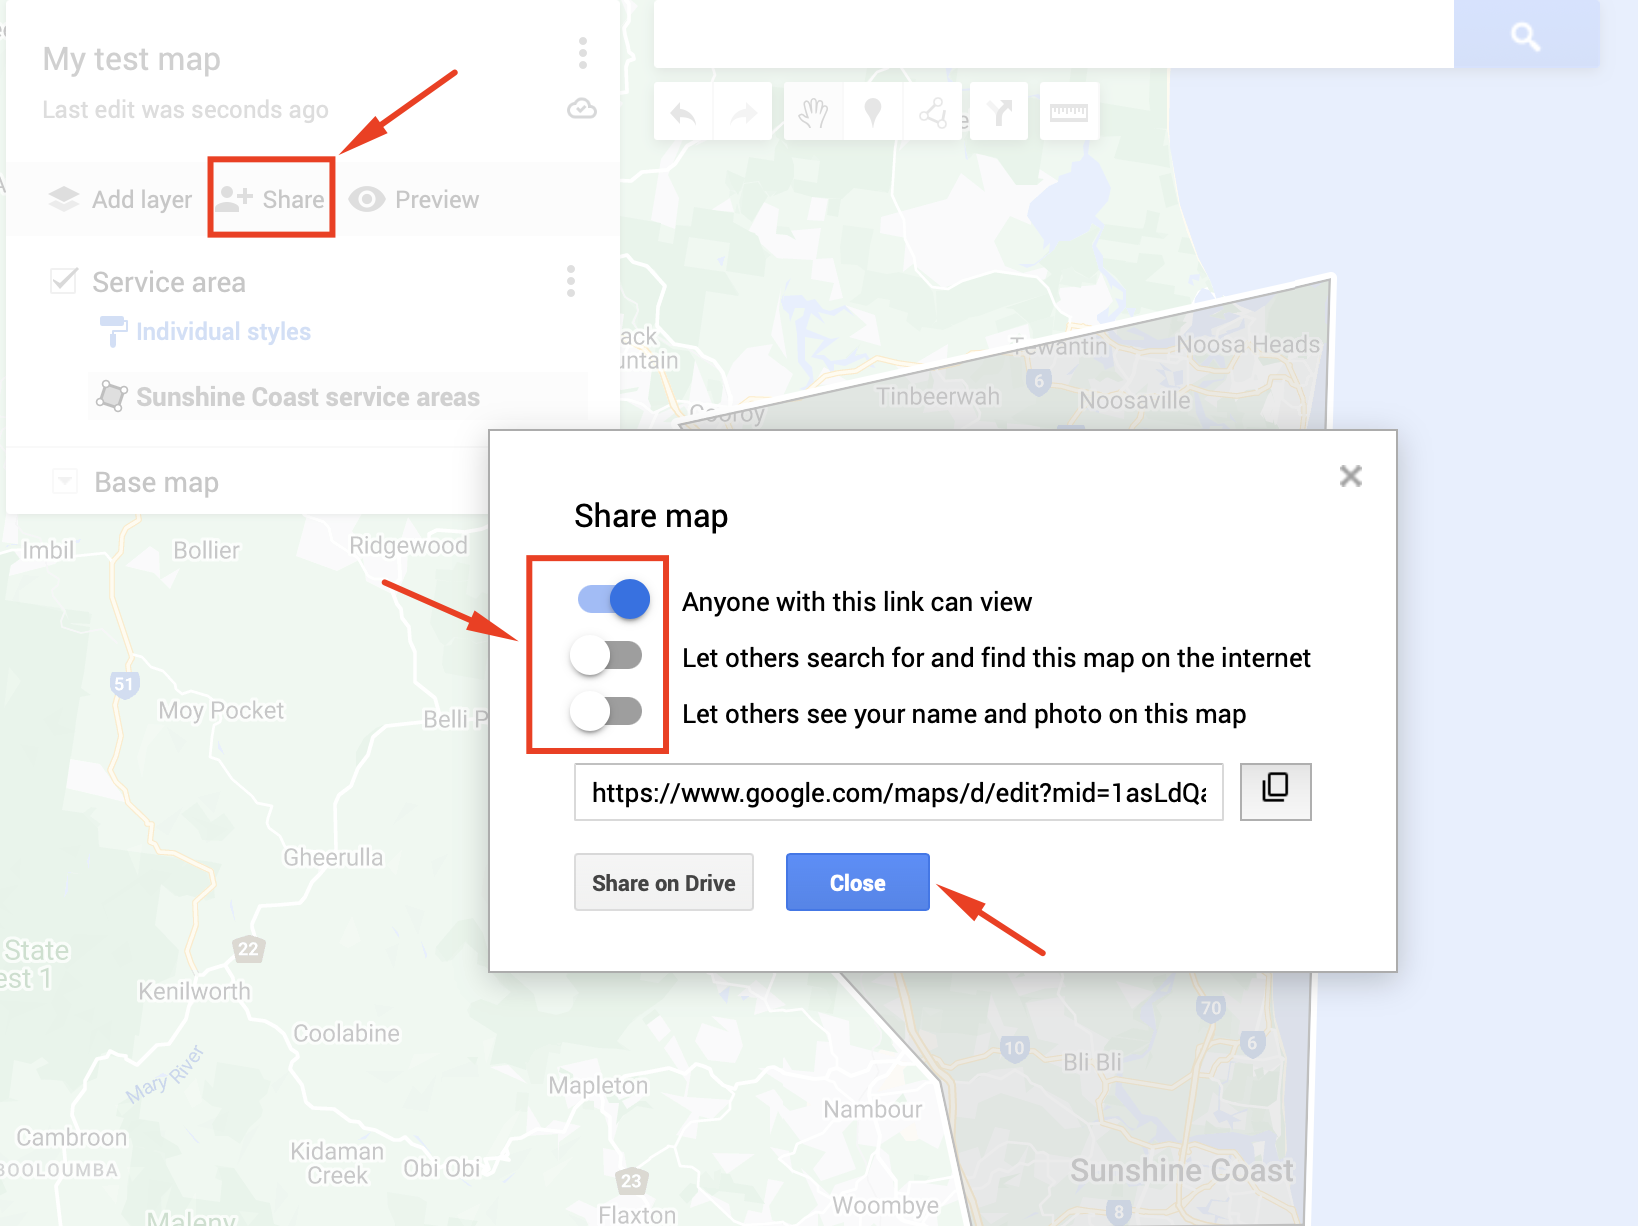
To make a map public, click Share and turn on the Anyone with this link can view and click Close.
Note: In some instances the “Let others see your name and photo on this map” option won’t appear here, an option will appear in the next step below to allow you to not show it.
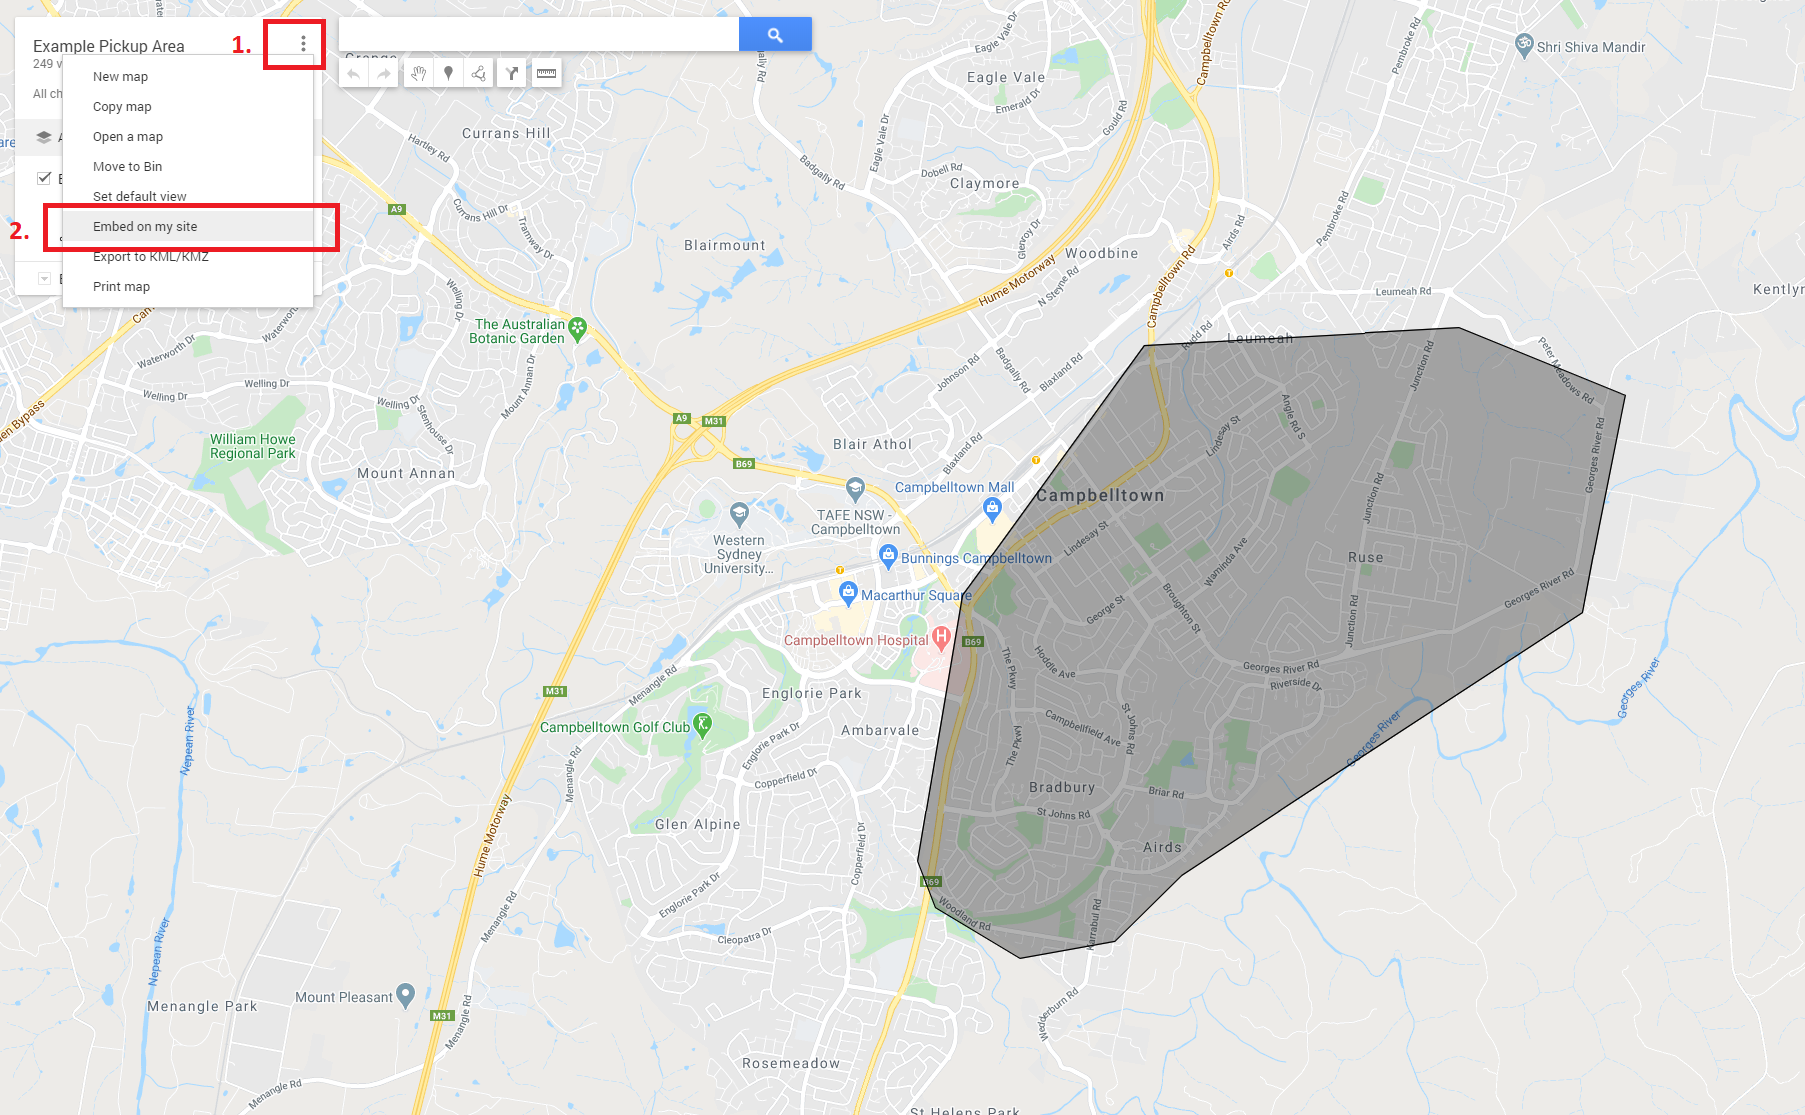
You find the map URL, select Embed on my Site from the menu:
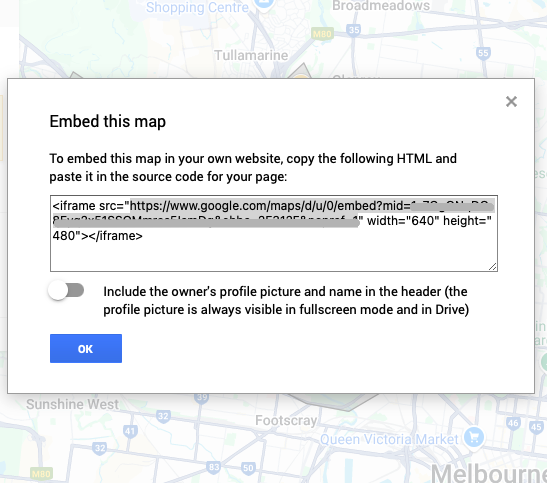
From the following pop-up, select and copy the URL between the quotation marks in the source code displayed ready for the next step in the next section. This is highlighted below.
Note: If you don’t want the owner’s profile to appear in the embedded map, ensure you unselect the “Include the owner’s profile picture…” option below it (and this will add an additional piece of text to that string “&noprof=1”).
Important
Only copy the highlighted section between the quotation marks for the “src” attribute only and not the entire text which includes “width” and “height” attributes. The URL will be slightly different for every user.
Embed the map on your website
Steps
Once you have copied the URL from the above section, paste this in the Google Map Area URL field on your website via Setup > Bookings > Locations, select a location.
Click Save button.

Check your map
Steps
Once the URL has been pasted and saved from the above section, refresh your Locations page and the new Service Area Map should be displayed. For example this would be https://mydomainname.com/Locations ensuring you substitute in your domain name.
Troubleshooting
If your map is not displaying or not displaying correctly, please ensure: