---
title: "Adding a course selector"
slug: "adding-a-course-selector"
updated: 2025-10-02T23:05:52Z
published: 2025-10-02T23:05:52Z
canonical: "support.bookingtimes.com/adding-a-course-selector"
---
> ## Documentation Index
> Fetch the complete documentation index at: https://support.bookingtimes.com/llms.txt
> Use this file to discover all available pages before exploring further.
# Adding a course selector
This article details how to correctly implement and style BookingTimes Course Selectors
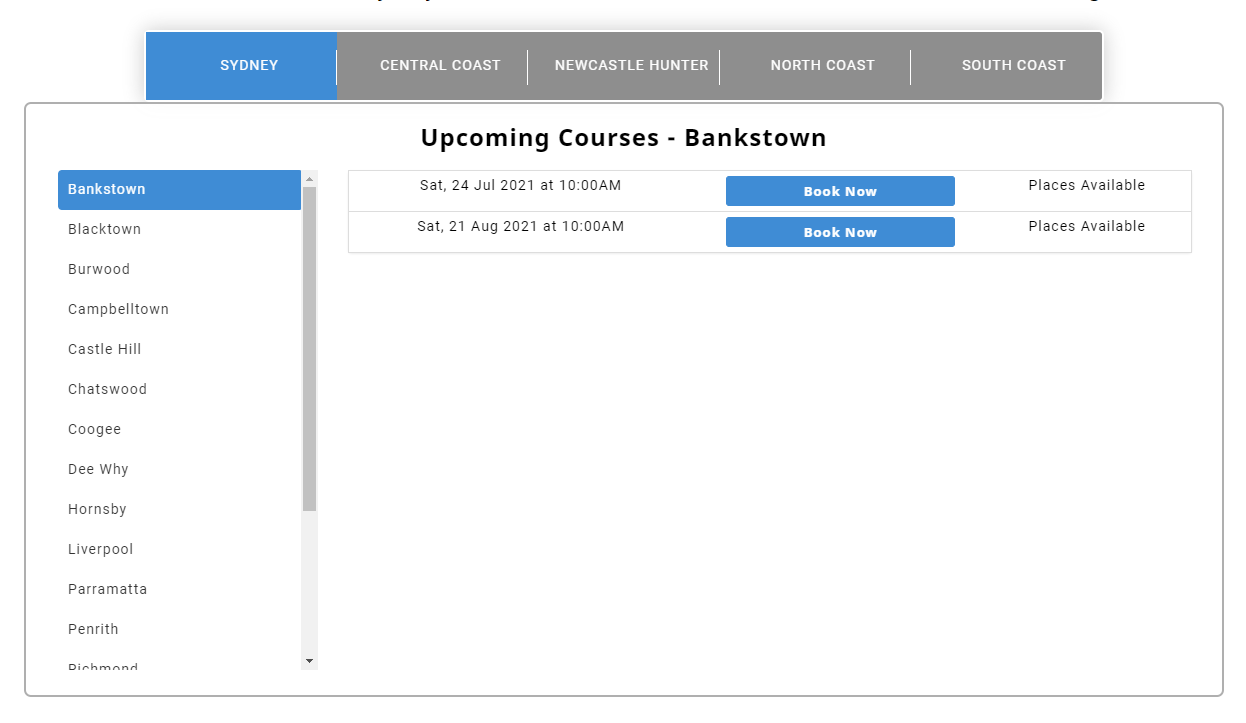Example Course Selector
Course Selectors need to be coded a special way to actually work with the booking system. Once you have done it once or twice, it is easy to implement. We use placeholder code which links into the booking system and does all the work for you.
All you need to do is copy the code and style it with CSS afterwards.
There are two types of course selectors. A course selector without regions which only has one level of filtering (by suburb) down the left side, or a more advanced course selector with regions which has two levels of filtering (by region, then suburb) across the top and left.
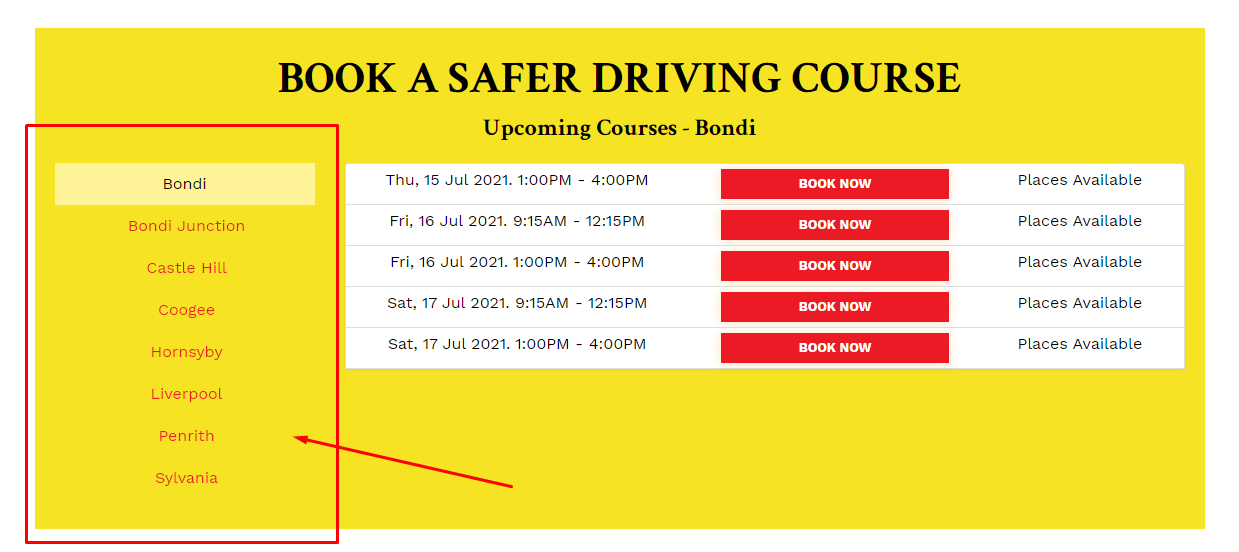Course Selector without regions
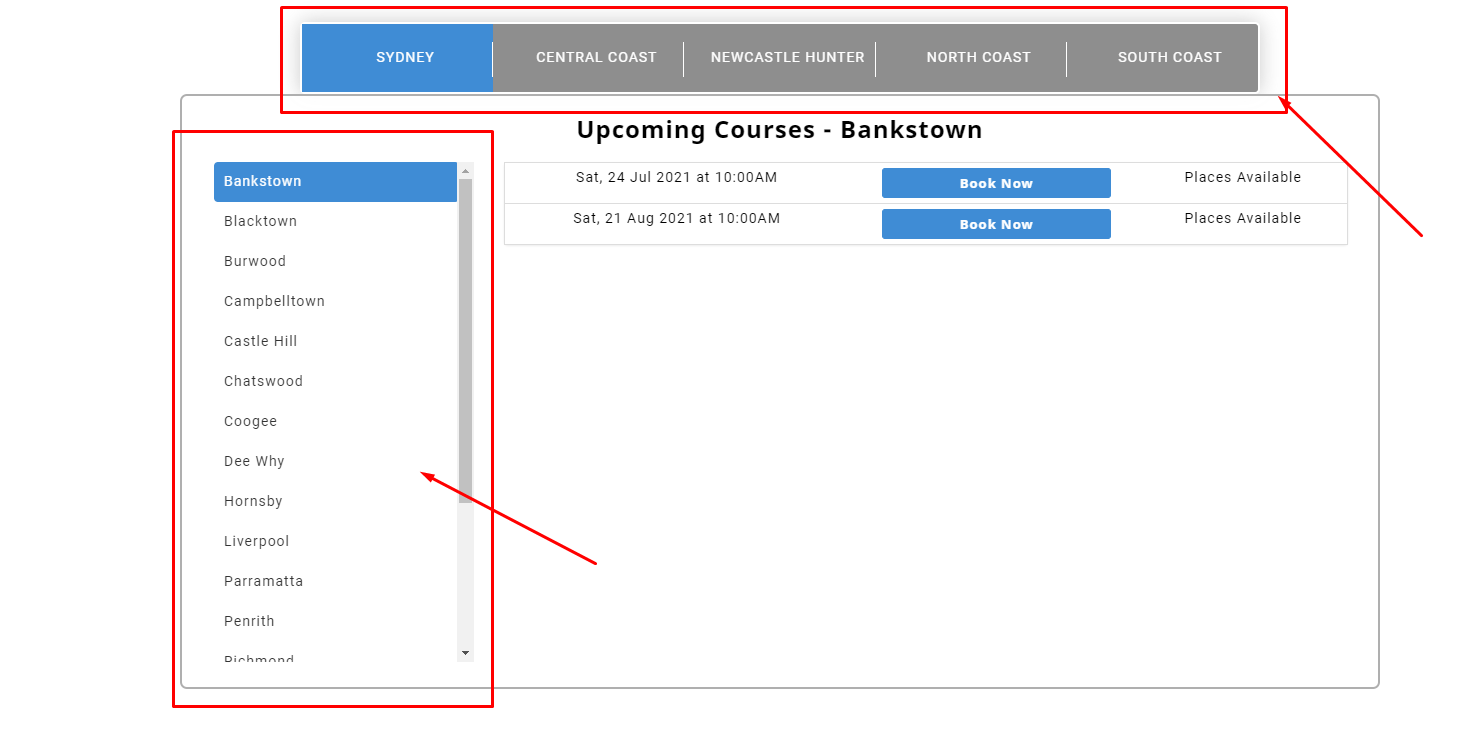Course Selector with regions
This guide will provide you with the code for the two course selector types, and instructions on how to style them.
Note
You must have courses scheduled in the system to see them show up on the course selector. See the help articles on scheduling courses here: [Setting up Courses](https://portal.document360.io/v1/docs/setting-up-courses)
---
## Course selector without regions
### Code
```markup
Upcoming Courses - Sydney
@Localities
@Courses
```
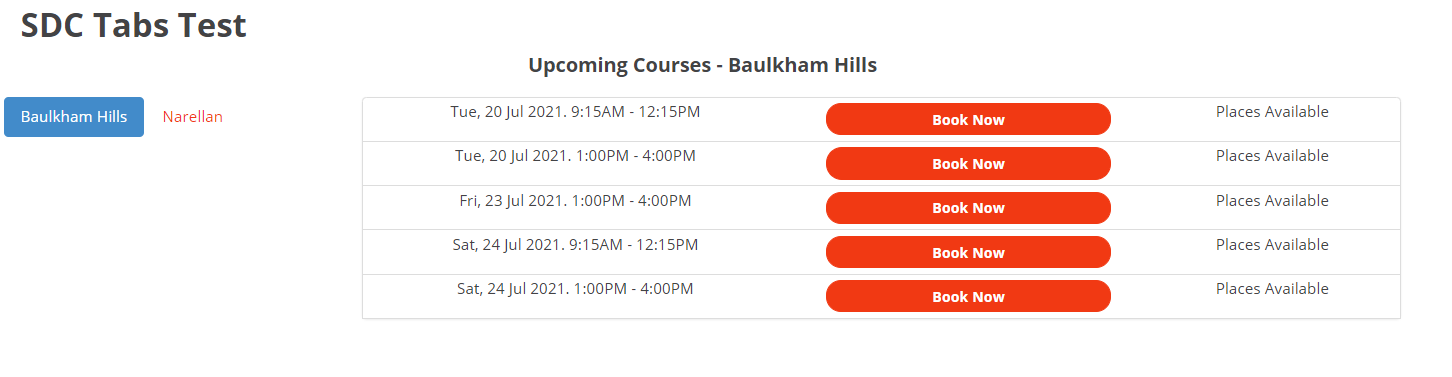This is what the course selector looks like with courses scheduled and zero styling. The **@Localities** placeholder from the code above generates the list on the left, while the **@Courses** placeholder generates the table with bookable buttons
### Styling
To style you simply select the classes, id’s and elements already present and apply CSS to them. You can inspect the page with browser dev tools to see the id, classes and elements the placeholders generate:
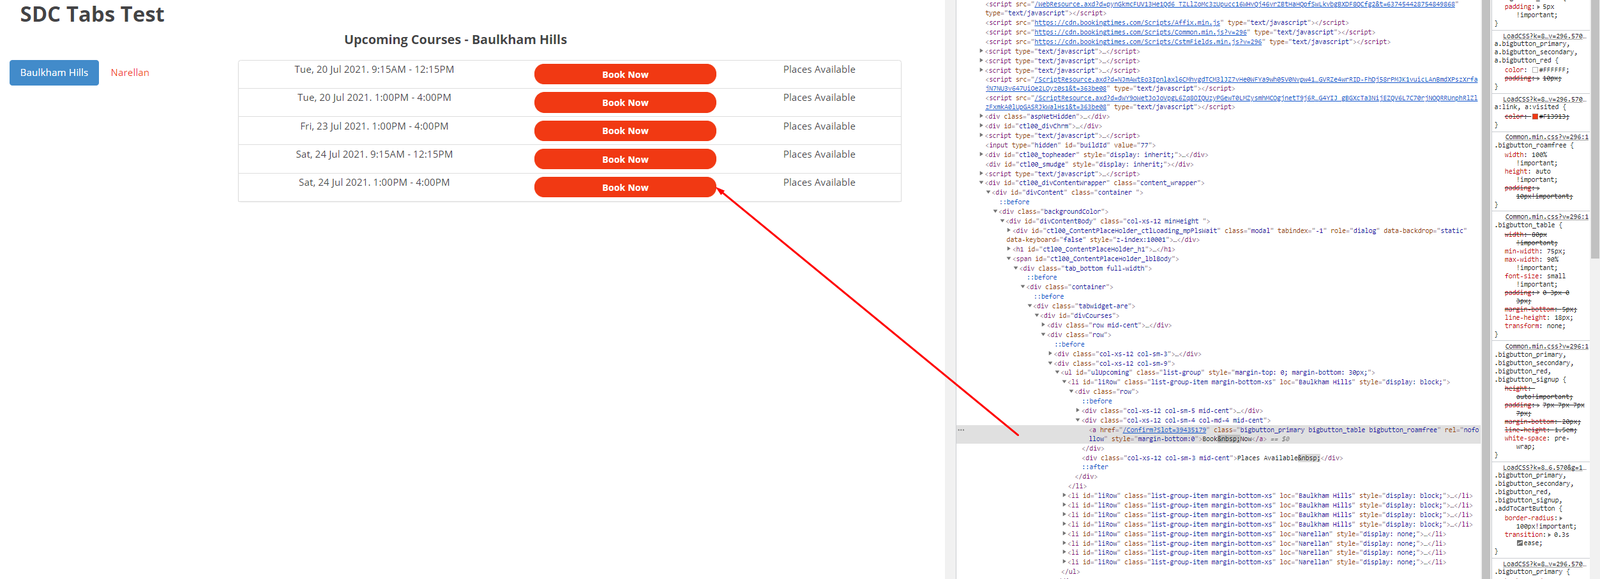Inspecting in Chrome dev tools to figure out what classes the Book Now button has
You can also edit the code to wrap elements in other elements. Please check the course selector works correctly when doing this, as elements in the wrong page could break it
Important
Please note, the **#spnUpcoming** element cannot currently be styled as capitalized (text-transform: uppercase;) as it will break the program
---
## Course selector with regions
You will need to an an extra bit of HTML and an extra bit of javascript for this to work.
### Code
```markup
```
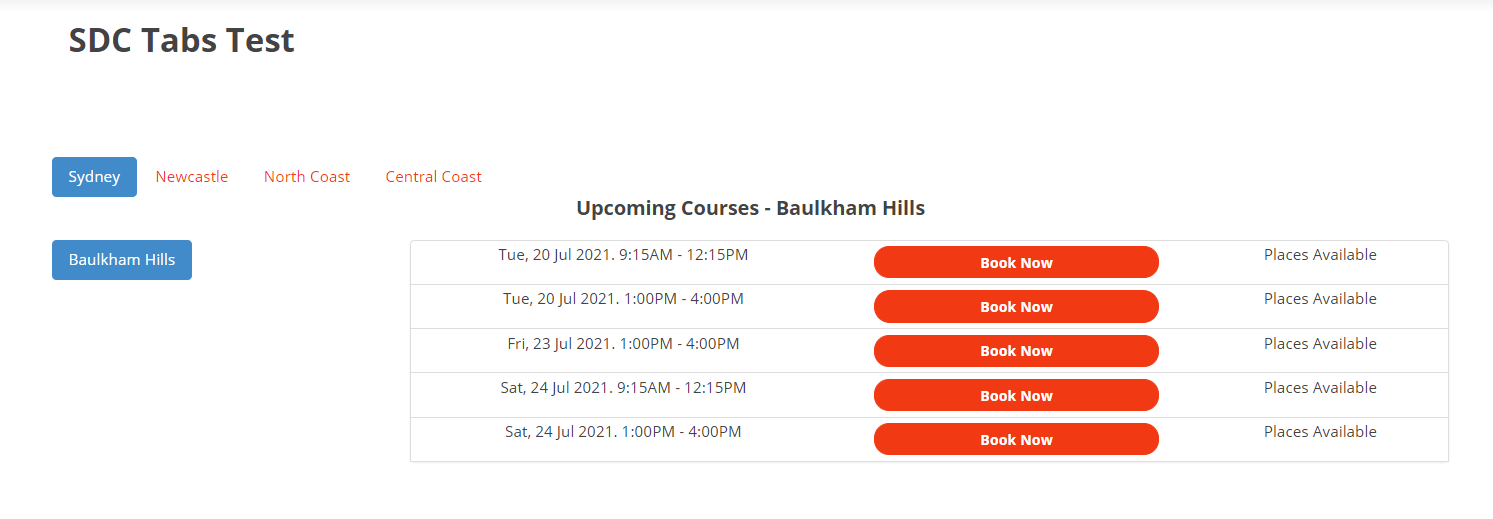This is what the course selector looks like with courses scheduled and zero styling. Note the region selector across the top
### Styling
To style you simply select the classes, id’s and elements already present and apply CSS to them. You can inspect the page with browser dev tools to see the id, classes and elements the placeholders generate:
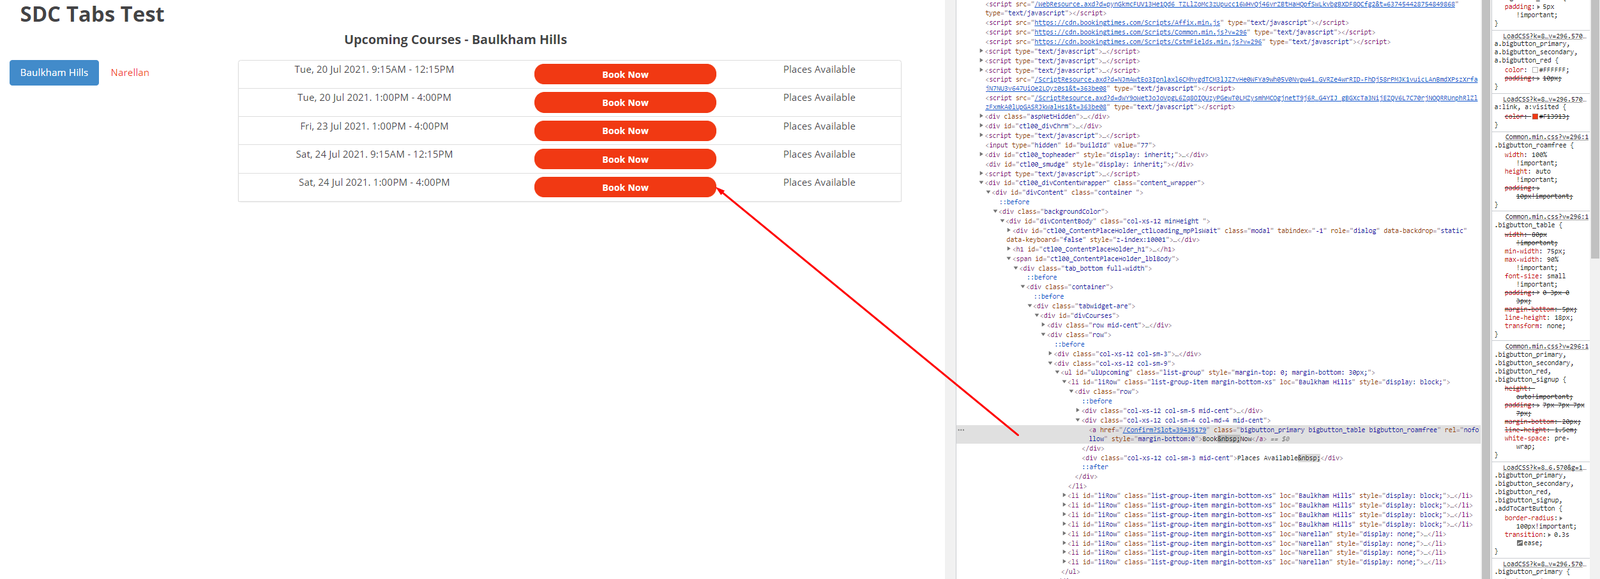Inspecting in Chrome dev tools to figure out what classes the Book Now button has
You can also edit the code to wrap elements in other elements. Please check the course selector works correctly when doing this, as elements in the wrong page could break it
Important
Please note, the **#spnUpcoming** element cannot currently be styled as capitalized (text-transform: uppercase;) as it will break the program